Hi all,
I’d like to propose an entry for the “play raw” series. I’ve tried many different things on it, but it seems I’m never fully satisfied
Although it could be that the picture is just hopeless, I’m confident somebody can get some great result and give me some inspiration
Here’s the RAW (licensed under CC BY-NC-SA 4.0). DSC03922.ARW (24.3 MB)
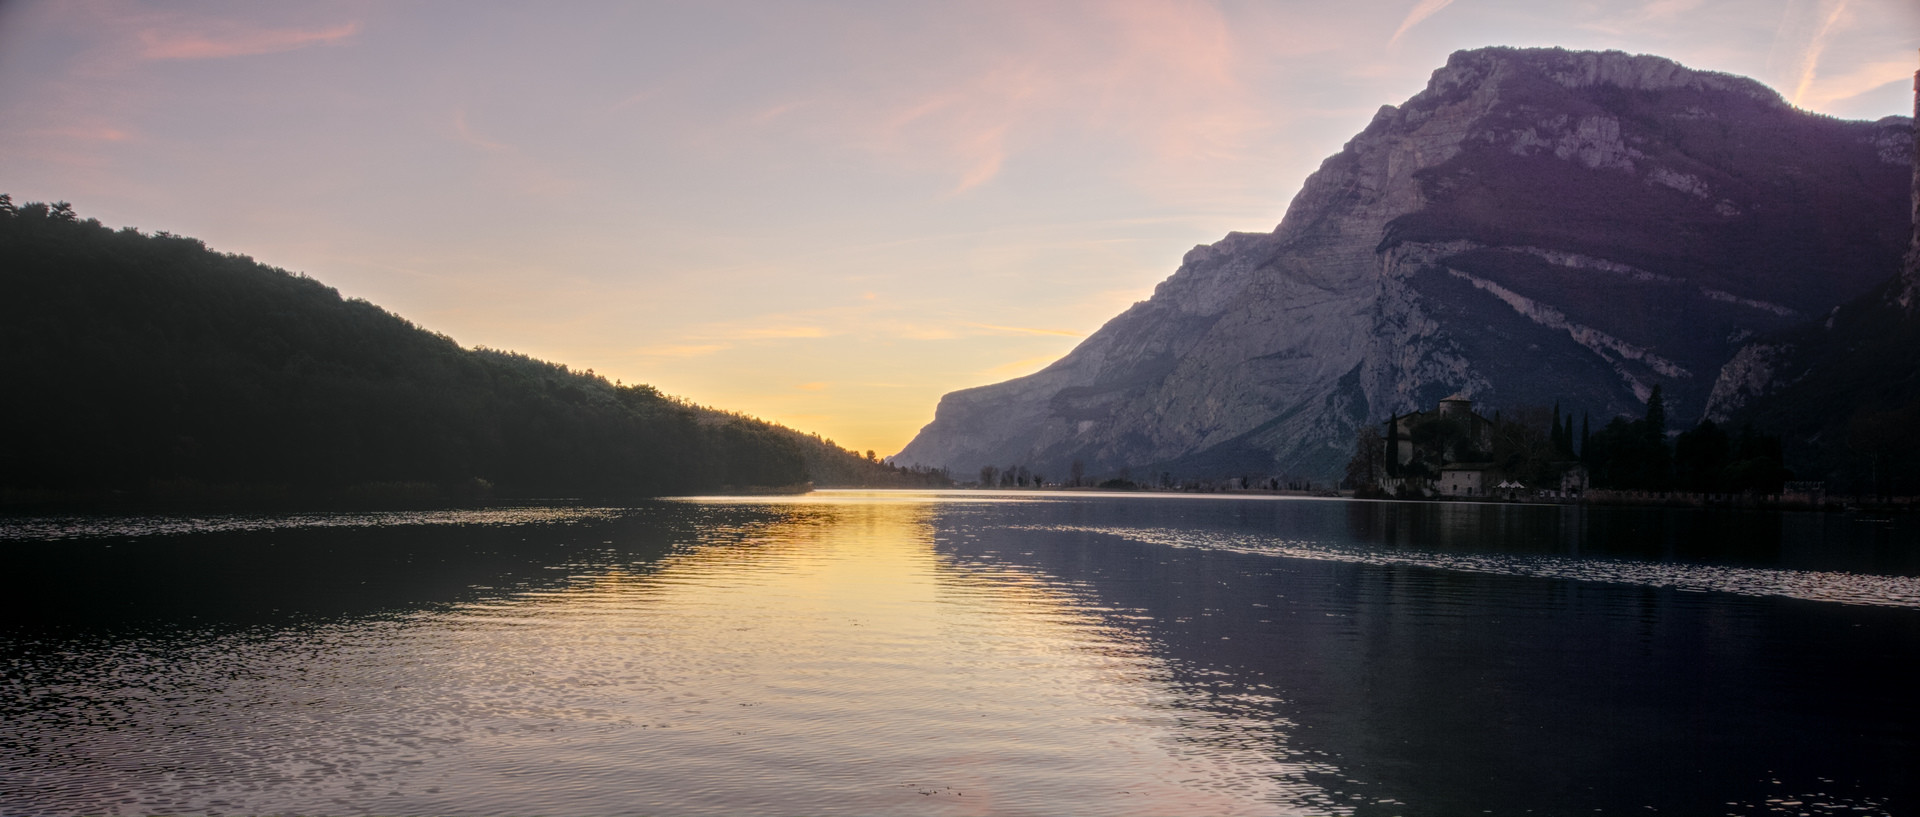
And here’s my latest attempt at getting something decent (in RawTherapee):
It’s tough when the castle is deep in the shadows of the scene, and I feel possibly that attempts to retrieve it from there look a little unnatural to me. So I let it sit quietly in the shadows as a nice visual to find…
I feel like a further explanation might be fun, so I’m editing this post…
With a shot like this, I asked myself, “What is the general feeling here? What is the main thing/feeling I want someone to take away?”.
For me, there are three things that are important:
The colors in the sky.
The jagged, hard shape of the mountains
Both of the above, but in the water.
For instance, does being able to easily distinguish the trees on the left add anything to the image/feeling? I don’t think so personally. The same is true of the features of the mountain on the right. It may be fine to have a feeling of the textures there and just visible enough to reinforce the impression that this is a mountain, but making out the details and bringing them into the mid-tones won’t really add much to the impression of a mountain there. The silhouette already does a good job of this.
Same thing with the castle. Is it really the focal point of the image? I would say the focal point is the colors in the sky/water along with the silhouette of the landscape (meeting in the middle-ish). So I don’t mind letting the castle becoming shadowed. It’s a nice secondary thing to examine if one wanted to really look closer/longer.
So I exposed for the sky mostly. Bumped contrast a bit and let details go darker. Then slight lift to the darkest blacks because I like it personally a little.
The first thing I did was cropping the image as I don’t find the bottom part interesting (I somewhat hoped that it included a bit more of the sky). Next, I used both tone curve and tone mapping to lift the shadows, but not too much to make it look like bad HDR. Compared to @patdavid’s approach I heavily increased contrast and sharpened the darker areas to reveal the textures of the mountain illuminated by the sun as well as the hidden castle. Finally, I toned the highlight parts of residue image with a blue color in order to create contrast with the sunset.
switched on exposure fusion and played with the local laplacian filter in the local contrast module in darktable. i don’t think i can push the shadows much more before it starts to look unnatural. messed with the colours a bit in the tone curve module.
Just for fun…the original idea was to unveil the castle. So I went into RT and cropped like a madman to, well, unveil the castle. Obviously, keeping only that small piece of the photo was going to sacrifice quality, so, welcome to Skyrim.
@thanks@agriggio for the raw and everybody for sharing their edits. @elGordo wow enhance!
@hanatos that’s like cinemascope, technicolour and a drunk italian whore had a daughter, if she made a film the end credits would surely roll on some moody scenery alike; I mean silky beautiful =)
I was trying way too many things, should have followed pat’s wise reasoning and not listen to punk music. Anyway, rawtherapee got me here
Then onto gimp and gmic bros (local cont, provia LUT and grain) with luma masks… but things didn’t go smoothly at all, you know when you’re trying to do somethin’ and your computer it’s trying to kill you, like hal in space odissey? Finally the gimp hunged and I was not going to repeat half of the fighting, so I left it at this very very slopy mess
This photo really is a nice plaything…thanks @agriggio! I took another swing at it, this time with DT. A little heavy-handed with the Velvia, but what the hell!
Thanks to all for your contributions! As expected, lots of interesting insights.
So, here’s another attempt of mine, after getting some ideas from various people.
Here is the best result I could achieve with manual masking and local exposure/contrast adjustments in PhotoFlow, before things started to get rather “fake”:
Using the soften module and a drawn mask so that it only affects the transition between the sky and the hills. Often I just use a blurred parametric mask to apply the effect to the highlights but in this case I wanted that specific edge.