POC : Introduction to a new experimental module: "3D Colorimetric Film (3DCF)"

Hey Christian … are you having a " Lua subfolder " in your config folder ?

Regards Andreas

You mean under User'Me’\AppData\Local\libre-dt-lab? No

Not sure where the folder is placed on windows …
But yes in the " libre-dt-lab" folder there should be a folder called " Lua " and a file called " luarc " .
At least both are present in the normal darktable config folder .

In the 5.6 folder, Yes the lua folder is there but no luarc file. I’ve scripts installed but none activated in dt which might explain the missing luarc file.

In the libre-dt-lab folder there is no lua subfolder, although scripts are installed but none activated.

OK so we’re in the same business :joy:

I have not bothered to try AI masking in Libre-DT because when I tried to download or do anything with modules as you would in DT preferences it said no matching modules…I assumed there was some hard coded issue or simply something due to the name change not matching the code …but it would always say something like no matching modules available…

Maybe I am just using an older version…

Or maybe I need to tweak this…

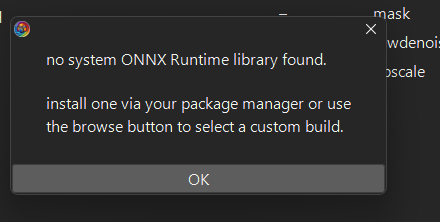
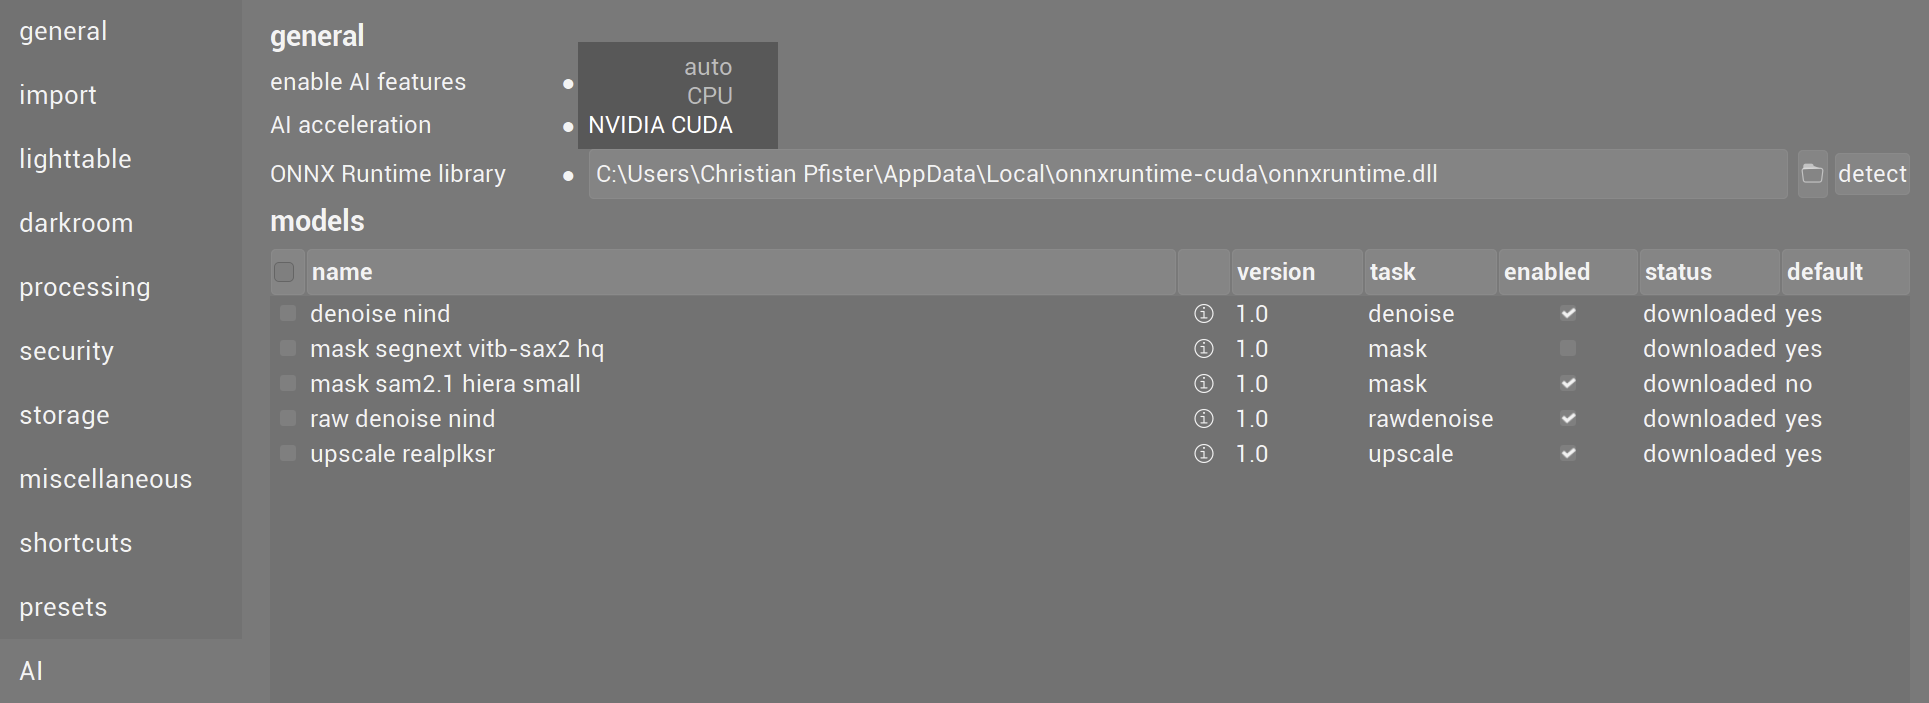
It was working for me. I first downloaded the models in 5.6, had then either to leave AI Acceleration at CPU or update the Nvidia driver, which I did. I then installed Cuda and used the script in the manual to install ONNXRuntime.

In libre-dt-lab I just clicked Select which found the path to the ONNXRuntime library. In AI acceleration I had to select Cuda, otherwise dt crashes.

If I understood correctly, you need ONNXRuntime for GPU acceleration. Otherwise you select CPU.

1 Like

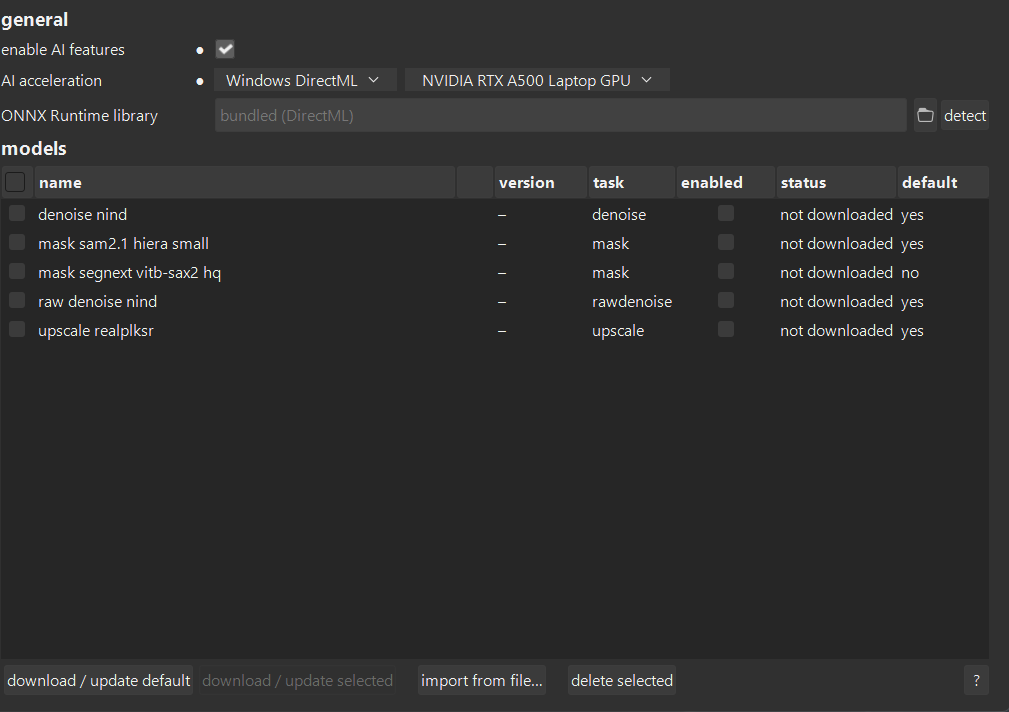
@Christian-B : In the latest version (23735f1) AI mask selection works again. Thanks
1 Like

Hello,

FYI, I’ve done a bit more work on the module:

  1. Improved highlight handling;
  2. Added a slider to boost saturation in shadows and midtones;
  3. Corrected the color workspace: error of +/-3°
    New dt_st_rec2020_d50_to_xyz matrix calculated directly from the Rec.2020 primaries + D50 white point
    Removed the CAT multiplication (D65>D50): the path is now direct: Rec.2020 D50 RGB > XYZ D50

The latest version is available on GitHub.
Greetings from a Belgian; :soccer: :wink:
Christian

2 Likes

THX for the added chroma option , Christian , i do like it .
Can´t see any difference in HL handling … but trust your vision !!!

Regards Andreas

1 Like

Hi Christian …
just discovered , that you added exposure to the module … a good addition IMHO.
No need to use the exp module , for the most part .
How about adding a black level slider to the module ?!

This module is becoming oh so good for me personally …

Here on M1 Mac Tahoe the exposure slider in AGX still has no effect , when moving the slider i can see the " working " on screen info … but nothing is changing . Nothing gets darker or brighter ?!

THX again for the ongoing developement

Cheers Andreas

1 Like

Hello,

While working on the ACES 2.0 module, I discovered a bug in the SSTS curve.

The SSTS normalization used / n (peak luminance) instead of / n_r (reference luminance, 100 nits). This inverted the peak ↔ brightness relationship: increasing the peak made the image darker instead of giving more highlight headroom. The behavior is now aligned with ACES 2.0 (ssts_fwd(x) / n_r).

New sliders (replacing the old “perceptual brightness”)

Slider Role Range
Input exposure Pre-SSTS exposure in EV −2 to +2 EV, default 0
Peak luminance SSTS peak luminance (curve character) −100% to +100%, 0% = 200 nits (ACES 2.0 ref.)

Peak is decoupled from exposure: Peak luminance controls the curve roll-off (higher peak = softer compression), Input exposure controls exposure independently.

Abney rotation — new formulation

The old hl_hue_shift used an arbitrary luminance threshold (st_desat_weight based on y_exposed). The rotation was often imperceptible.

New approach: the rotation angle is tied to the actual SSTS compression ratio:

compression = min(y_tm / (y_abs × EV), 1.0)   // 0 = heavily compressed, 1 = linear
weight      = pow(1.0 - compression, exponent)
exponent    = max(1.0 − |hl_hue_shift|, 0.1)
angle       = hl_hue_shift × 1.0 × weight
  • hl_hue_shift = 0: no rotation
  • hl_hue_shift > 0: rotation increases with compression, smooth transition
  • hl_hue_shift = +1.0: progressive rotation from compressed highlights toward midtones

Out-of-gamut yellows are automatically chroma-clamped (rotation scaled to stay within [0,1]) with no hue artifacts.

I’ll take a look tonight or tomorrow at the bug you’re having with the AGX slider.
Have a nice day,
Christian,
P.S. I won’t be talking about soccer today, :wink:

THX for the additional info Christian , much appreciated !!!

Poor goalie …

Cheers Andreas

1 Like

Hello,
I found the bug. I had simply forgotten to integrate the new exposure input slider into OpenCL…
greetings from the Luberon, :herb:
Christian

Okidoki … glad you found the issue

1 Like

I was sad your team lost, was rooting for you. Greetings from a neighbour from the north

1 Like

Oh, thank you so much. I’m going to root for the French team now, the country where I’m enjoying a peaceful retirement.
Greetings from the Luberon, :fr:
Christian

1 Like

@Christian-B : sorry, these days I’m not following all topics closely. Did you add an exposure slider to AgX, or is this an ‘AgX-mode’ of your tone mapper? I have not checked out your branch, I already have too many copies of the darktable source tree and binaries on my system. :slight_smile:

I’m asking because:

  • darktable recommends you set exposure right from the beginning; for example, color balance rgb also depends on it
  • exposure can already be altered in AgX by changing the pivot input:
    • suppose your image is underexposed by 1 EV (the point you want to become 18% output has 9% input value; I will refer to this point as mid-point); let the brightest point be 4 EV above mid-point (so 3 EV above mid-grey), the darkest 8 EV below mid-point (so 9 EV below mid-grey); you use the auto-picker to get those values.
    • you increase exposure by 1 EV → the mid-point shifts to 18%, white shifts to 4 EV above mid-grey (remains 4 EV above your mid-point), black shifts to 8 EV below mid-grey (so remains 8 EV below the mid-point).
    • if, instead, you dragged the pivot relative exposure to -1 EV, and used the auto-pickers, you would get the same result.

Here, I took a well-exposed image, picked the black/white points:

Then dropped exposure by 1 EV (see exposure module, 0.7 EV → -0.3 EV), moved pivot input to -1 EV (“increased exposure in AgX”), and picked the black/white points. This demonstrates that moving the pivot is the same as adjusting exposure:

If I misunderstood, and you were talking about your own module, then sorry. Otherwise, I would strongly object to adding yet another slider to AgX.

1 Like

Hello Kofa,

I’m sorry for the confusion, but we’re in the wrong discussion thread!

This is another project where I added a workflow selector to easily compare the results with and without the TM. To make this comparison easier, and since we’re working in linear mode, my goal is simply to move the ±7 EV adjustment to the TM input.
As for AGX, you’re right, adding the slider isn’t really necessary.

Greetings from the Luberon,
Christian

1 Like

I see, thanks for the clarification. The observation regarding color balance rgb still stands, though, and modules like tone equalizer are also easier to use if the image is properly exposed.