I would definitely use this as a “special-case tool”, as it crushes down to sRGB wherever you do the first transform out of camera space. In rawproc I currently don’t use a working profile, so my first color transform is at display/output.
A bit more generally useful version might be one of the adobergb modes; here’s a version that uses -g adobergb-strong, which is the mode Anders recommends as a starting point:
Exposure is the first thing I tried using to get a good starting point but I couldn’t get the details in the petals the way I wanted them. Reset the module and went to the raw white points module instead.
The raw white points module because it can, at times, give nice results when stuff is (partially) blown out and I was curious if it would be able to help me here. It did. I am somewhat surprised to be honest that changing it this much didn’t have any adverse affect on the rest of the image. With blown out images the changes need to be rather small.
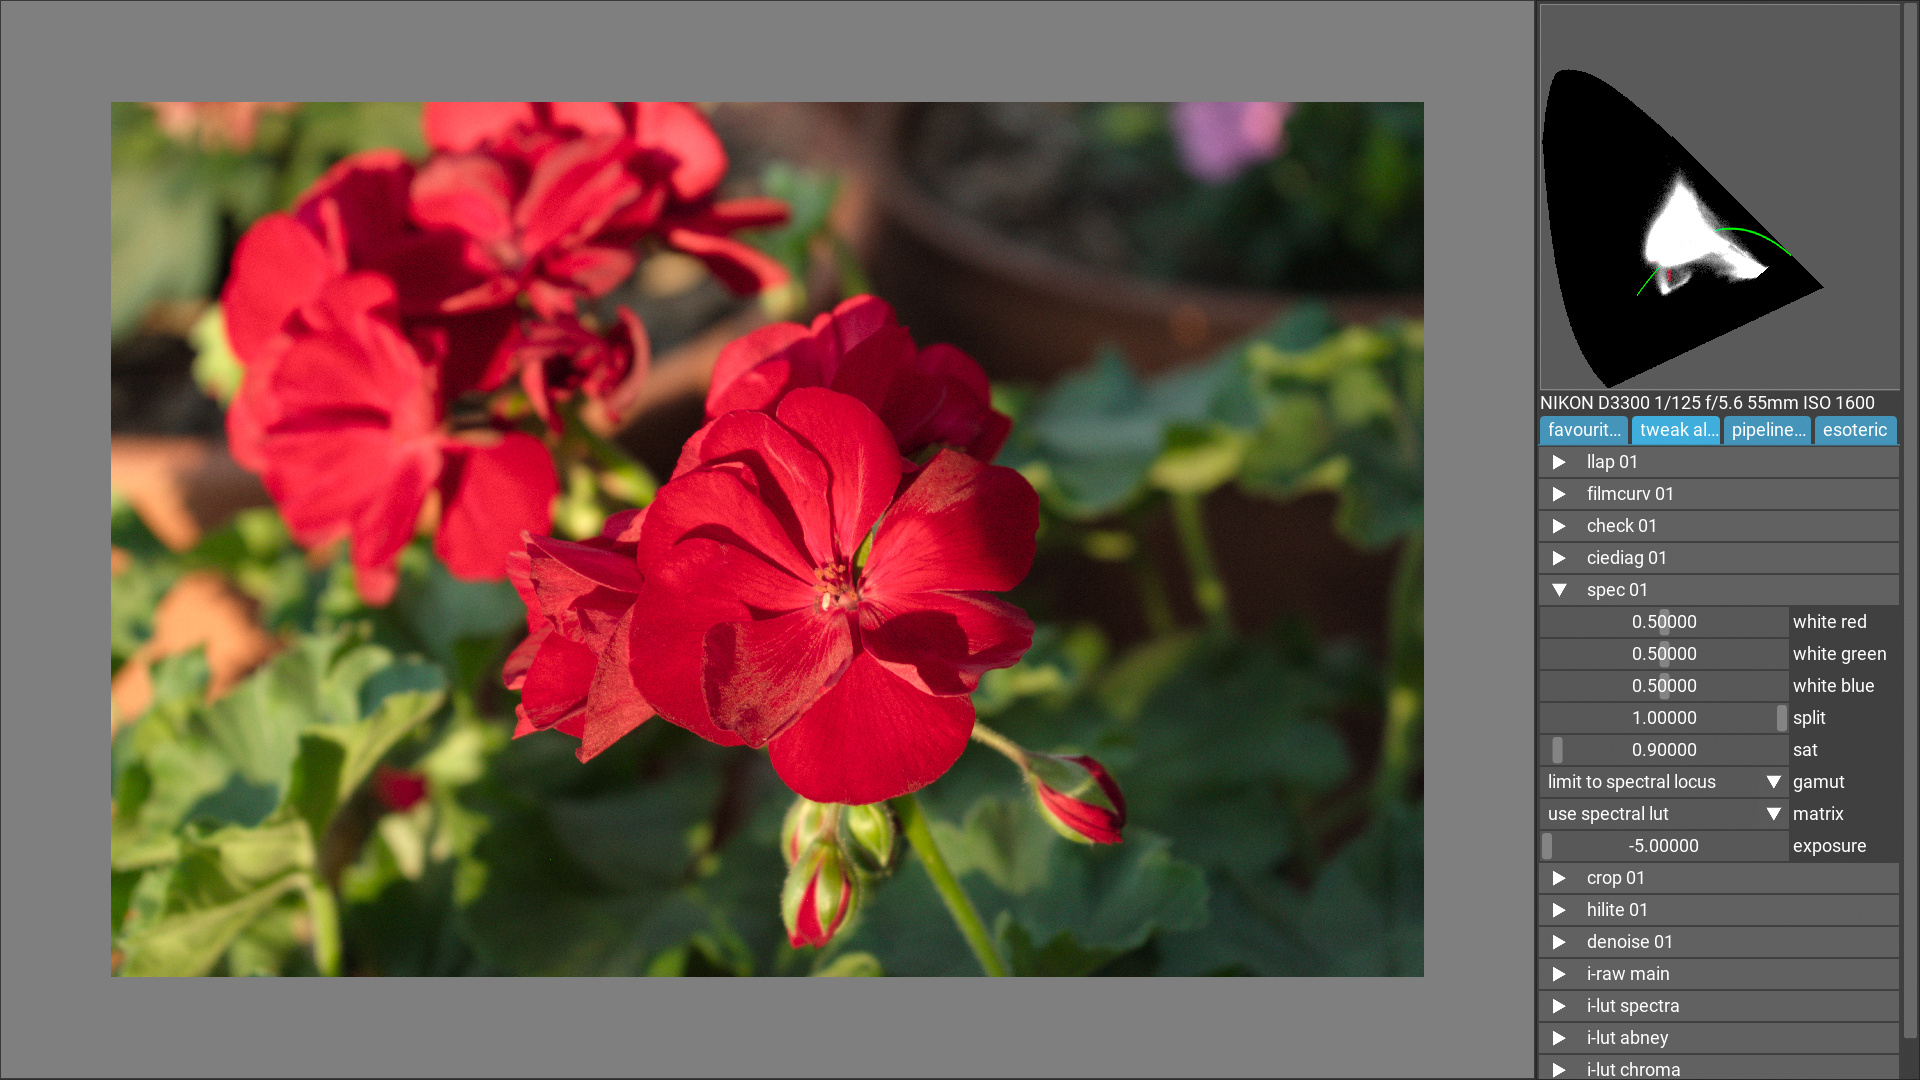
the cie plot clearly shows you the out-of-gamut chromaticity. exposure is orthogonal to this (i.e. would go out of the screen in this plot if you wanted to show it). this means regardless of brightness/exposure time, these colours cannot be represented in srgb.
@CarVac: I just used Filmulator (v0.11.1) and it indeed does a great job with this shot!
If I Use the settings you posted somewhere above I notice that setting the White Clipping Point (0.7) doesn’t give the nicest result in my case. 1.15 seems to be much better. Is this a monitor issue or is something else at play?
BTW: Dell U2719DC, calibrated and profiled (a few weeks back now).
hmmm… I have reloaded the *.xmp and everything is fine.
can it be that in the module color callibration, the options “normalize channels” are not activated?
Tried again. Despite now knowing that details of this red monster are very faint, I tried to emphasize them and at the same time to avoid the bleeding of red I had in my first version around pistil and stamen. Really great photo to play with!
Unfortunately the blossom is a bit out of focus.
I think it may just be a matter of personal taste. I didn’t want the rest of the image to look very dark, so I pushed the red flower as bright as I could without clipping.
But if you put the red in the midtones using a higher white clipping point you can see more contrast in the petals.
I really like your reply. It is an example of what we should have more of in these Play Raw topics. Not just posted plays, then nothing. The results should also be discussed. This occurs occasionally, but not very frequently.
Yeah, I’ve been playing with Filmulator and this shot and, as always, personal preference does play a roll.
I’m impressed by how easy it is using Filmulator to get a very good base (arguably the end result). You can go and fine tune till you are blue in the face but the ease at which a good result is established compared to both RawTherapee and darktable, which can definitely get good results but take more fiddling, is noteworthy.
@Tim I agree. When I have the energy, I typically try to strike conversations in Play Raws but it also depends on whether people want to talk. Sometimes the opposite is true: people are too willing to talk about one aspect (ahemfilmic) and we get lost in a wall of words.
Of all those renditions the Adobe matrix is perhaps the best compromise. It could be made a little more orange in channel mixer, but isn’t far off. I do like the cie diagrams, shows what we are dealing with, and how different profiles change it. I’m beginning to think the best approach for srgb display is to combine two different versions using masks in gimp. Version one for the foreground, similar to your cfa curves or adobe matrix. Version two for the background flowers, taming the gradients by desaturation/gamut compression.
Odd. The normalise channels box is ticked. I see the following values:
CAT: None (bypass). Gamut compression 1. Clip negative rgb from gamut ticked.
COLOURFULNESS: red, -0.516. green, 1. Normalise ticked.
BRIGHTNESS: red, -0.625. Normalise ticked.
I concur with what Jacques said, reducing the red slider in brightness tab gives a closer result to what was posted.
Yes, 'twas a bit windy. Just adds to the challenge
Thanks. After all, I am here for discussion! I learn more that way, and contributing to play raw takes time so it is only courteous.
Just curious: Anybody else besides @Soupy and me see this behaviour when loading @Suki2019’s sidecar?
EDIT: @Suki2019 Did you do anything to the image before importing it to darktable or do you have something set related to the working profile (inside or outside of dt)?
It doesn’t show in your input colour profile, but if I change the working profile from the standard linear Rec2020 RGB to PQ Rec2020 RGB all problems are gone and the image looks very much like the one you posted.
darktable 3.4.1 produces this wrong result.
the image is processed on my PC with DT 3.4.0.
on my laptop runs DT 3.4.1 and also produces such a strange result.
I just tried to find this specific issue on github. Can’t find it but there’s enough mention of the colour calibration having issues in 3.4.0. All of them fixed in 3.4.1
EDIT: Just tried your latest xmp: Works like a charm!