Replicating Fujifilm JPG colors from raw files?

Hello everyone!

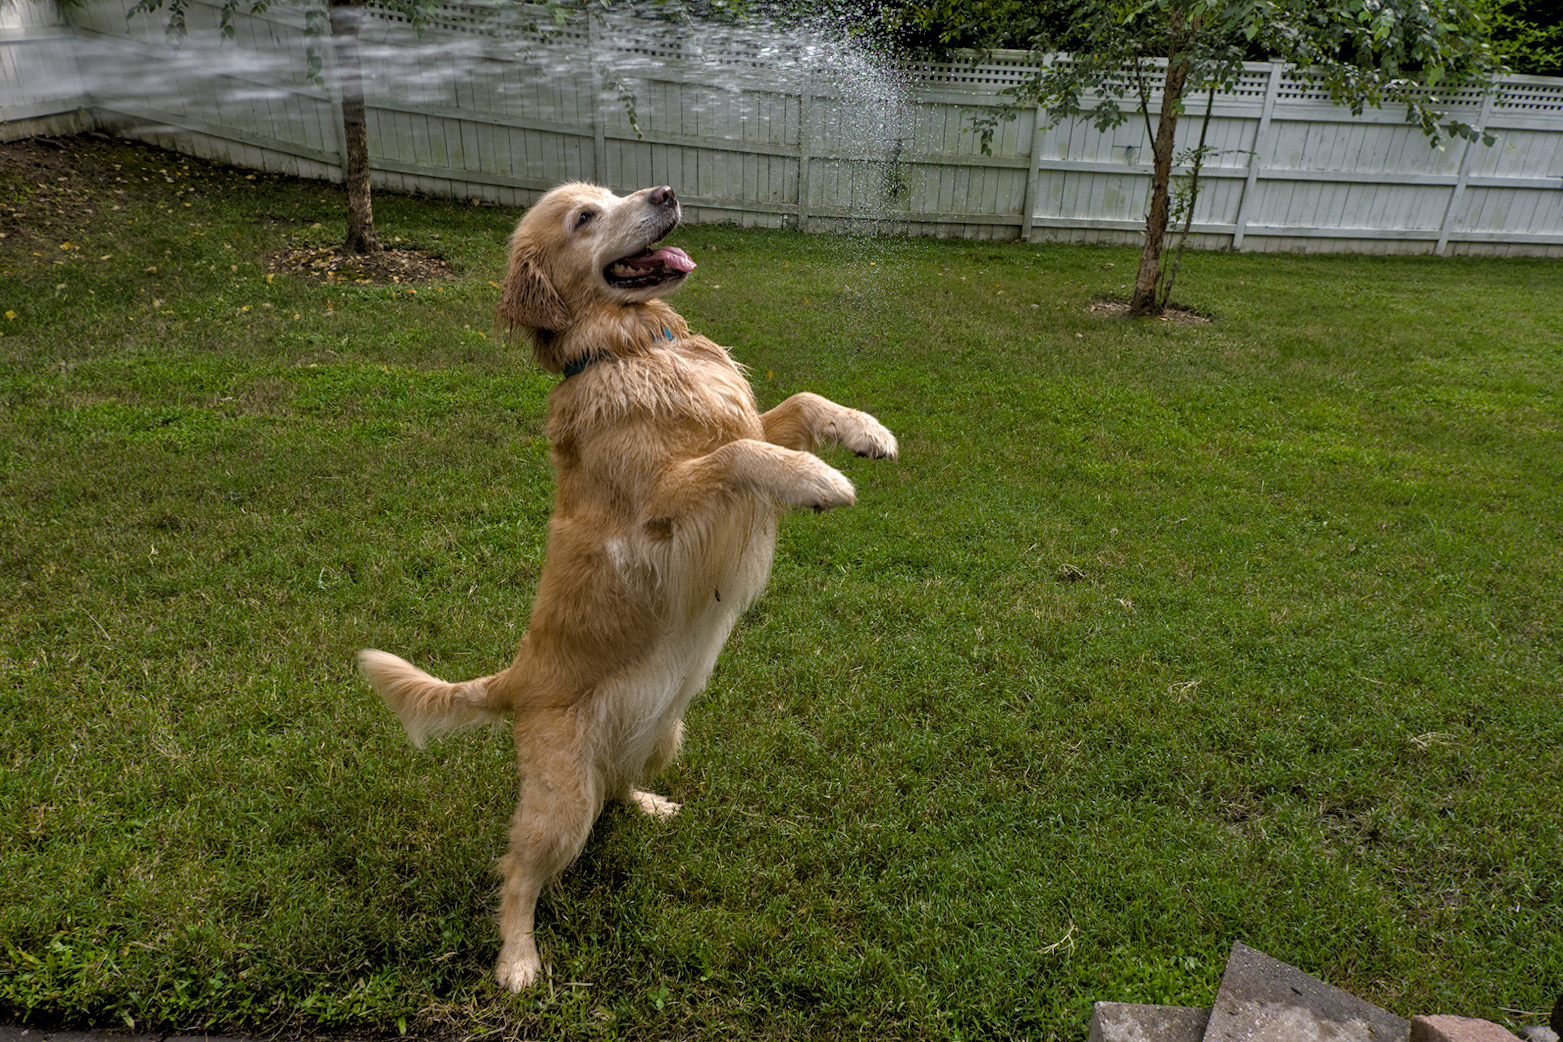
I have been shooting RAW + JPEG with my Fujifilm X-T3 for a while now, and I absolutely love the colors that I get from the built-in film simulations in the JPEG files. I have all the original raw files saved as well, in the hopes that someday I might want to refer back to them.

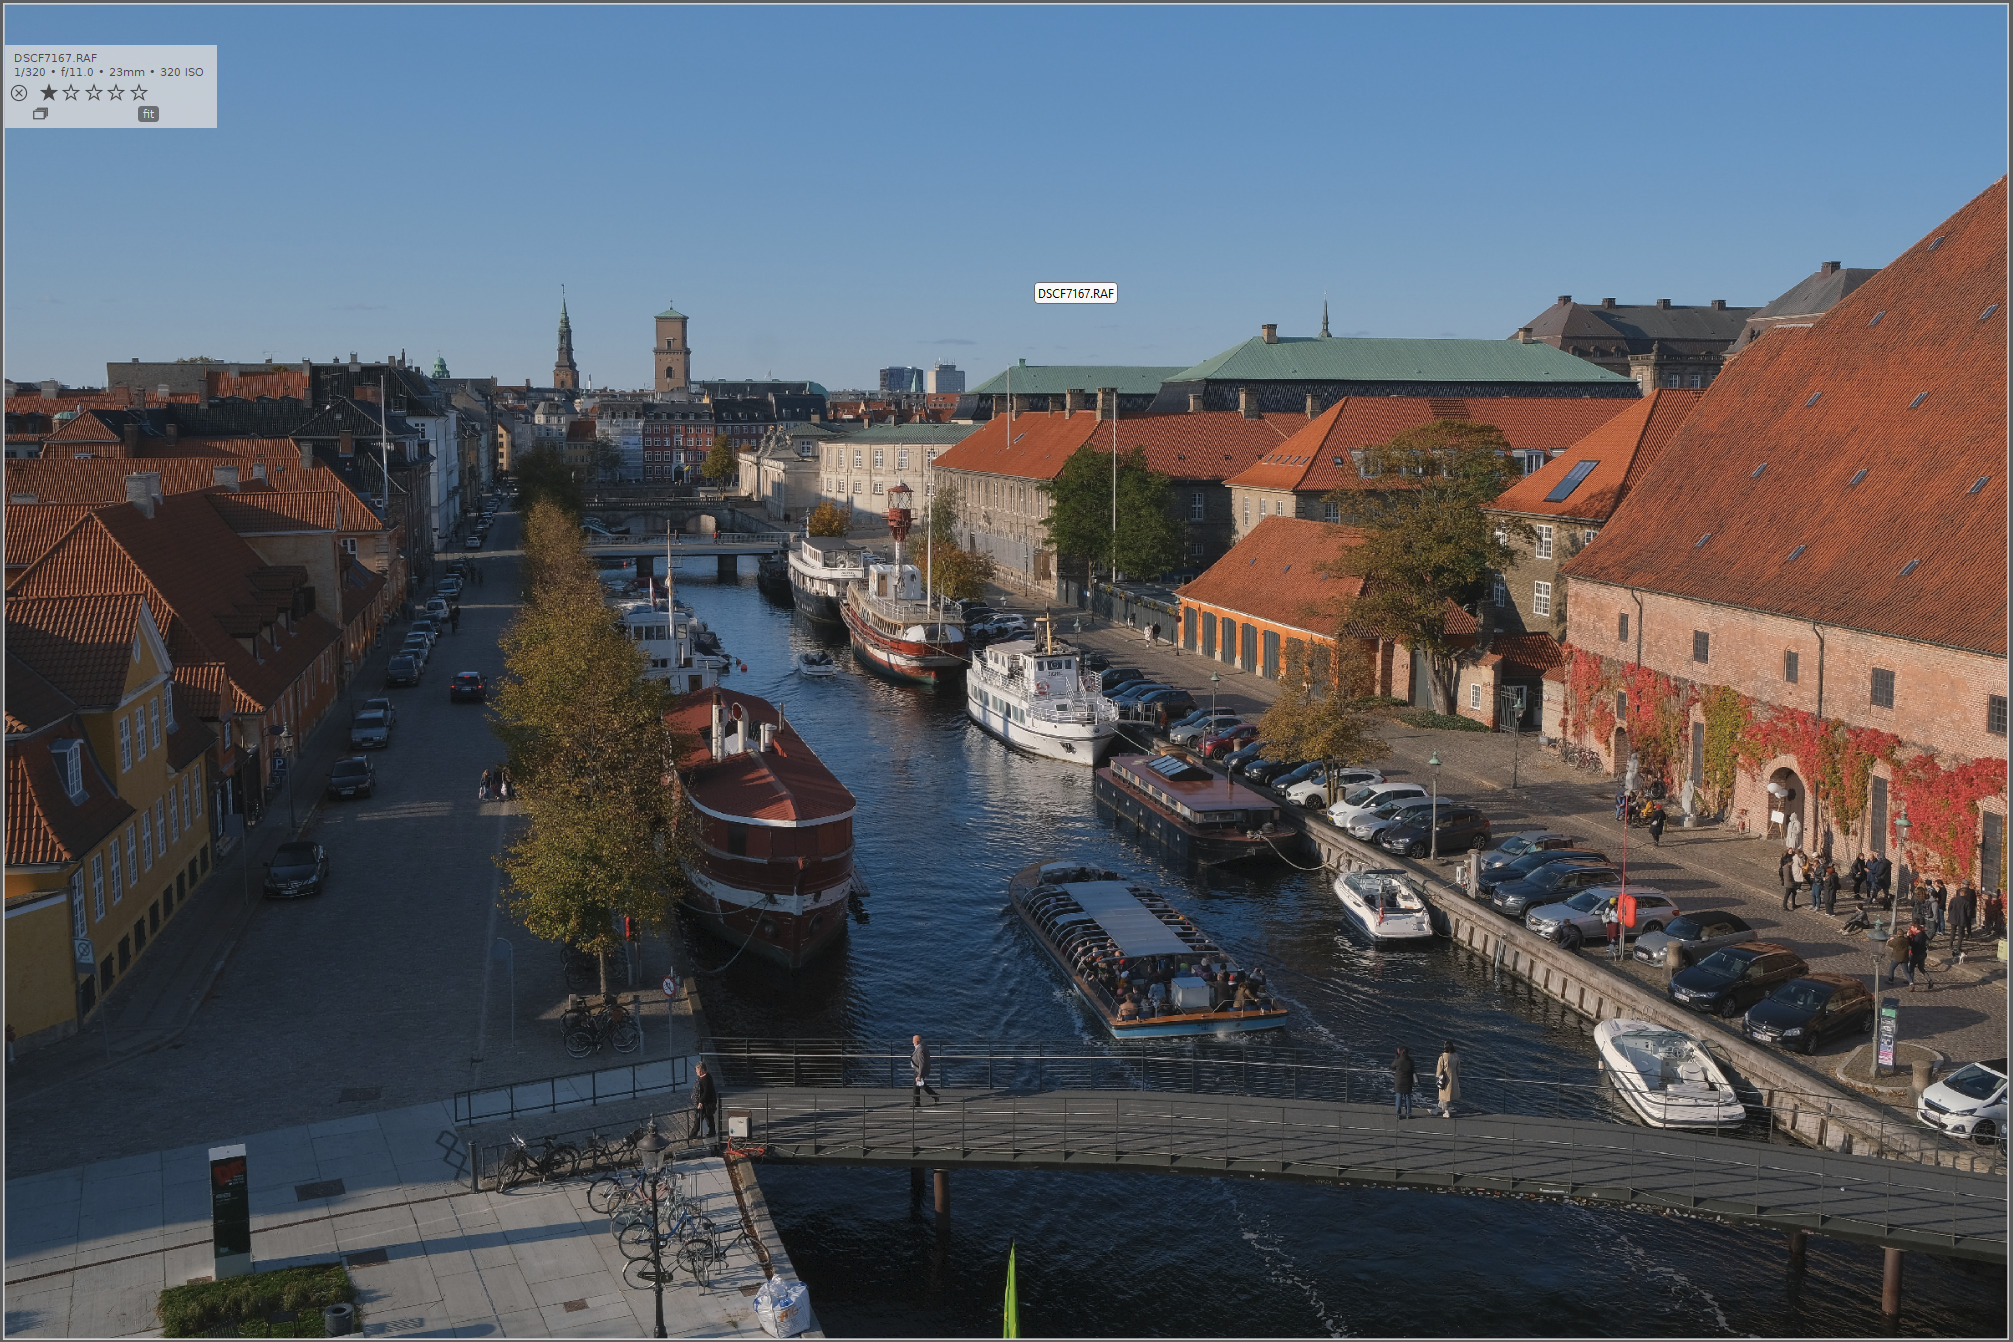
What I would really like to do is find a raw editing program (probably either Darktable or RawTherapee) that would allow me to open up the Fujifilm raw files, and quickly get to a starting point that looks like the JPEG images that the camera generates.

I have made a few attempts at this, but haven’t even gotten close.

Most of my attempts so far have been with Darktable. I’m not totally committed to either program (they both look nice, and are open source). At this point, I’d probably just want to use the one that could actually help me best achieve my goal of getting the colors to match the JPEGs.

I am using Ubuntu Linux. My experiments with Darktable were conducted with the Darktable version that comes with Ubuntu (20.04), which is a 3.x version, and also Darktable 4.2.0 from the official Flatpak release.

The first thing I tried was just loading the raw files directly, and seeing what Darktable did with them. I have also tried loading the Fujifilm LUTs v8 file from @bastibe, and also tried loading the LUTs made available by Stuart Sowerby on the web. Since the Darktable styles link on his web site no longer works, I tried using the RawTherapee LUTs in Darktable instead.

Finally, I also tried loading raw files in RawTherapee, and tried loading some LUTs in there.

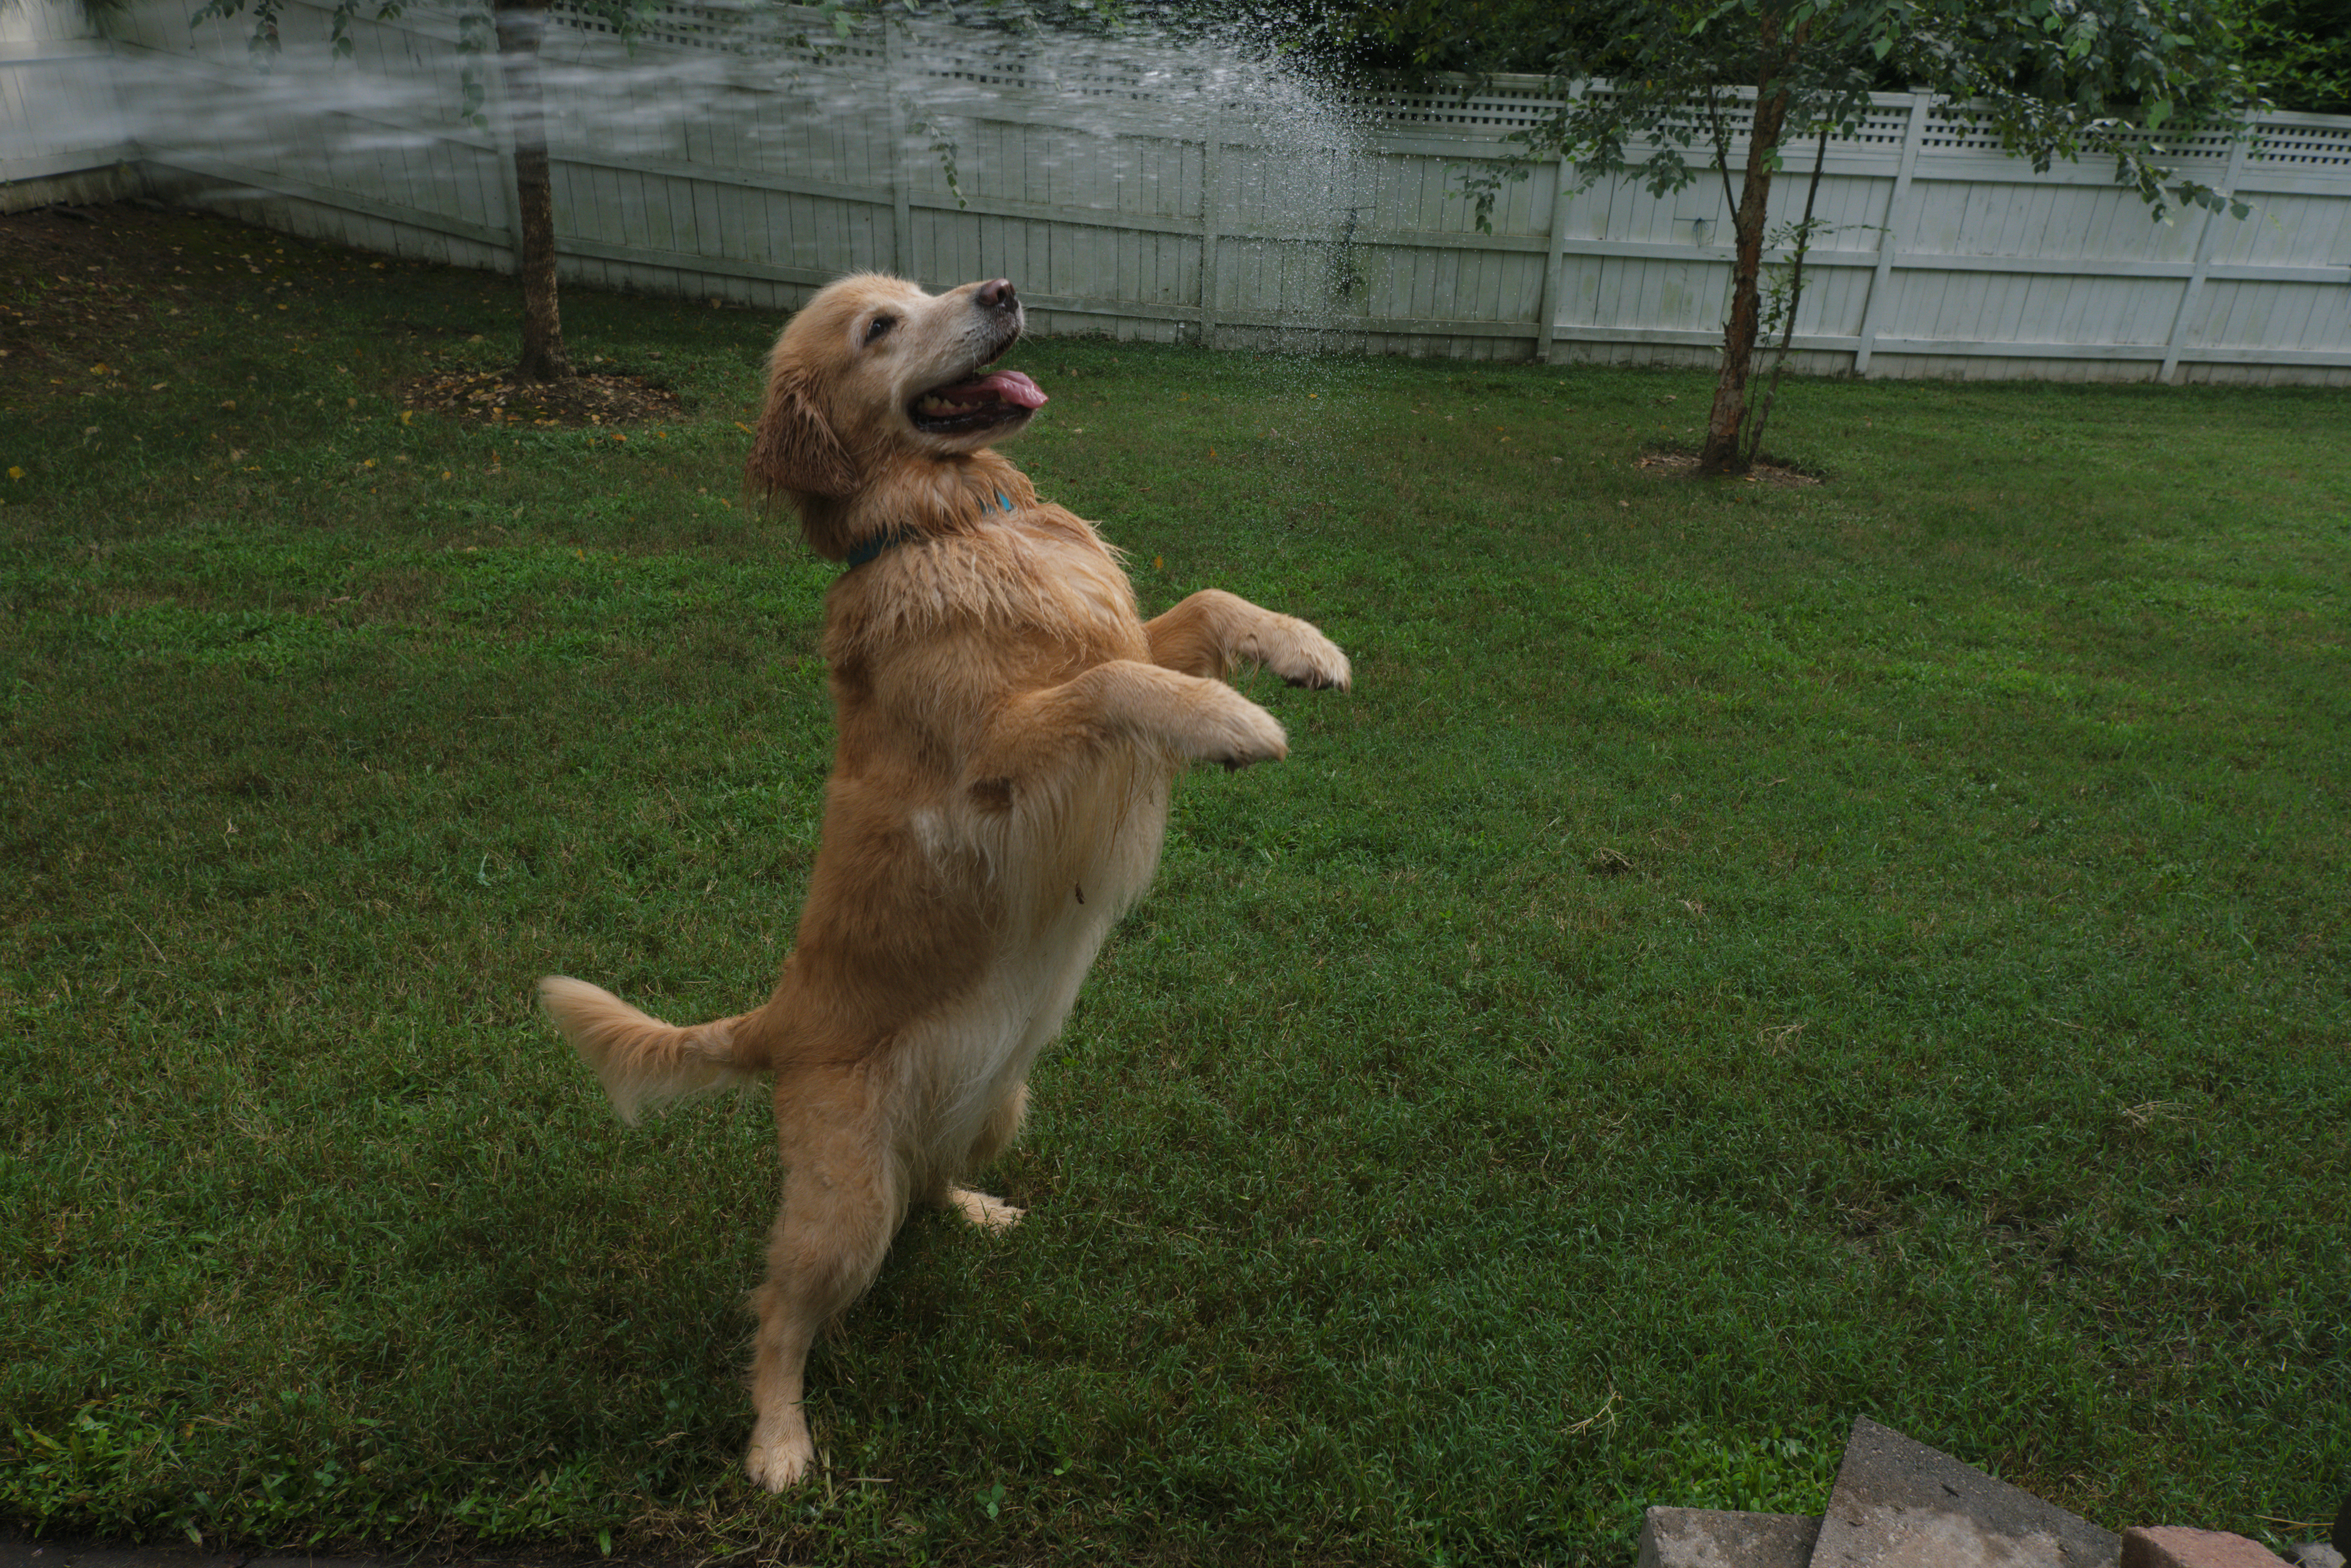
In all cases, I end up with a situation where I see an image that bears a resemblance to the JPEG, but with colors that don’t look as nice, and exposure values that look different. I understand that raw processing is more flexible than using JPEGs (I only shot raw back in the Canon DSLR days).

Has anyone managed to set up a workflow with Fujifilm cameras and open source raw processing software that replicates the Fujifilm colors? Or should I just stick with the JPEGs?

I’m adept with Linux, command-line operations, writing software, and all of that. I believe that someone out there has figured this out. But so far, everything I have tried has not worked.

I would love to hear from anyone who has gotten a Fujifilm raw editing workflow set up with colors that aren’t disappointing. I’m probably just missing a step somewhere…

Many thanks in advance!

1 Like

Hi Nathan and welcome! I can’t help much with this I’m afraid - I don’t have a Fujifilm to start with. I was going to point you to Stuart Sowerby’s page, but I see you’ve found that.
I don’t usually worry too much about replicating jpgs, as I can usually get something better - with my Sony… But I recognize that Fuji are a bit exceptional in terms of the OOC jpgs, so I see your point.
Good luck!
P.S. One option is to try disregarding your jpgs (temporarily!), have a look at few DT or RT tutorials, and see what you can come up with. You might find that in the process you realize what is missing or different to the jpgs, and find how to fix it… not sure if this is helpful :roll_eyes:

3 Likes

This is my own opinion, and hopefully someone will come along and prove me wrong.

Fuji has the most sought after jpegs, and I don’t think you’re going to recreate their editing pipeline using anything expect some software that has a commercial relationship with Fuji to recreate those colors. Certainly their look and feel is way more complex than a LUT or some simple development recipe.

You’ve seen what the result of quite a bit of work is with @bastibe’s, Stewart’s, and to some extent the LUTs available in GMIC/RawTherapee’s film simluations. There is also Joao’s stuff at https://blog.joaoalmeidaphotography.com/en/t3mujinpack-film-darktable/

If all that is not close enough for you, I’m not sure you’re going to get there. If you want the jpeg, then just use the jpeg. On most fuji cameras, you can reedit the raw file on the camera and produce a jpeg. That certainly doesn’t harness all the power of the raw, but you’ll get the look you’re after.

Most people in the darktable camp would advocate that you don’t pay attention to the jpeg and instead try and develop your own style.

9 Likes

One more idea - I assume Fujifilm supply some raw conversion software with the camera - maybe you could use this to export a TIFF with as high bit depth as possible then edit that. I’m not sure, but this might be a halfway house between editing a jpg and a raw. Just a thought.

3 Likes

It is great when the camera makes JPGs which are so pleasing as we don’t always want to develop every photo from scratch as a raw file. I also don’t advocate trying to reproduce any out of camera JPG from any Raw file, but if that is what you want to achieve then I suspect the camera manufacturer’s supplied software is your best bet.

However, to address your original post. I occasionally prefer the camera’s jpg compared to my RAW edits. So I approached this problem by opening the JPG in DT and doing a snapshot. I then opened the RAW file and applied basic adjustments such as exposure and filmic. I then refer to the snapshot of the JPG and work out what I prefer in the jpg. It is usually the colorfullness of the image, so I then tweak the image in the color balance rgb module. The presets such as add basic colorfullness can be helpful to see how adjustments can be achieved. 99% of the time I eventually achieve a better result than the camera and in the process learn more about hand crafting my images with DT.

The color zones module can let you increase or decrease saturation of specific colors and I use the rgb curve module set to independent channels to do some fine tuning of color balance as well.

I have not explored luts very much as I like to handcraft my RAW files and not follow another person’s recipe. Just my personal approach. Others who use luts may be able to guide you better with that approach.

Good luck getting the answer you want.

4 Likes

Nathan, one more thought (sorry I’ve posted so much…) would you like to post one (or two) of your shots here, both RAW plus JPG so I/we can try matching them? Ideally shots that you feel are good representatives of the colors. And that you’re happy to share of course!
I’d like to give it a go… no guarantees though! If you’d like to do this, you can just upload the files and add a Creative Commons licence. The usual one used here is this one (in case it helps): This file is licensed Creative Commons, By-Attribution, Share-Alike.

I had a try with an X-T3 file from here: https://www.kristoffertrolle.com/2020/fujifilm-sample-raw-files/
The creator has very kindly made the files freely available. I was able to get fairly close without using a LUT. What do you think?

Just noticed that the screenshot doesn’t match the original - I think I have a color management problem… bother. I don’t have access to the original .jpg.
Screenshot of the embedded JPG:

My edit in DT:

6 Likes

I second this, would be a fun challenge.

1 Like

Challenge accepted! I’m preparing some files to upload now…

5 Likes

On another note, it would be wonderful if the color checker in color calibration could accept custom values for each swatch. One could photograph a chart with actual fuji film (and other brands), measure the values and input them into dt. Of course, I have no idea how complex this would be to code, or how accurately it would work.

3 Likes

First, I want to thank everyone who replied. I really appreciate it!

Here is the original JPEG from out of the camera. This is using the default (and most neutral) Provia film style, with all other settings at their defaults. This seems like the cleanest baseline to use to compare LUTs and so forth.

Here is my best attempt at replicating the look of the JPEG that doesn’t involve moving sliders around, using Darktable 4.2.0. This image is the result of opening the raw RAF file in Darktable, turning the Lens Correction module on with the default settings, and then using the LUT 3D module to apply the Provia LUT that I downloaded from the Fuji LUTs V8.zip file that @bastibe made available in a link found here: Help Me Build a Lua Script for Automatically Applying Fujifilm Film Simulations (and more) - #59 by bastibe

Finally, here is the raw file if anyone wants to attempt any darkroom magic:

DSCF5240.RAF (31.8 MB)

Here are my observations regarding the differences between the Fujifilm camera JPEG and my attempt to replicate it using Darktable so far:

  1. The lens correction in Darktable is different than it is in camera. I shot this with the Fujifilm 16mm f/2.8 R WR lens, which naturally has a fair amount of barrel distortion which the camera corrects. I think I prefer the Fujifilm correction to what Darktable did here.

  2. There are brightness differences between the two images. The JPEG image out of the camera looks brighter… but in a way that goes beyond just a simple exposure slider adjustment.

  3. The Darktable image looks more blue. I shot this with a custom white balance set to 5600K in the camera. Darktable seems to default to a white balance of 5317K, with a tint control set to 0.974, for some reason.

  4. The JPEG appears to have more contrast.

  5. The JPEG just looks… more lively. I’m having trouble articulating it. But then again, I’m not the strongest when it comes to raw photo color grading (which I hope to learn more about).

Thanks again to everyone who replied so far. I really appreciate it!

3 Likes

I should point out one other issue… the colors displayed in the web browser do not match what I see on my display. Maybe ICC profiles aren’t applied. Since this post is all about precise color differences, I’m going to attach a zip file here with the JPEGs mentioned above.

fujifilm-darktable-jpegs.zip (27.3 MB)

And finally, I license these files under the Creative Commons, By-Attribution, Share-Alike license.

1 Like

Thanks for giving this a shot. Based on the two images posted there, I like the second one better, which I believe is the one you said you edited in Darktable. The embedded JPEG in your first image looks more gray and washed out. Not sure if that’s down to an ICC profile issue, or something else? At any rate, your edits look very nice!

I downloaded some free Fuji-X film-simulation LUTs a while ago, but I can’t for the life of me remember where I got them from. I did, however, find these:

Personally, I don’t really care that much for Fuji’s out-of-camera JPEGs (maybe there’s something wrong with me :smile:); I have my own way of doing things.

3 Likes

I tried those 3D LUTs in the link you mentioned. That web site shows perfect side by side comparisons of raw and JPEG files that look identical. That’s what I want to be able to do! However, when I apply the Provia LUT from that web site, it does not look like the JPEG.

What am I doing wrong?

The LUTs are only a very small part of the whole. Trying to replicate the out-of-camera JPEGs using anything but the same software and the same settings that were used to process them, while technically not impossible, would be very time consuming and involve a lot of experimentation.

I agree with @paperdigits here:

So far, the closest match is if I use the Stuart Sowerby Provia LUT, and disable the Filmic RGB module in Darktable. It’s still not as close of a match as the examples on his web site, but it feels like progress.

This seems a good idea, but since I am not a develop I can not say how big an ask it would be and if it is worth their effort.

I agree with this completely. Too many variables.

However, I think I made a breakthrough!

On the left half of the image, the original Fujifilm JPEG from the camera.
On the right half of the image, the raw file processed with a few settings.

Here is the winning combination from my latest attempt to process a Fujifilm X-T3 raw and get it to look like the Provia JPEG from the camera with all default settings. I’m listing the steps here, because someone else will invariably try to do this in the future, and will find this from a Google search or something.

  1. Open the image in Darktable (I’m using 4.2.0, the latest version)
  2. Turn on the “lens correction” module (which fixes barrel distortion and vignetting)
  3. Turn on the “LUT 3D” module, and load up the Provia LUT from Stuart Sowerby (link posted earlier in this thread). Specifically, it is the Fuji XTrans III 3DL variant.
  4. Turn on the “color correction” module, and drag the white point and the black point to the positions shown in the screen shot below (and also adjust the saturation to 1.05 in the same module)

darktable-color-correction

I don’t claim that this exact approach will generalize and work for all images. But this is the very first time that I have ever been able to get a Fujifilm raw file to not look disappointing in Darktable!

Thank you so much to everyone who posted. This has been tremendously helpful! It’s clear that I need to learn more about everything that Darktable can do, and raw photo editing in general. However, now that I have proved to myself that I can get good Fujifilm colors in Darktable, it is inspiring me to put in the time to learn more.

6 Likes

Ha! It’s a challenge alright…
I tried the LUT from @bastibe, but like you it wasn’t all that close. I think the problem with LUTs is that they depend on the ‘baseline’ settings to look right. I don’t know what workflow works with these. (I should say that I haven’t tried to find out)
So I reverted to my usual workflow, (no LUT) and settled down to matching. I’m using DT4.2. After a while I came up with this result:


To me, compared using the snapshot feature in darktable, it looks very similar, but not identical.

I saved the set of adjustments as a style
3rd_attempt_X-T3.dtstyle (4.8 KB)
which you could import through the styles module in darktable, in the lightroom view if you’d like to try it on a few more images. I’m not that confident that it’s right for all images… it will need the exposure adjusting depending on the image, but in theory, if I got it right (unlikely!) the rest should work ok.

Use the history stack to reset the image before applying, if you’ve made adjustments already, or make a duplicate in dt.

BTW, it won’t work on DT4.0.1 or older as I used the new sigmoid module instead of filmic.
I did most of the ‘heavy lifting’ in terms of color adjustments in the color calibration module.

The style was made with dt set (in the preferences) to legacy chromatic adaptation defaults, as I prefer using just the white balance module to color calibration for, um, white balance adjustments. I like CC for this kind of thing though! I think the style should work fine with ‘modern’ set for this, but I haven’t checked.

I found it’s closer (for this lens) if you set the lens correction module to use the lensfun database instead of the embedded data.

4 Likes

Well done working out a solution that works for you. DT is such a great program and provides just so many options. I tried playing around, but could not really match the colors of the grass and added a little magenta to mine because I preferred it.


DSCF5240.RAF.xmp (14.3 KB)

4 Likes