I switched my settings to scene-referred and “modern” chromatic adaptations. And I set my theme to be “darktable-elegant gray”.
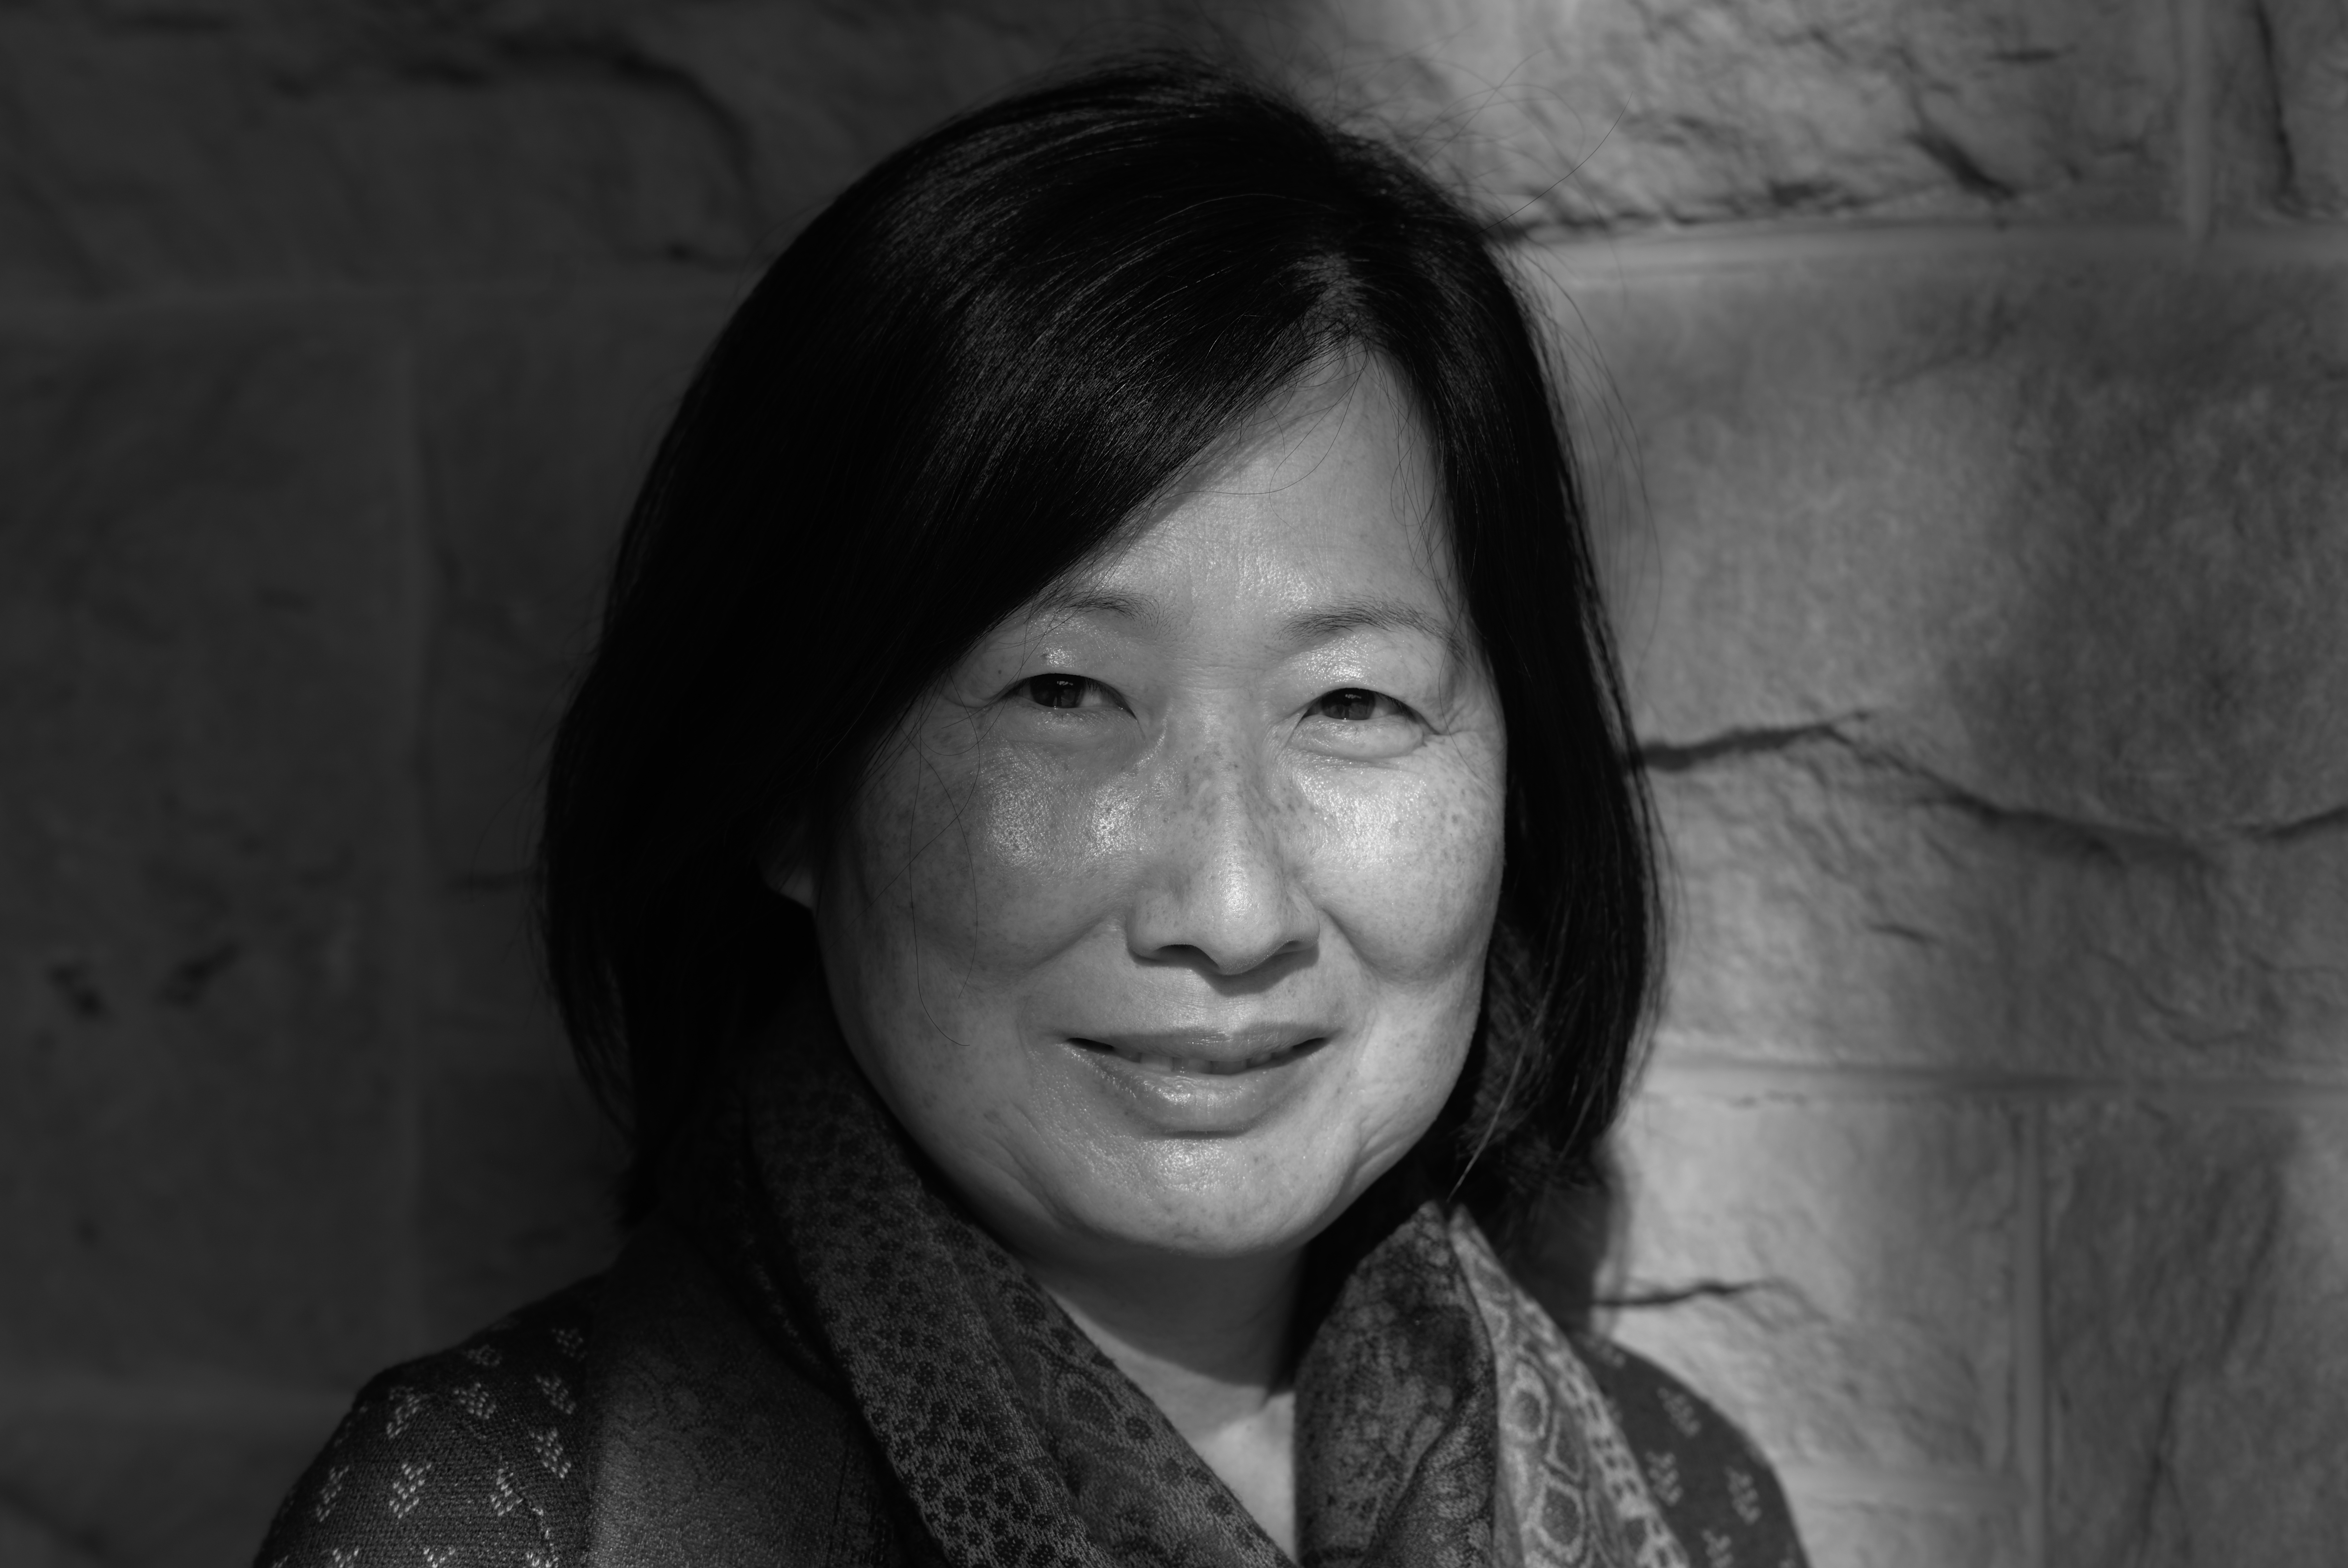
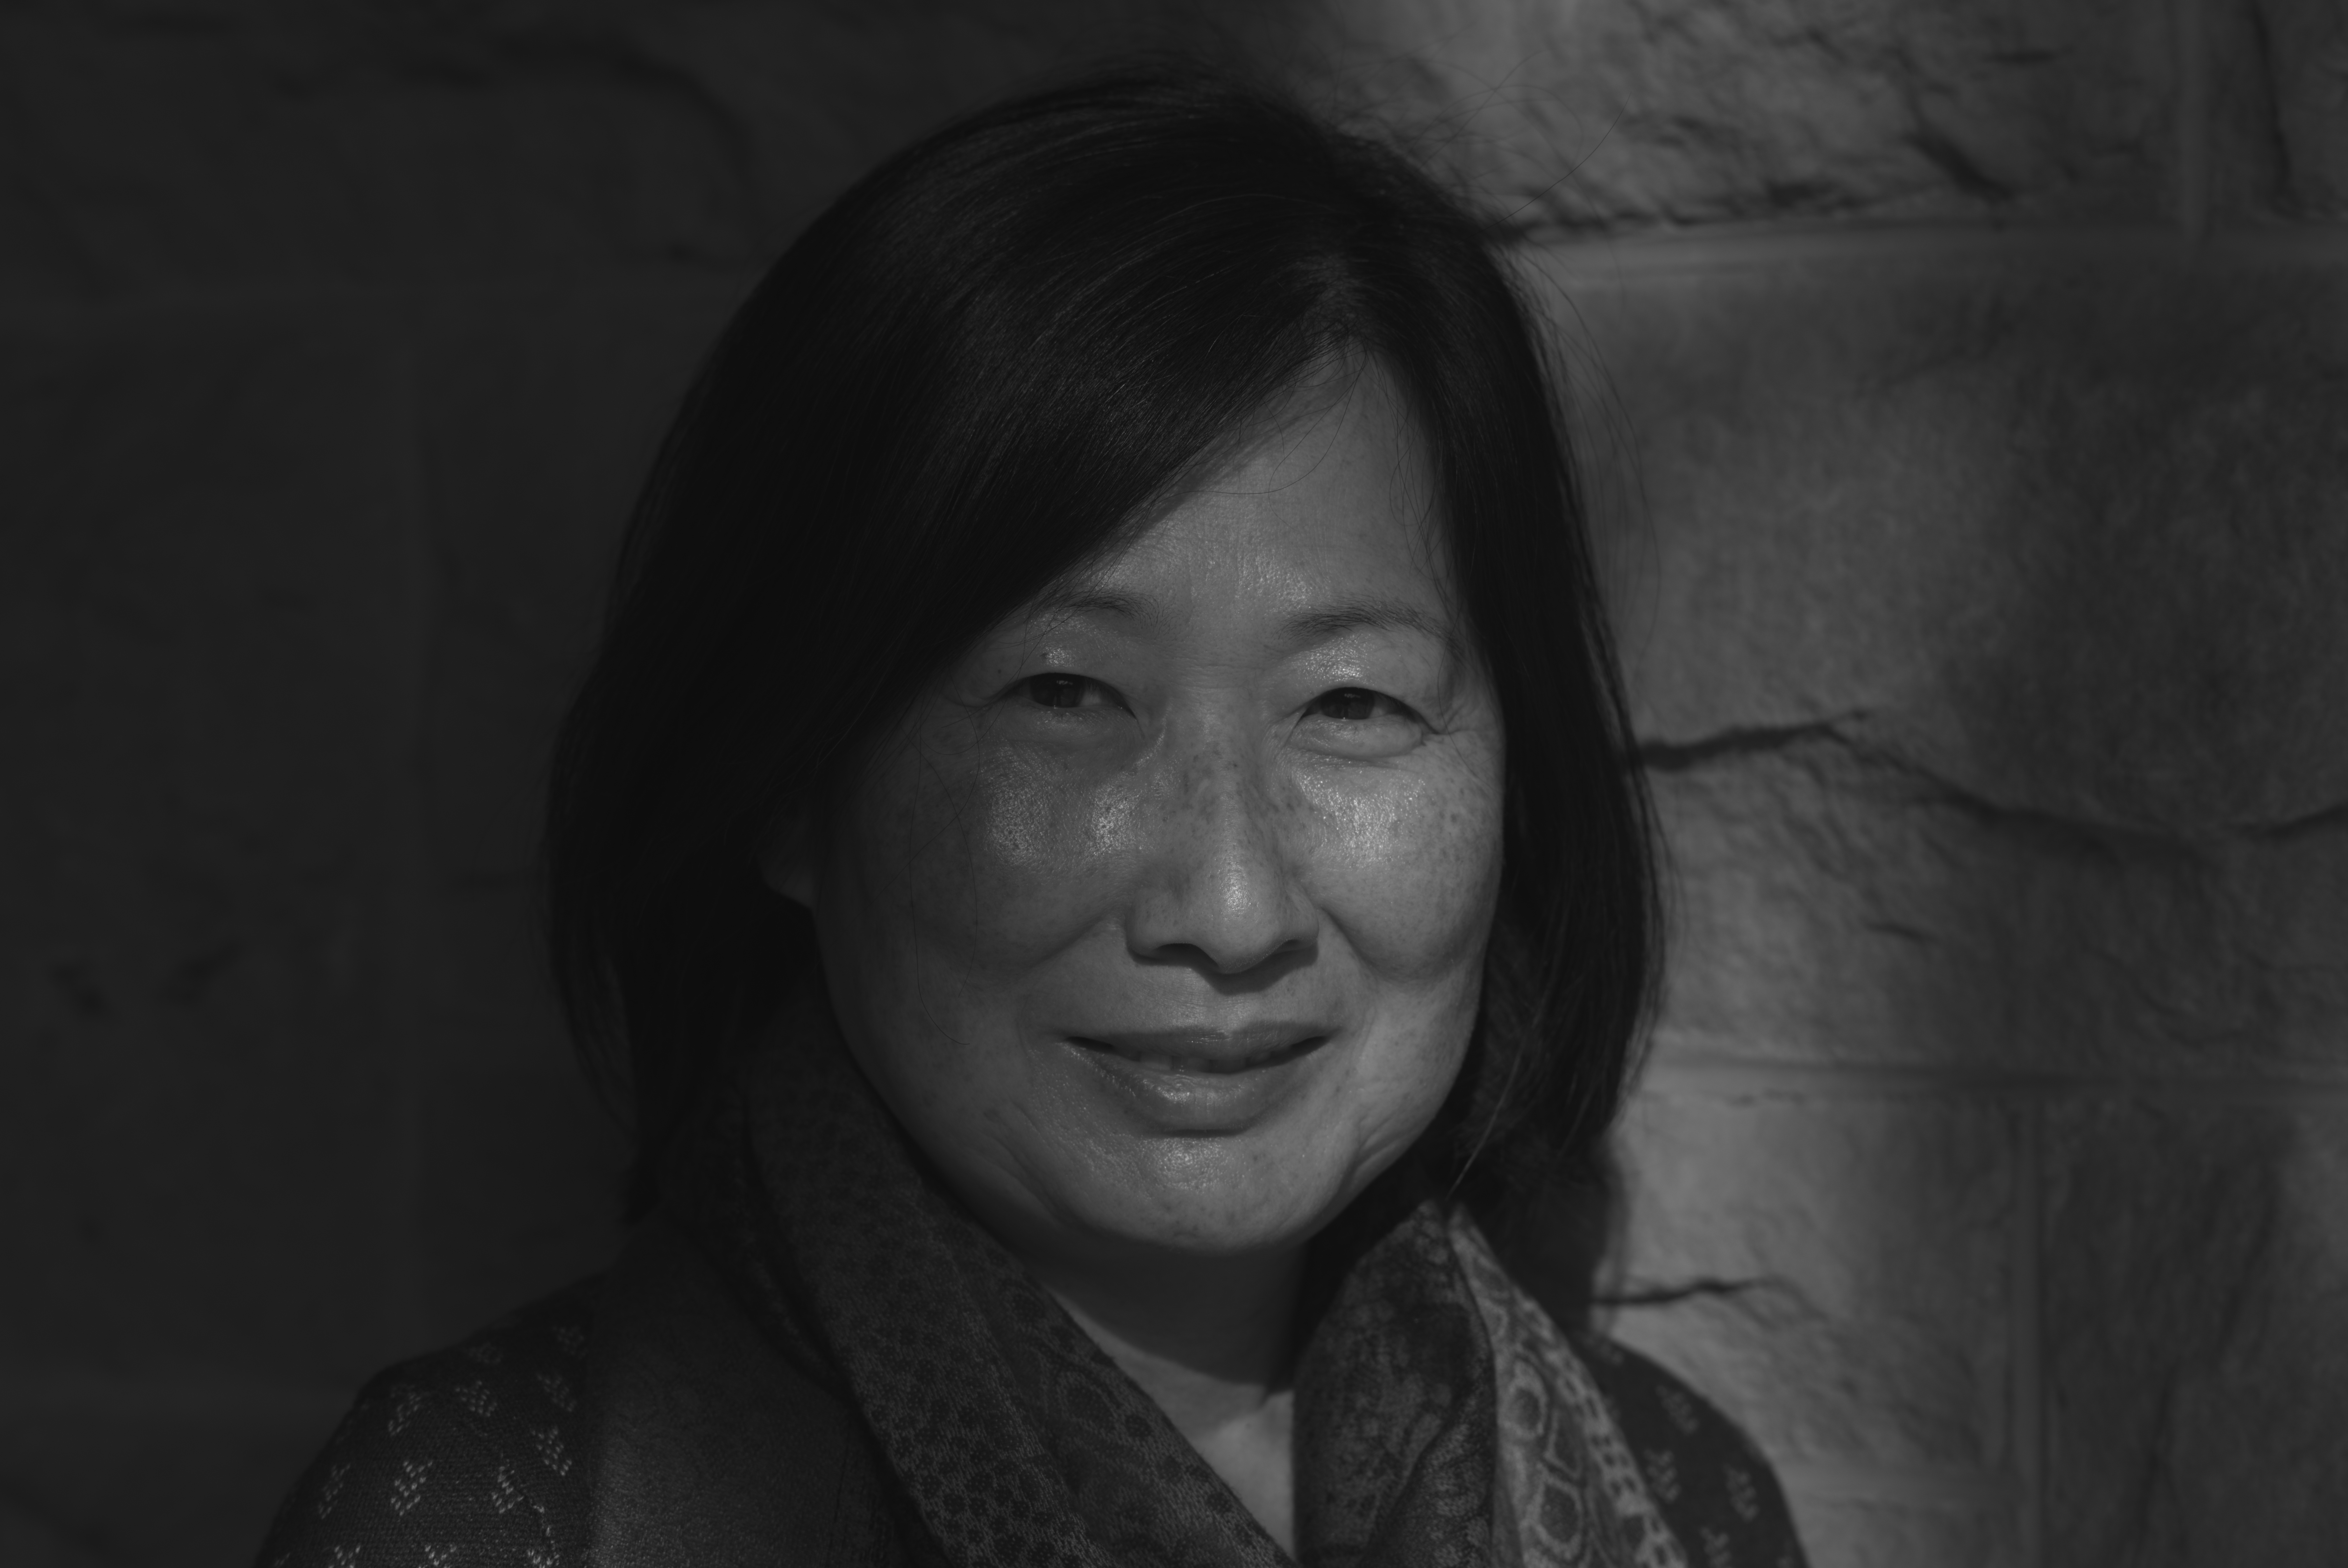
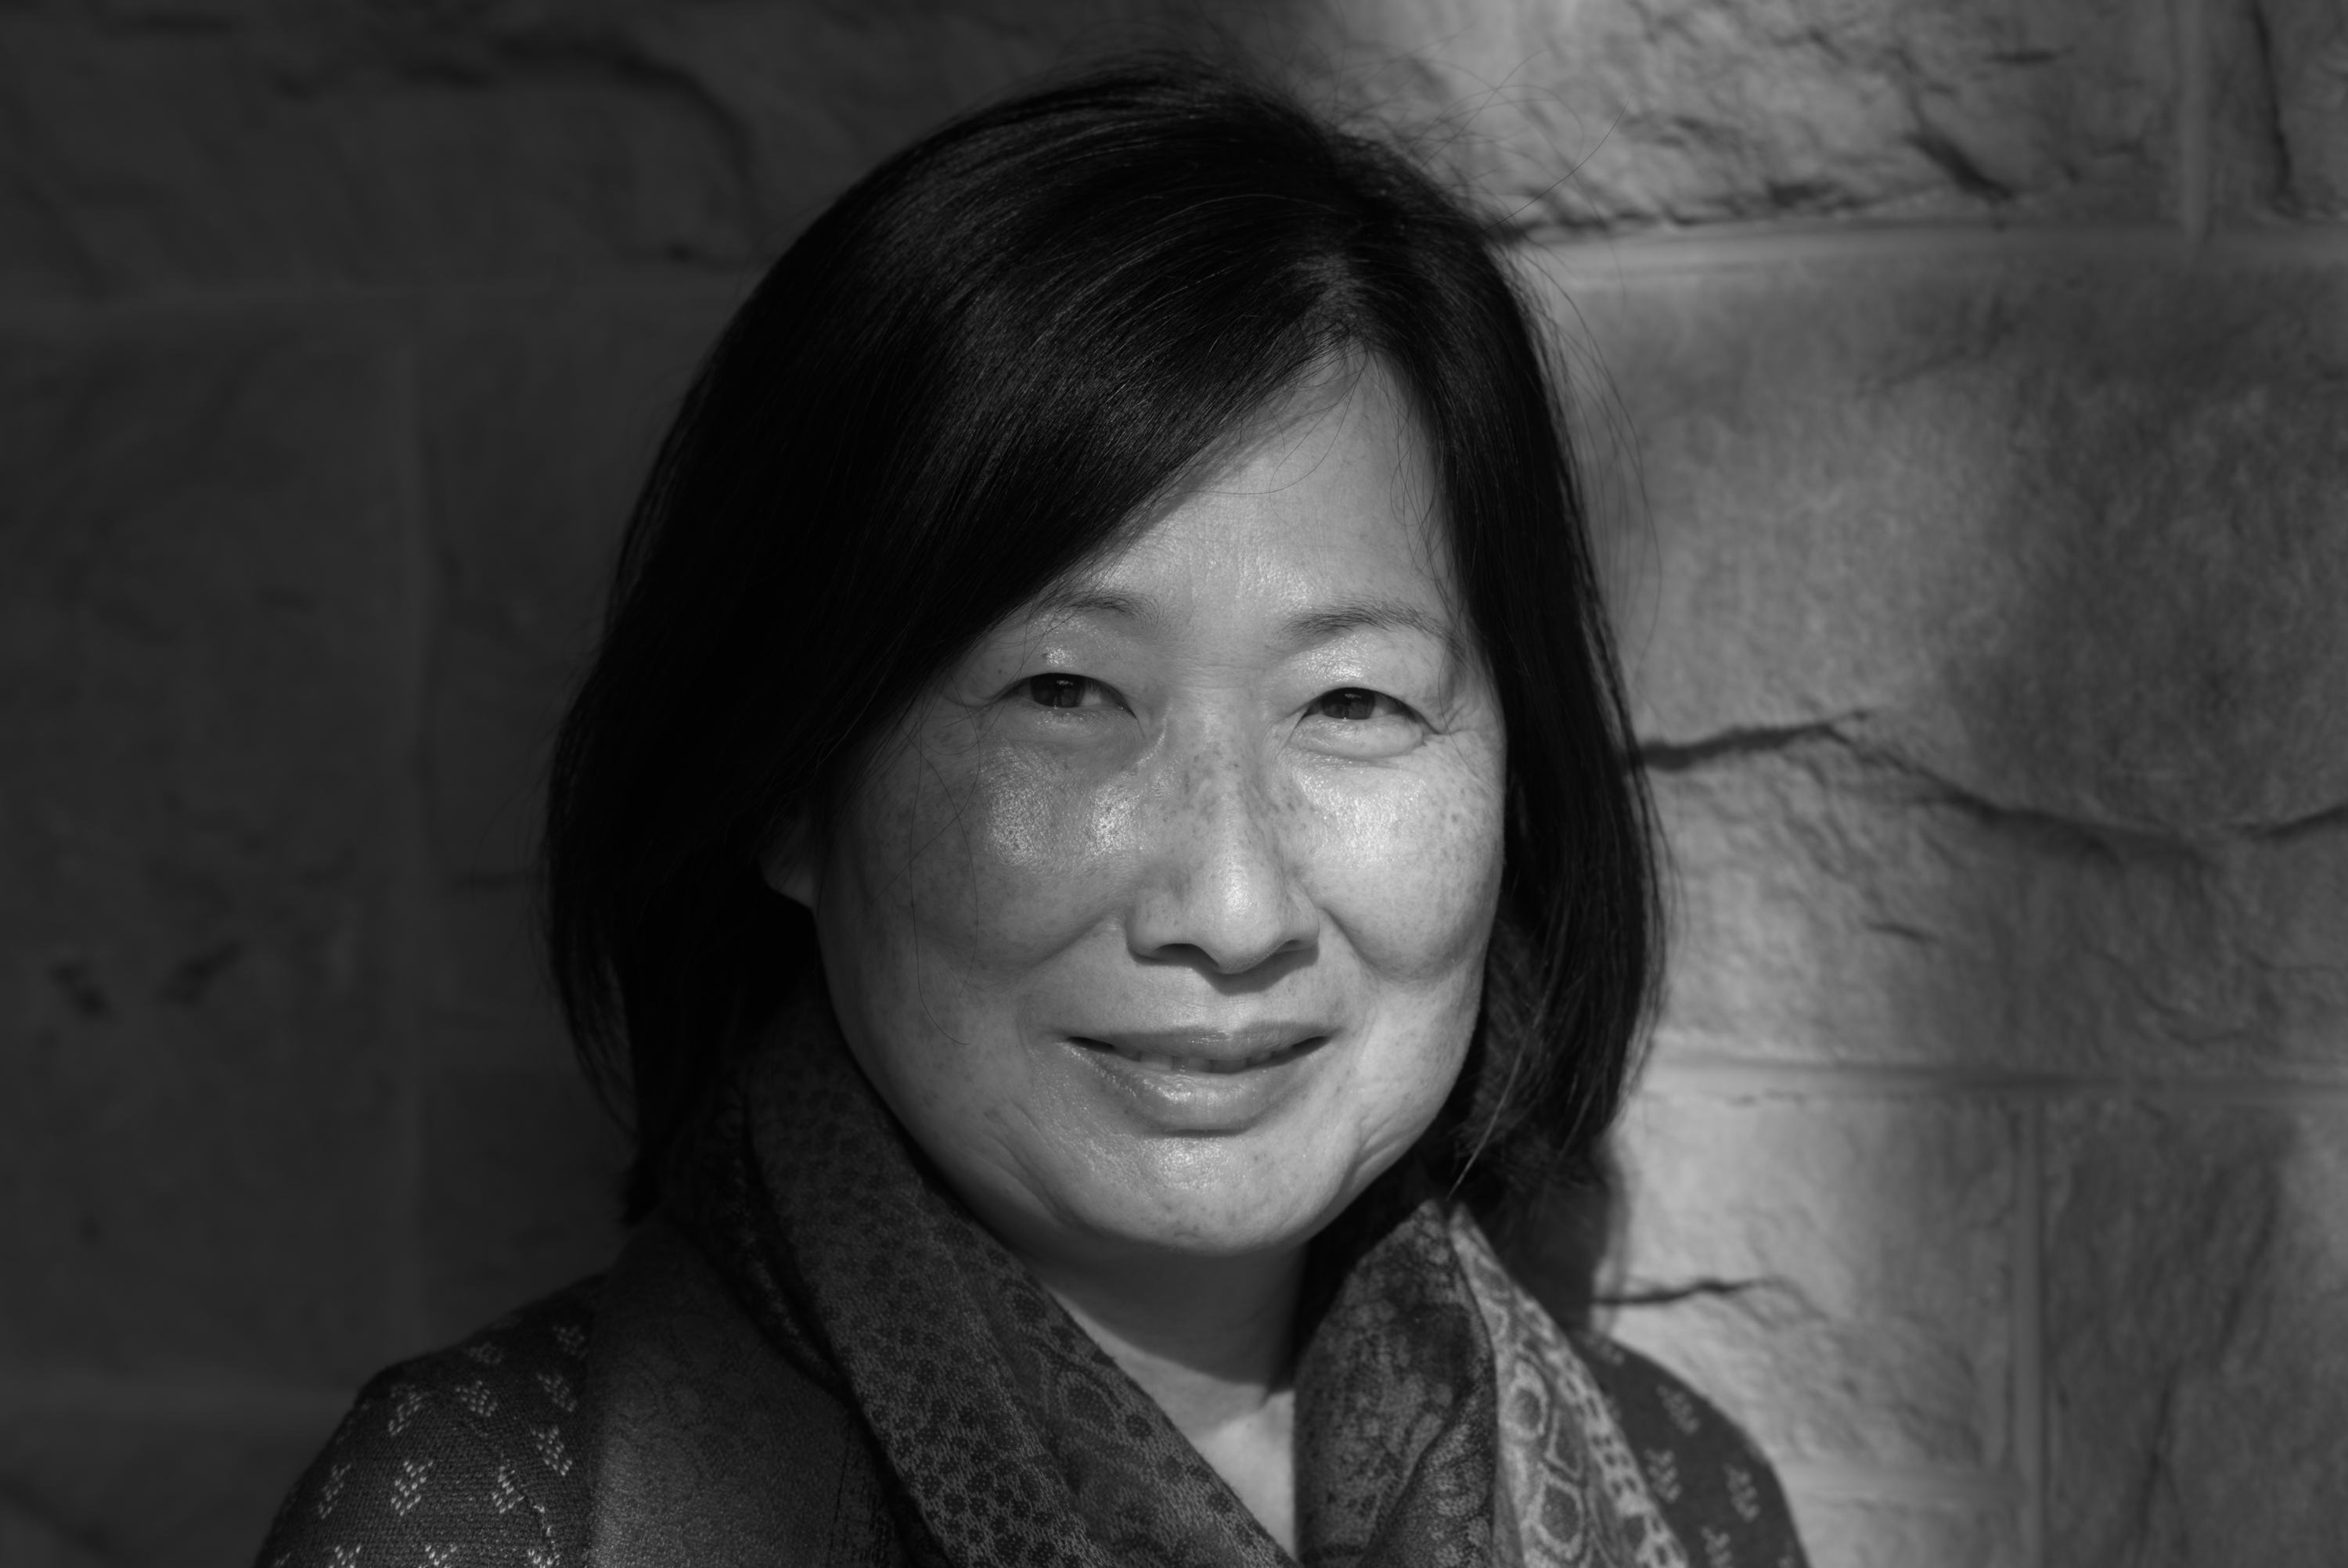
Same image, if I were to apply a B&W preset say Fuji Acros or Ilford 100, I get a different outcome with scene-referred vs display-referred. The image is more “washed out/grayish” with the former; not so with the latter. Other instances where I processed the image more (following Boris Hajdukovic’s Episode 50 etc for processing portraits and converting to B&W) produced similar outcome. See examples below.
Modules used: Exposure->Denoise->Color Calibration->Fuji Across Preset.
Even upon loading the image, before I bring up Exposure module, the image seems “washed out” in Scene-referred compared to Display-Referred.
Surely I’m doing something as scene-referred is supposed to be superior to display-referred.
What am I doing wrong?
Thank you in advance for your tips and suggestions. 0 Default Image.NEF (38.1 MB)
Yes, I bump up Exposure (per Hajdukovic’s recommendation).
Using Filmic module didn’t alter the fundamental issue that I referred to in my post: the washed out effect even before I use any module.
For simplicity I only showed the difference between scene- and display-referred where I only used the Color Calibration module, gray, Fuji preset. Including Exposure before, Filmic RGB before/after don’t affect the washed out effect…and I didn’t bring them up as they might serve to confuse what can be otherwise clearly stated with a minimum of module(s) and choices.
Yes, you are right, I underexposed by .7EV on my camera.
Wouldn’t that affect display vs scene-referred the same?
Further, even if I bump up exposure in darkroom it hardly affects the final image…
I guess, my Q is: were I to underexpose my shots would it affect processing differently in SR vs DR modes, all other things being the same?
I think that the main difference would be that display-referred enables the base curve by default, which usually aims to give a more contrasty/colorful result similar to the OOC processing. Whereas scene-referred by default does give a bit less contrast and possibly saturation, until you adjust to your taste using color balance rgb, filmic and maybe tone eq. Or in 4.2 you can use sigmoid instead of filmic which can give results a bit more like base curve.
I used Color Balance RGB, Filmic, and also Tone Eq (as demonstrated in the Hajdukovic tutorials). And new instances of Color Calibration above Color Bal RGB, etc.
I guess I’m doing something wrong as the final result–whether I several modules or just with Color Calibration alone, as described above–is a LOT less contrast and washed out…
Perhaps I should upgrade to 4.2 and give sigmoid a try…
I tried loading your jpgs as sidecar files to see your edits, but it only worked for the display referred version. (don’t know why) So just I did a quick edit trying to match your display referred version, but in scene referred using filmic. All I did was apply the Acros preset in color calibration, then adjusted exposure and the white relative, black relative and contrast sliders in filmic. It’s pretty close, but not identical. It does seem to me that the issue is just that in scene referred you have a different default ‘look’, but at least with this image it’s quick to adjust. Apologies if I’m missing a point or anything… 0 Default Image.NEF.xmp (6.7 KB)
And here’s another quick one using sigmoid instead of filmic. I find sigmoid a little more ‘intuitive’ to use, but results are pretty similar in this case.
I noted that across the three edits, the exposure I landed on for filmic and sigmoid is pretty similar, whereas the in the display referred version you did the exposure is set lower. This is just because of the different algorithms I think. I always adjust exposure till it looks right anyway, but you could make an auto applied preset for exposure if it was a nuisance.
0 Default Image_02.NEF.xmp (7.6 KB)
By the way, I expect you know already, but you can load my xmp files via the history stack module on the righthand side in the lighttable view.
Nothing wrong as such, it’s more that the new workflow with filmic leaves at much room possible for you to adjust how you want - the old display referred more gave you a fixed starting point.
This is what I get… using autoexposure I get +1.5 EV looks okay to me…
Then filmic and the auto picker for white and black…
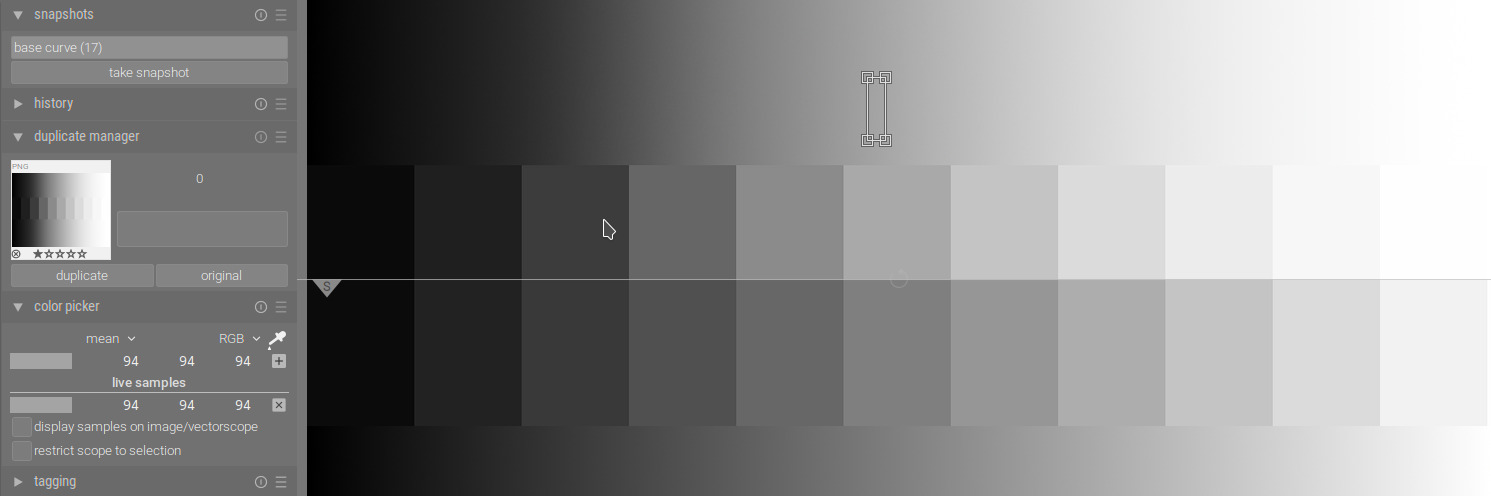
Nothing more… looks fine and not washed out and dark as the one offered by the OP… I think maybe in that case it was just being too conservative with exposure… Boris’s latest video using the tone ramp really shows a correct exposure…this initially blows out much of the ramp… I am sure many people using scene-referred are maybe just not using enough exposure because they are used to a certain value in the display referred that might be little to no exposure added??
Edit with a small tone eq you can take away some of the shadow and vignette… That may not be good if it is there by design… But basically this is only a third small adjustment
Steven, Todd: Thank you for your detailed comments and suggestions. What I’m taking away from your comments:
"All I did was apply the Acros preset in color calibration, then adjusted exposure and the white relative, black relative and contrast sliders in filmic."
I was doing things in reverse: adjusting exposure first, adjusting filmic, and then color calibration last with Acros preset. Could that sequence be the wrong way? It is the sequence Boris consistently has in his YouTube videos and it is different from Steven’s.
not using enough exposure
I agree, I was conservative in amping exposure, which I understand can be a double whammy having underexposed (deliberately) in the first place. Being a bit generous with exposure can actually help and I need to get out of my comfort zone on that.
I appreciate your comments and am grateful to you for your time and suggestions.
Off I go to now play (with more abandon) with scene-referred, exposure, filmic and tone equalizer (and yes, I shall also check out Boris’s tone ramp video and auto-picker for white/black).
I don’t know to be honest - I was trying to match your first edit, so I found it much easier to compare once it was in b+w… also I usually find I need to (re) adjust exposure after adjusting the contrast. I don’t know if that’s cause I’m not experienced enough or just a preference.
I very often swap around in order anyway! My way is not necessarily the best way - I tend to do what works, but sometimes I get lost anyway.
the sequence doesn’t matter since darktable processing is done in a fixed order. But you might need to do some readjustments in later modules in the pipe if you change stuff that comes earlier in the pipe… especially when using parametric masks. just trust your eyes
(Martin says): darktable processing is done in a fixed order.
I’m confused…and perhaps it’s because I misunderstood or don’t know enough…
My understanding is:
a) darktable processing is “in a fixed order”, the order being reflected in the listing of modules, with those above following those below, and the modules themselves differ depending on whether scene- or display referred;
b) modules available for scene-referred are unavailable or sometimes inapplicable to display referred. E.g., in scene referred it makes no sense to use Contrast Brightness Saturation or Color Contrast modules nd hence they are unavailable. Instead you use Filmic and Color Balance RGB and Color Calibration etc.
c) Color Calibration always appears before i.e., lower in the list compared to Filmic. So, after applying Filmic if you are to need to use Color Calibration you have to create a new instance of the latter, move it above Filmic and then tweak the new instance of Color Calibration.
is this what Steven meant by “swap around…”? if not what else can swap around mean?
And if, as Martin says, “sequence doesn’t matter”, what can be behind Boris’s creating a new instance of modules lower in the list, moving them above those higher in the list, etc. (as he did with Color Calibration vs Filmic and other such modules in his videos)? if “sequence doesn’t matter” why is the processing in a “fixed order” disallowing modules to be moved up/down the list?
I hope, naive as I seem and am, my questions (and the answers from those that know better) might also help others similarly situated (and I’d like to think I’m not the only one with these Qs!)
Note that those LUTs require display-referred input (they can only map 0…1 to 0…1). You can rarely (never?) know what input their authors used to match them to the camera’s processing.
The base curve does not maintain the brightness of midtones: it lightens most of the image. Filmic and sigmoid, on the other hand, keep midtones where they are.
Istvan, I found your response, and its contents, not merely informative but illuminating.
In short, whether you intended or not, you “taught” me how to fish (with darktable), what to use and how and when, and how they compare to alternatives.
Thank you!
As you say, modules are applied to your image from bottom to top, as shown on the list of modules on the right in darkroom. Click on the tab with a power button symbol to see those modules that are active.
Darktable has a default module order that works well for the vast majority of images. It also has a few different sets of modules that can be activated automatically when an image is loaded into the darkroom (for example scene-referred and display-referred). Click on the hamburger icon to see the available module sets.
You can turn modules on and off, and make adjustments, in any order you want. Darktable will still run your image through the different modules from bottom to top.
It is usually more efficient to make adjustments roughly from bottom to top. The reason is that, if you make a change near the top, then another change near the bottom, you often have to go back and readjust the near-the-top module. This back-and-forth is minimized if you work bottom to top.
This approach may require some getting used to. For example, adjusting exposure may blow your highlights, but it doesn’t matter, because filmic or sigmoid will fix that. Likewise, filmic will often produce washed-out colors, but it doesn’t matter, because you’ll fix that in Color Balance RGB module.
The reason display-referred modules should not be used before filmic or sigmod is that they use a different scale. Display-referred modules want all pixels to be in the range [0, 1], but scene-referred modules use the scale [0, \infty].
You can move modules around to change their order in the pixel pipe. My recommendation is to avoid doing this until you master the default order.
Miguel, Color Balance RGB is below filmic in the pixel pipe.
So if it is to fix the washed-out colors produced by filmic does it explain why I would need to create a new instance of Color Balance RGB, move it above filmic, and do the “fixing” in that new instance, as said fixing would follow and not be overwritten by filmic?
Yeah, that’s what I meant by “making adjustments roughly from bottom to top”. In other words, there are exceptions, and this is one.
Filmic is the last of the scene-referred modules because its output is mapped to the range [0,1]. But it is not necessarily the last module to adjust.
I usually start by adjusting exposure, then adjust filmic. The image will often require contrast and color adjusting, often done with Color Balance RGB and/or Tone Equalizer, left in their usual place before filmic. Sometimes (not often) filmic may need a final tweaking.