Shadows/highlight compression is one of the fundamental tools in image processing.
Used with moderation, it can rescue images for which the dynamic range is too big to be properly displayed. However, it is a tool in which the actual algorithm being used plays a crucial role one the quality of the result. Shadows and highlights have to be separately processed without creating visible and unpleasant halos. This is usually achieved through various forms of edge-aware blur operators.
Recently there has been quite some work done both in RawTherapee (mostly by @agriggio) and PhotoFlow, to improve the visual quality of shadows/highlights compression. Since the two programs use a quite different approach, I thought it would be interesting to compare side-by-side the results on the same image. This is not meant as a “battle” between the two programs, but instead as a way to discern the pros and cons of the two approaches, and see if we can get the best out of the two.
The algorithm used in PhotoFlow is based on this work by Paris and Durand, and can be summarised as follows:
- the input RGB image (assumed to be in linear encoding) is converted to log-luminance
- the log-luminance is blurred with a bilateral blur operator
- the high-frequency component is extracted as the difference between the original and blurred log-luminance values
- a linear scaling is applied to the blurred log-luminance
- the high-frequency part is added back to the blurred and scaled log-luminance
- finally, the new log-luminance channel is converted back to linear encoding, and blended into the initial RGB channel
The algorithm typically produces a flat and dull result, but with preserved local contrast. A nice and easy way to re-introduce some global contrast, which IMHO generates visually pleasing results, is to apply a filmic tone-mapping curve to the result.
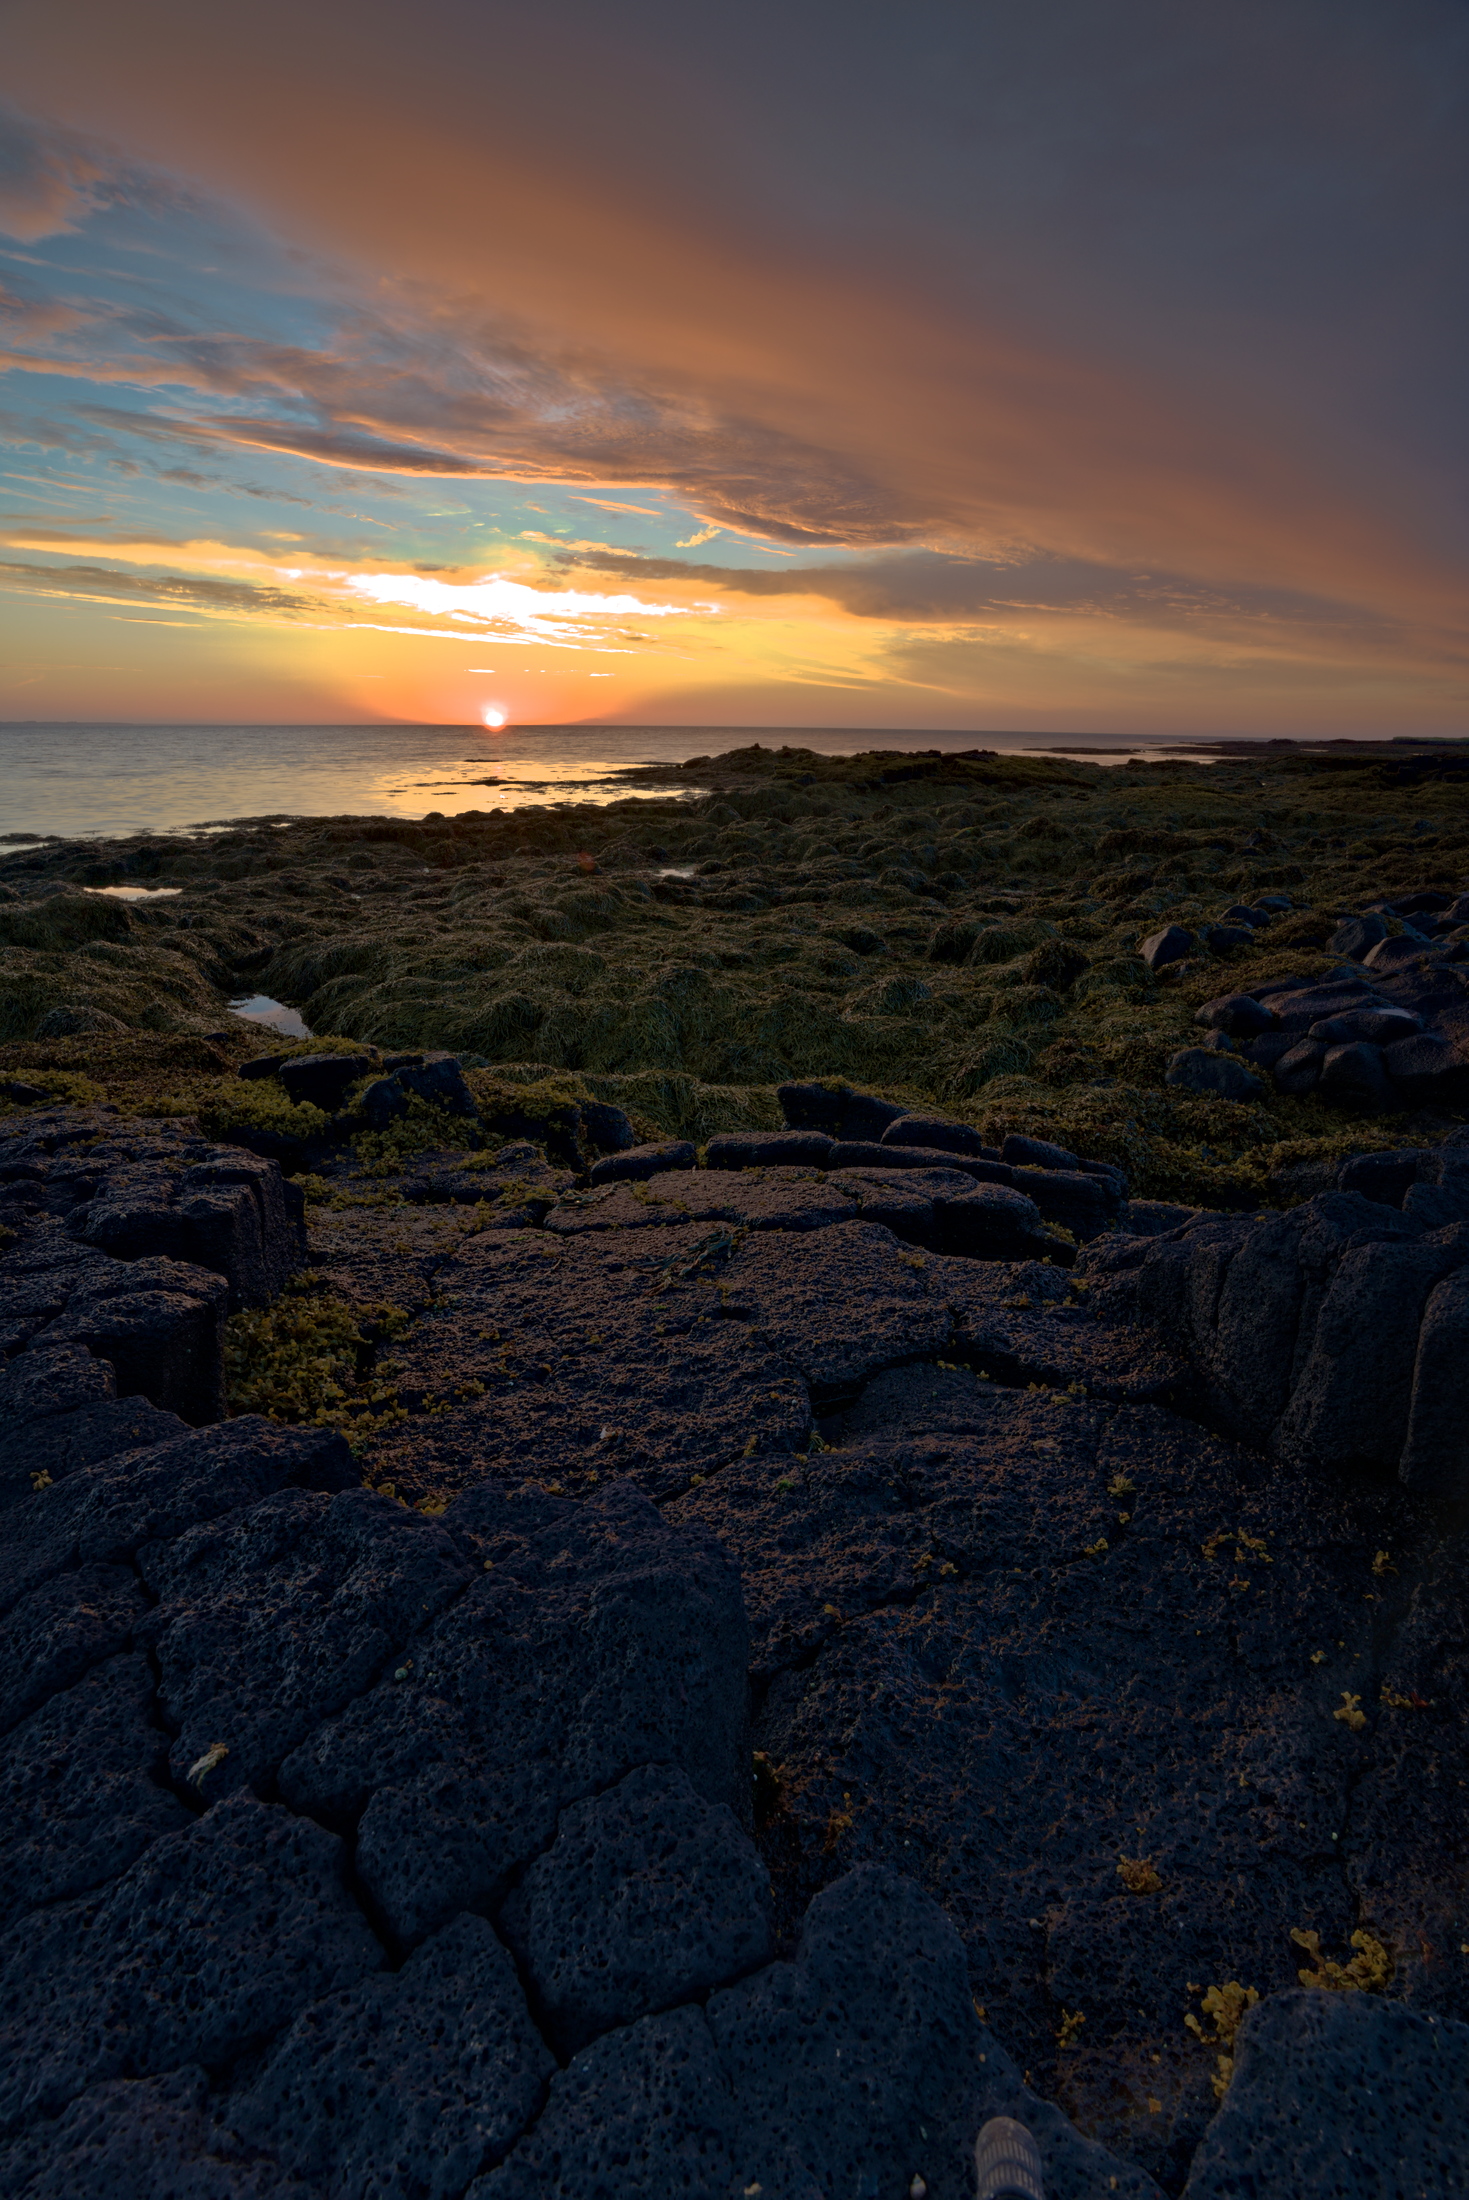
To illustrate all this I have taken the RAW image from the Volcan Stone Sunset PlayRAW, and generated a scene-referred 32-bit floating point TIFF (in linear Rec.2020 colorspace) that will serve as a starting point for both the PhotoFlow and RawTherapee edits.
Here is how the initial image looks like (the blown highlights are not really lost, they are just represented by values > 1):
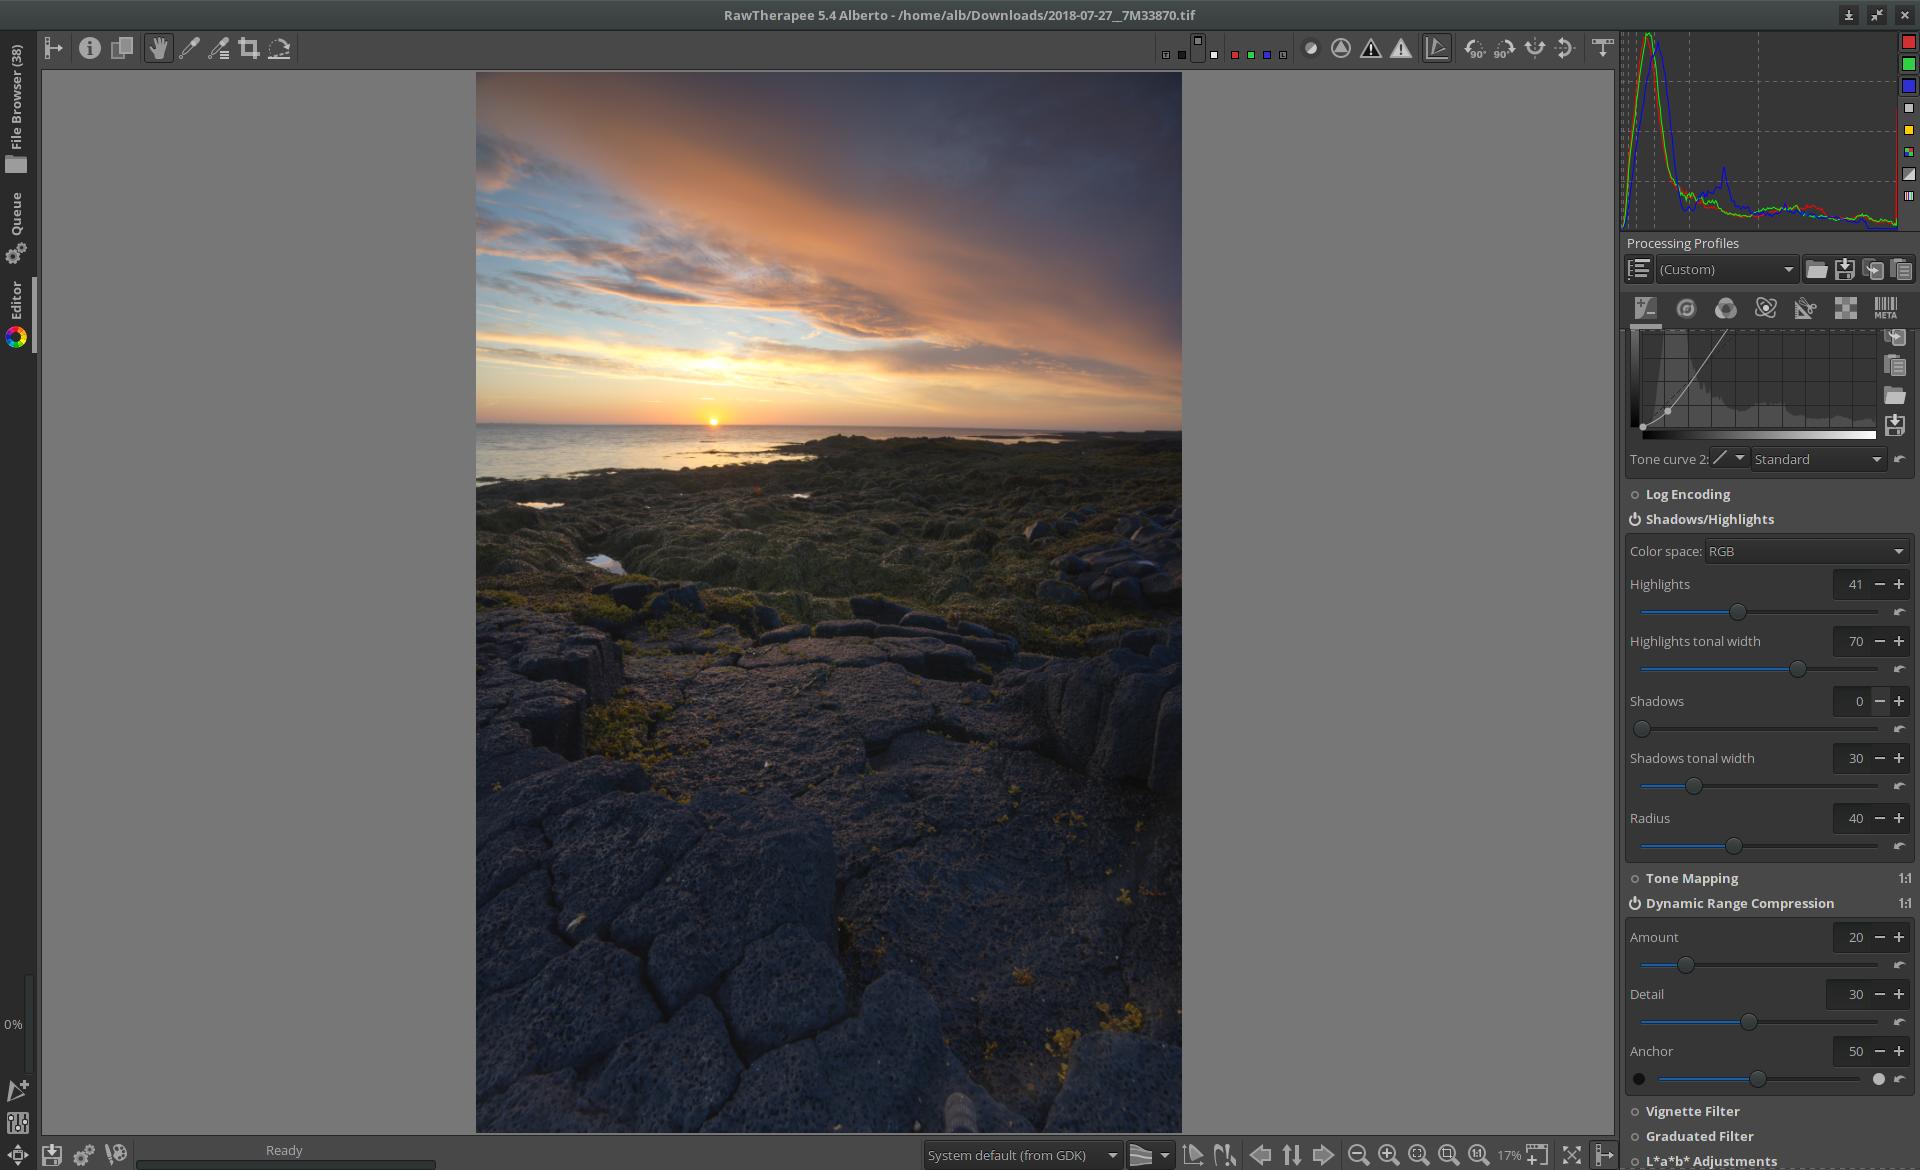
I lifted the exposure by 1 EV and applied the dynamic range compression module with default parameters:

Finally I added a filmic tone mapping adjustment:

Let’s see how this compares with the new shadows/highlights module in RT. I still had no time to investigate in detail the RT algorithm, maybe @agriggio can provide some details…
One clear difference is in the blur method: RT uses a guided blur, while PhF uses a bilateral filter. I am planning to implement the guided filter in PhF as well, with quite high priority…
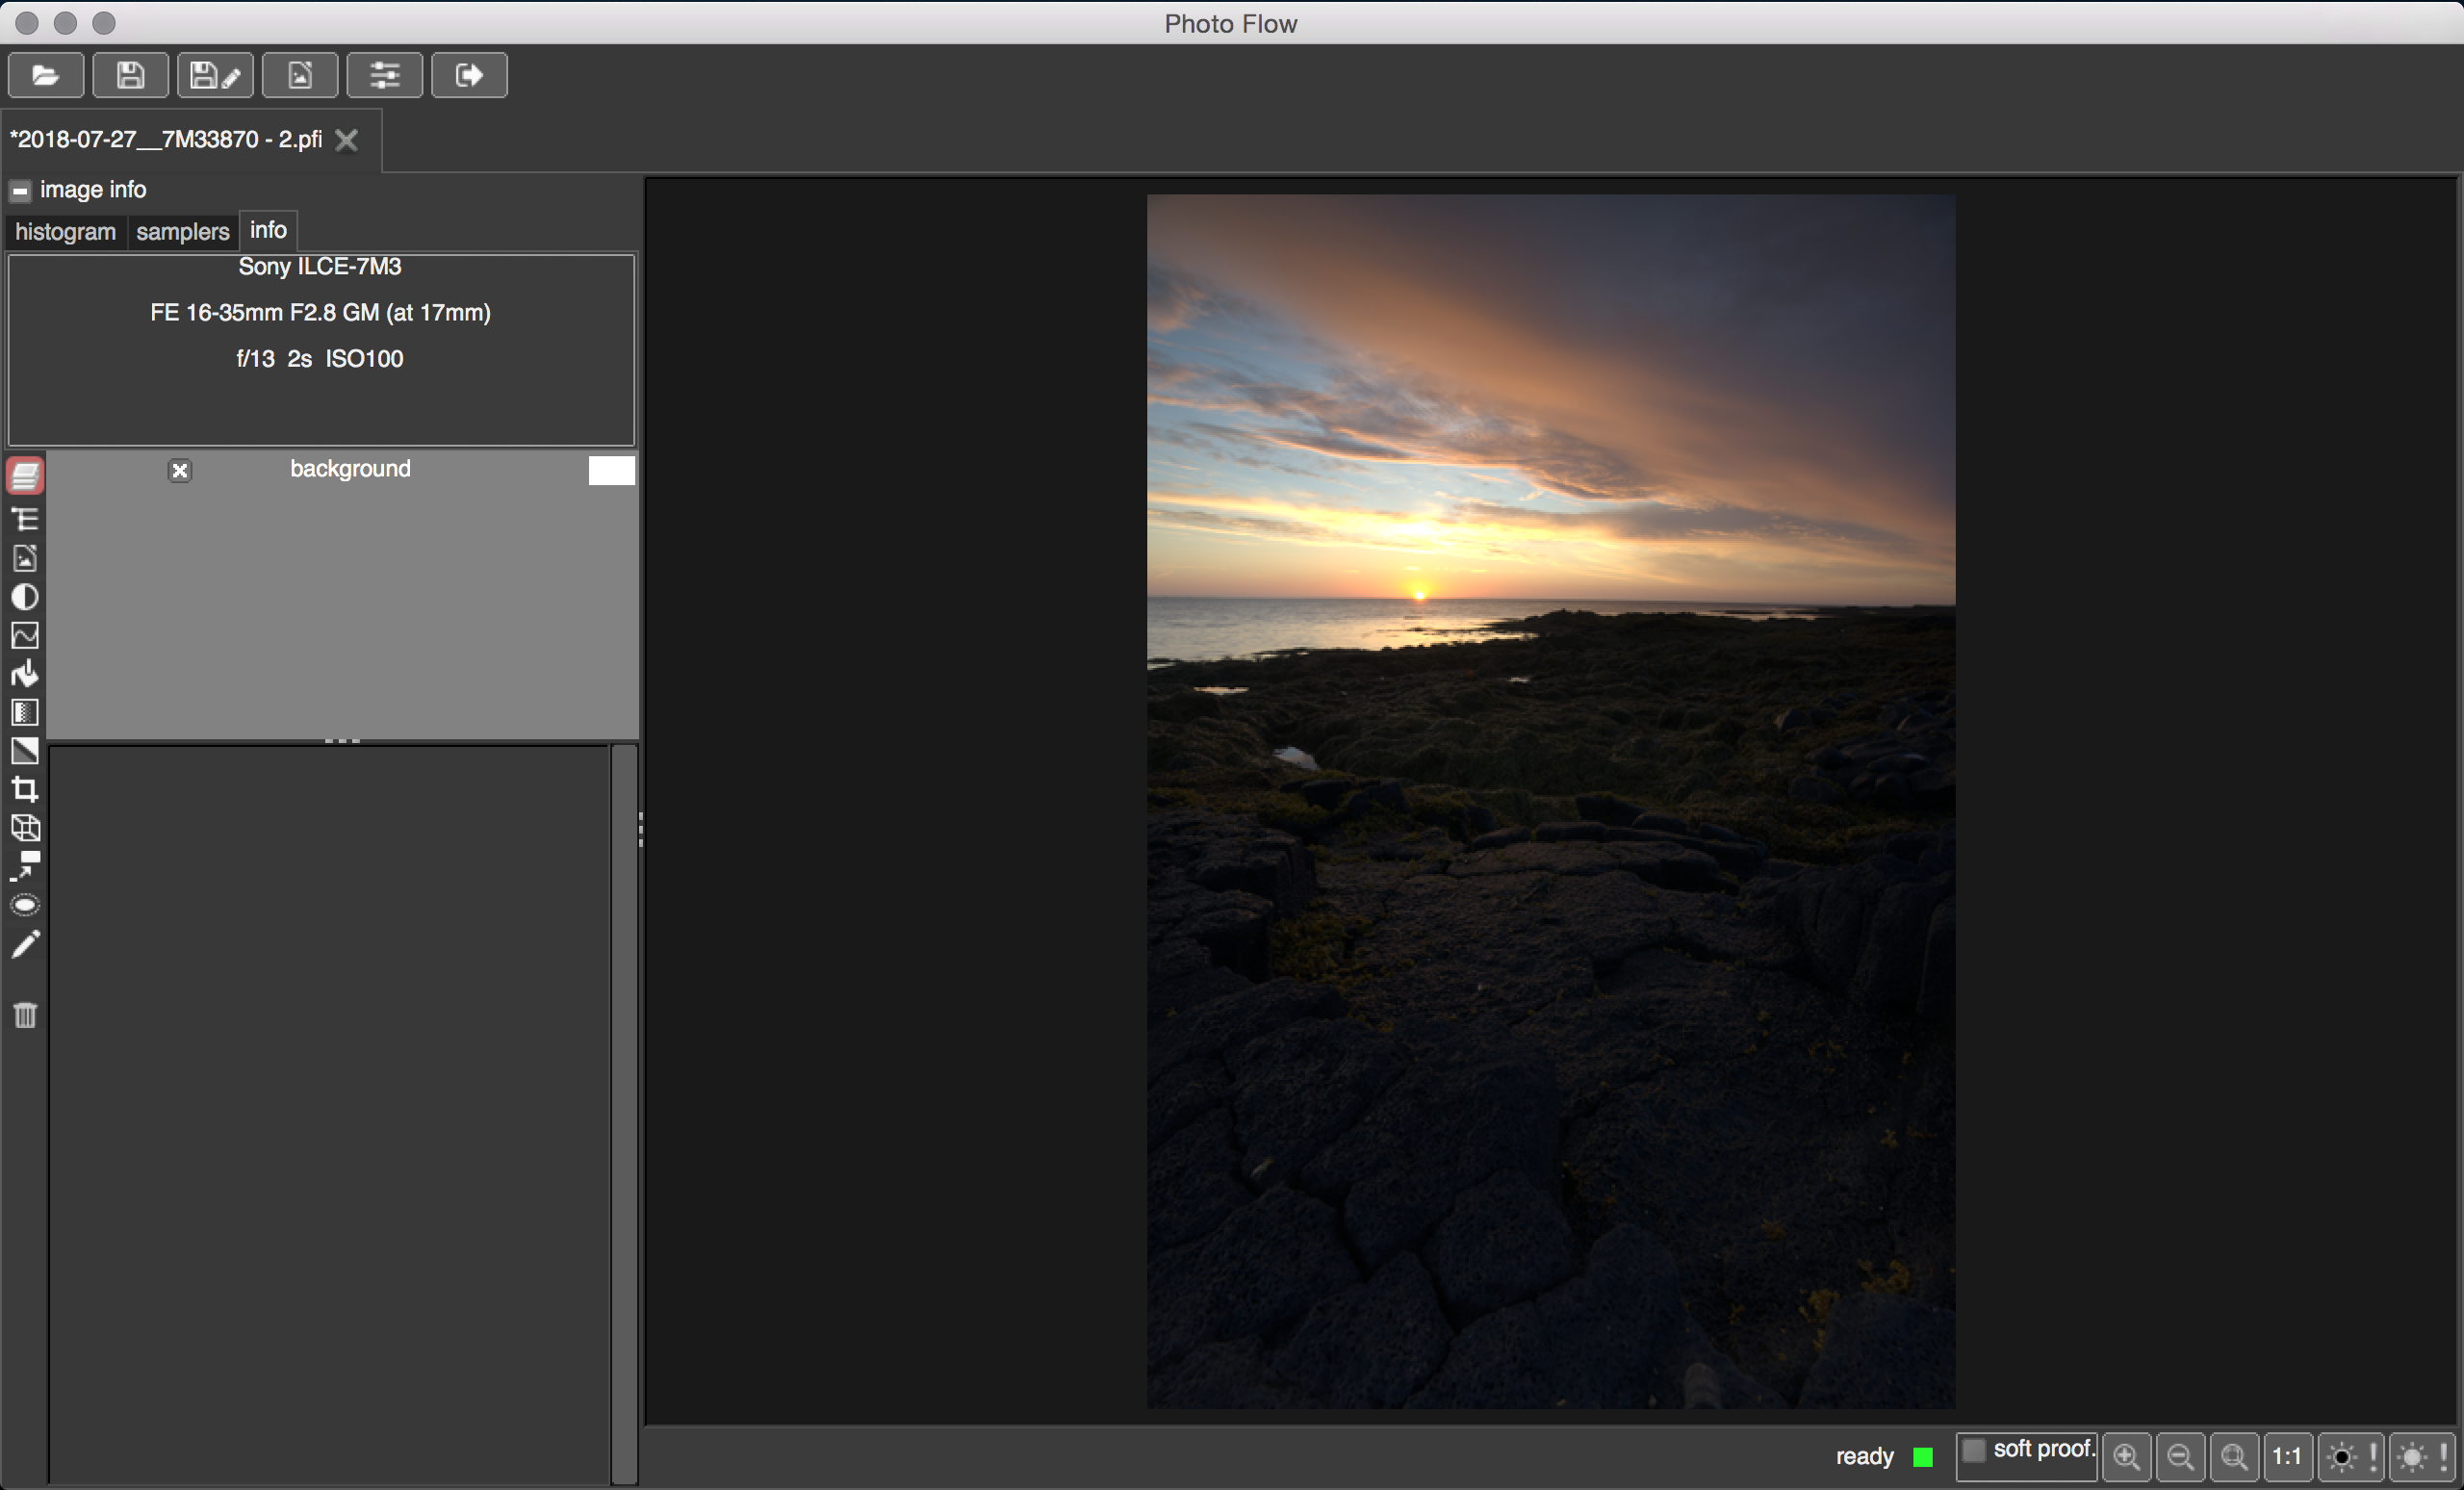
Here is the result of RT’s shadows/highlights applied to the test TIFF image:

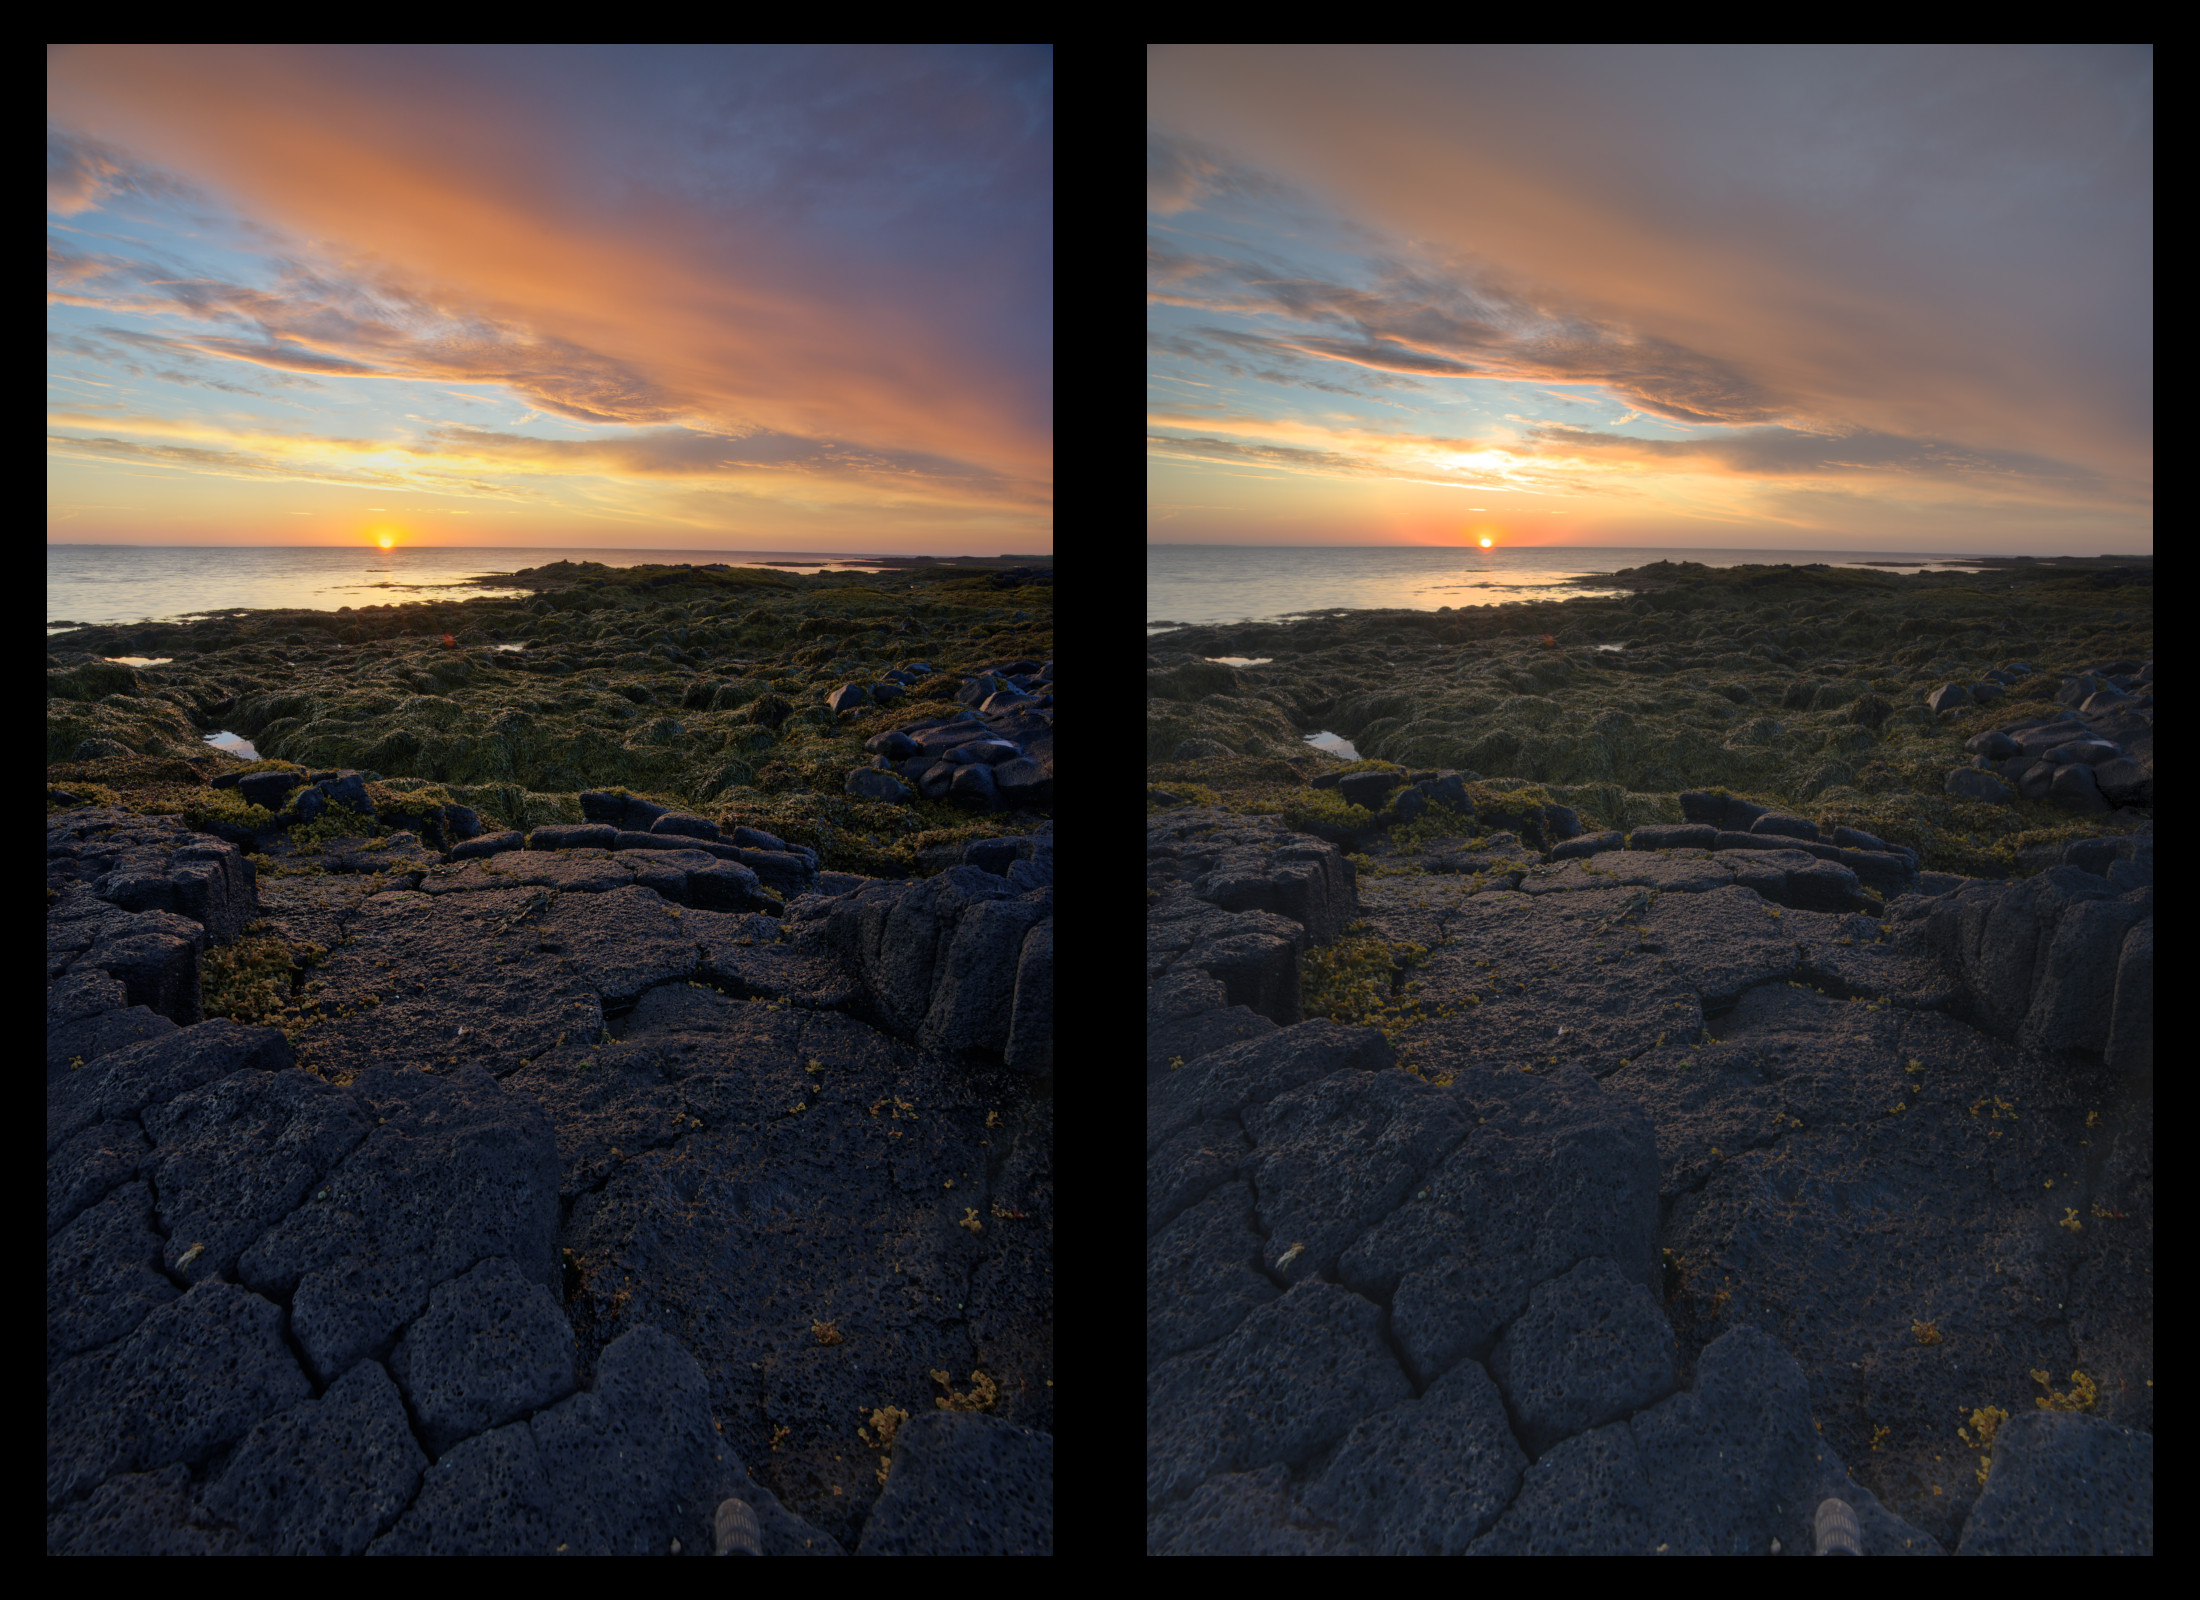
Here are the two final results side-by-side (left: photoflow, right: rawtherapee). It is fair to mention that the RT version does not have any additional contrast adjustment applied to the shadows/highlights output:
Few ideas for discussion:
- what is the best encoding (linear, perceptual, log…) for the blur step?
- what about the adjustment of the luminance vs. the individual RGB channels?
- what is the best approach to adjust the global contrast?