The question has been raised before, but I thought it worth uploading a before and after image.
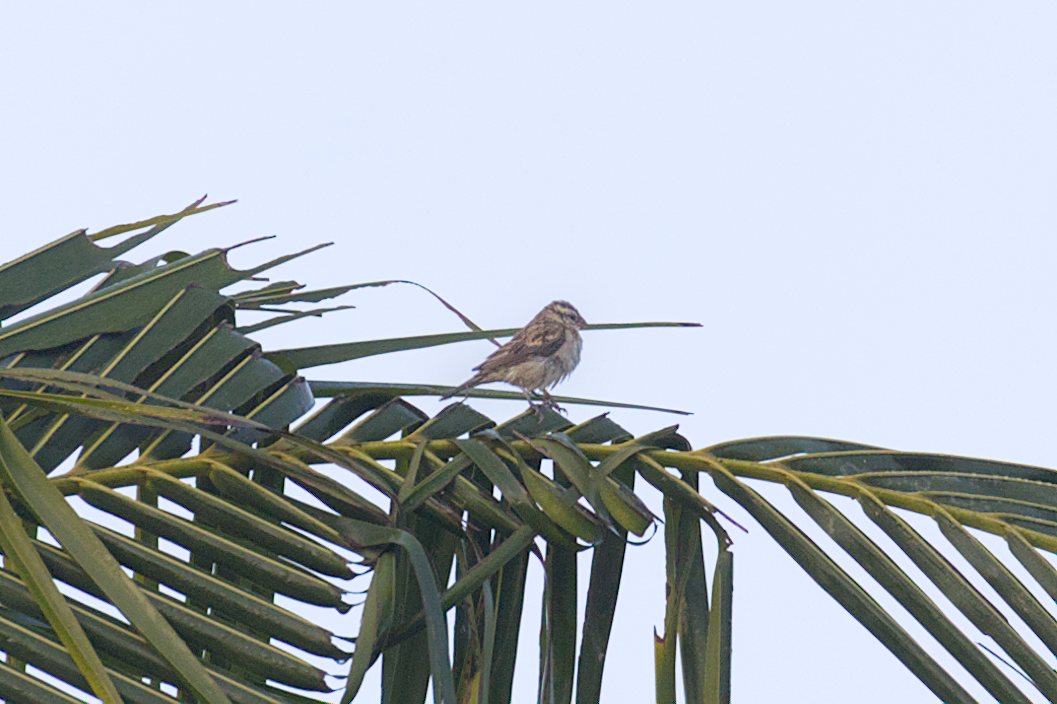
The photo is of a female Pin-Tailed Whydah in Ghana (the male is much more exciting with an enormously long tail feather during the breeding season) This is a small bird about 35m away, with rotten lighting just after dawn. I wouldn’t normally keep the image as I have better photos from other trips, but it wasn’t easy to identify the bird at first glance so I put in a bit of effort.
For a first pass, I used the Local Contrast module with HDR local tone mapping preset, and the Sharpen module. This runs quickly and brings out some detail in a dark, silhouetted image.
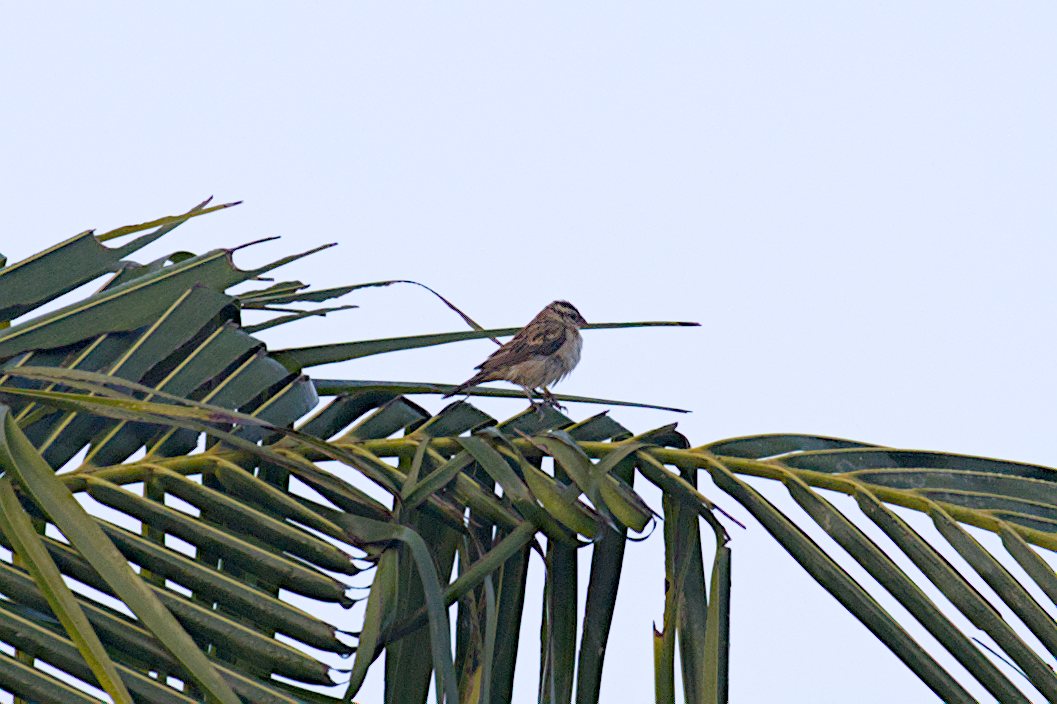
Still no identification, so I turned off Sharpen, and Local Contrast, and ran DorS Module 3 times:
Preset Lens Deblur: Hard
Preset Local Contrast
Preset noAA filter
I have a good GPU so these modules run in a couple of seconds. For really distant blurred images, it can be useful to run the Deblur module at 60 iterations.
The result is sharpness/clarity whatever you want to call it, but not as stark, and its not just a case of reducing the opacity of the older modules. It is genuinely a better effect, and makes it easier to identify the bird.
Indeed, it looks better with the DorS. Did you modify the three presets or used them as they are?
On my side, I stick to the old modules as my PC is a bit old and usually Sharpen module gives quite decent results. Only sometimes I coupled Sharpen with DorS noAA filter.
I left the presets as they were, but generally, I find that increasing the number of iterations increases the “perceived clarity” up to a certain point. After that point it looks awful.
Raising the sharpness slider to 1or 2% can also work , but any further is usually a waste of time.
As always, it depends on the quality of the base image and YMMV.
Try the dehaze preset. I find it more of a sharpening than what you see with traditional dehaze adjustments… The odd time you get some grain but it really is to my eyes a really nice sharpening
Depending on the picture it can be helpful to stack DoS modules. I start with demosaic sharpening(No AA for fuji), then lens deblur/dehaze and finalize it with either local contrast or fast sharpness, depending on the needs. Sometimes I use the detail threshold mask, can be quite helpful too. These 3 stacked seldom give it an over sharpened look, but almost always make it look more clear.
When I first got the GPU card, I went through most of the options, and although dehazing did have a useful effect, I found the deblur, and local contrast presets had the most “credible” sharpening.
I struggle to find the right adjectives to describe the differences, but “blurred through crisp to pixellated” and “blurred through contrasty to monochrome black/white” might be two axes to think about.
Yes the DoS presets stack well, but according to the manual the order can be quite significant, so they want the following sequence:
from the manual page:
" 1 denoise,
2 local contrast enhancement,
3 dehaze,
4 lens blur correction,
5 sensor and demosaic correction.
Starting with the coarser-scale reconstructions reduces the probability of introducing or increasing noise when performing the finer-scale reconstructions. This is unintuitive because these processes don’t happen in this order during the formation of the image. For the same reason, denoising should always happen before any attempt at sharpening or increasing acutance."
I raised a topic on this order some time ago on pixels.us. There is a contradiction between where the D&S module should go, and the order of the instances. Aurelian’s anwser was something like “you have eyes”.
Indeed we all need to train our eyes, but fiddling around with the multiple options and presets can be pretty time consuming, with diminishing reurns (not to mention eye strain peering at the fine details!)
I think the baseline guidance is very useful, but not a reason to avoid experimentation,
Hi @Aliks. I find it difficult to justify the effect of sharpening if different images are being used like the ones you show here.
Honestly, I can see no real difference concerning sharpening. Maybe the resolution is too low ?
I prefer to sharpen with contrast equalizer and use diffuse or sharpen only in really challenging cases because of its heavy CPU load.
Hi Pass712. I agree with you in the case of normal images - after all who views them at ultra high resolution from 20 cm away?
However, when I upgraded my GPU to an NVIDIA GeForce RTX 3060 last year, it became possible to experiment with the various options for processing rubbish photos.
What I found was that several presets were giving me quality enhancements of 5-10% on my images and it was almost cumulative. Perfect for getting enough from a poor photo to reliably identify the bird species.
The point of diminishing returns was around 3 applications of D&S. After that point you could see a very subtle change at the highest resolution. Still useful for really poor bird photos, but not really part of a standard workflow.
Note also that Cornell University has a bird identification app - give it a bird image, location and date and it tells you the 3 most likely birds, based on a vast and growing database. Of course the better the image, the more accurate the result, so there is a good payoff from several minor quality improvements .
I find it really interesting that the order for D&S is so important. I will read the manual and do some experimenting. But, I have a question about performance when using D&S module. D&S module is obviously very resource hungry and what I am wondering is what is important for speeding up the performance. Is it the CPU (I have an Intel i7), is it ram (I have 32GB) or is it the GPU?
Also, I agree with Todd about the dehaze preset when I tested it just now. Great sharpening tool with a bit extra punch to contrast.
Sharpening is so very subjective so its really hard do more than state a preference or perhaps point out an obvious artifact or issue but I was surprised when I ran through the presets. I suspect a lot of people pass it by and choose something labelled sharpening or deblur…but to me the dehaze offers a really nice touch up and the resulting effect is not something that resembles what you get typically from dehaze. As an aside not I often blend the haze module in lightness to avoid saturation and color effects … unless i am actually looking to enhance that as well… just subjective assessment on my part…
This. D&S really needs OpenCL to speed up. I always struggled a bit to use more than a few iterations, until I bit the bullet and installed a Nvidia GPU. Night and day tbh. And I now find myself making much more use of D&S, often the no AA filter preset to start with, sometimes followed with another instance with either the local contrast preset (often tweaked) or a preset I made that gives a sort of combined coarse sharpening and a local contrast boost. A bit like the dehaze preset actually.
It’s a really good module I think
Since I started using the details threshold mask on d&s instances (deblur or dehaze) I run into way less trouble with noise. Never need to use d&s for noise reduction any more. Details threshold usually set to 20-30.