nice, thanks. you can also share privatly with me if you’re more comfortable with that. i’m not in the business of selling images…
sometimes it’s a matter of juggling print and film exposure, sometimes i find i’m just so used to digital dynamic range that film (sim) appears to be limiting. but i want to make sure i understand your issue exactly.
I have found that the zones module is quite helpful when I feel like the shadows get too dark. It often results in more natural results compared to curves + drawn masks.
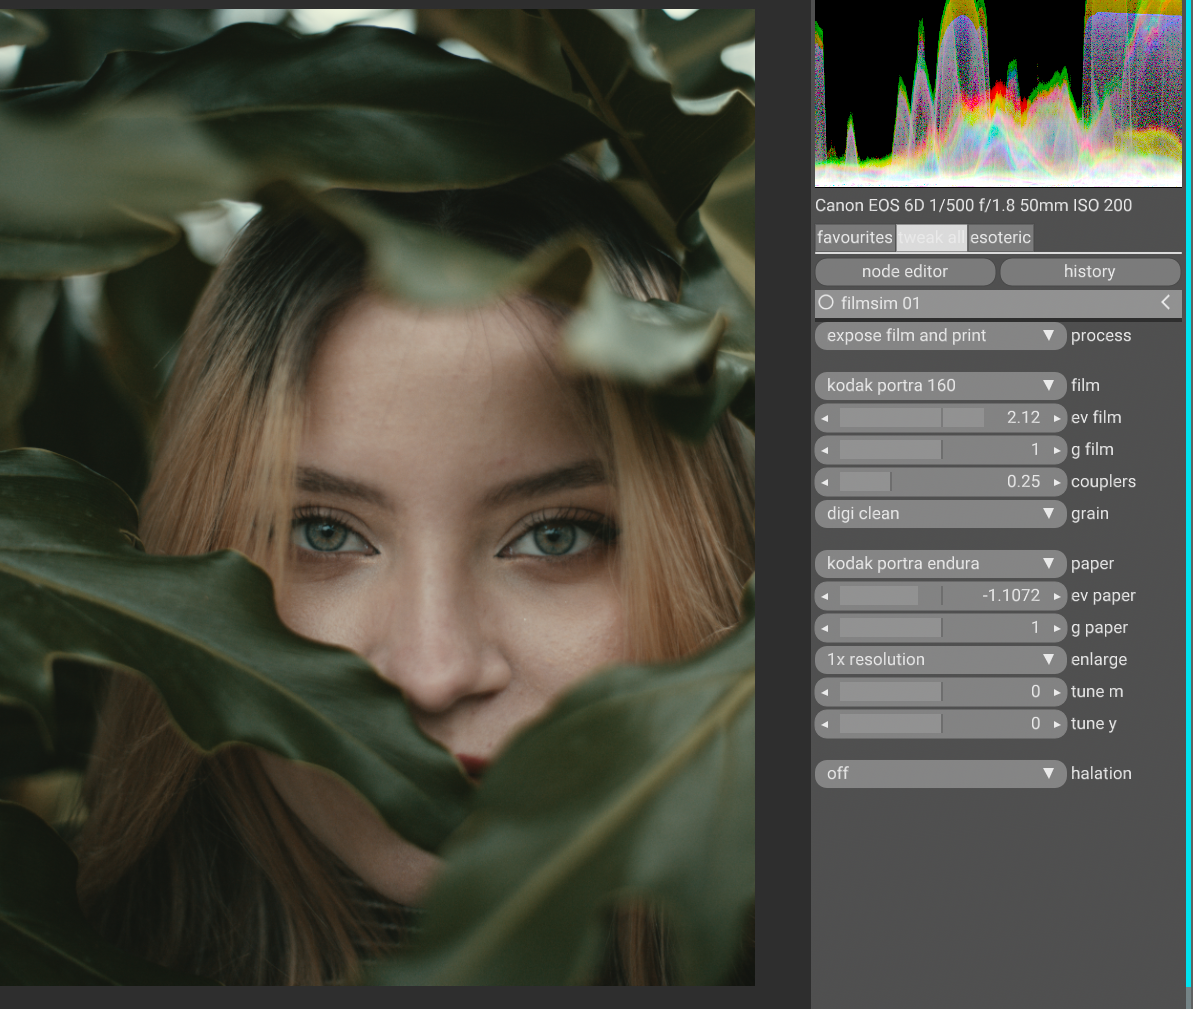
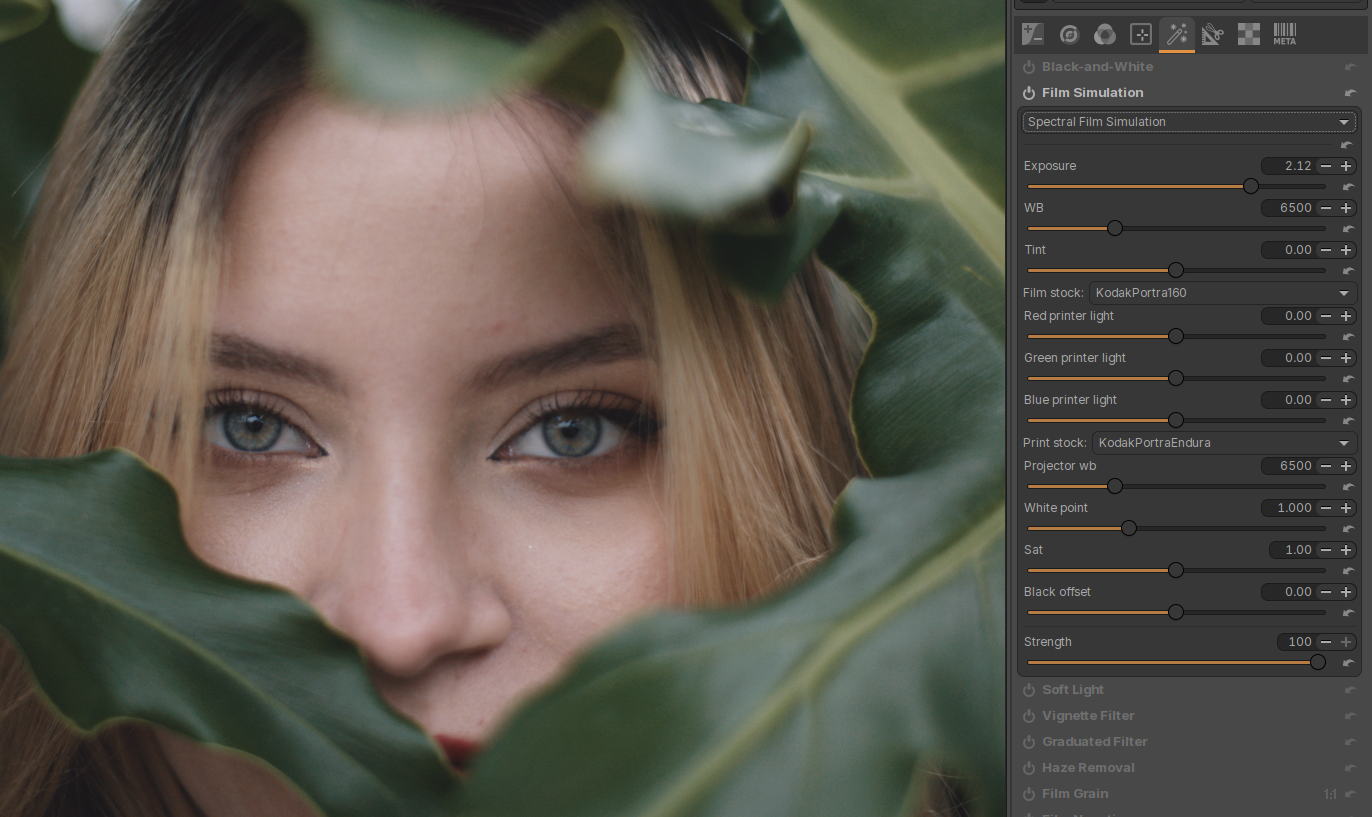
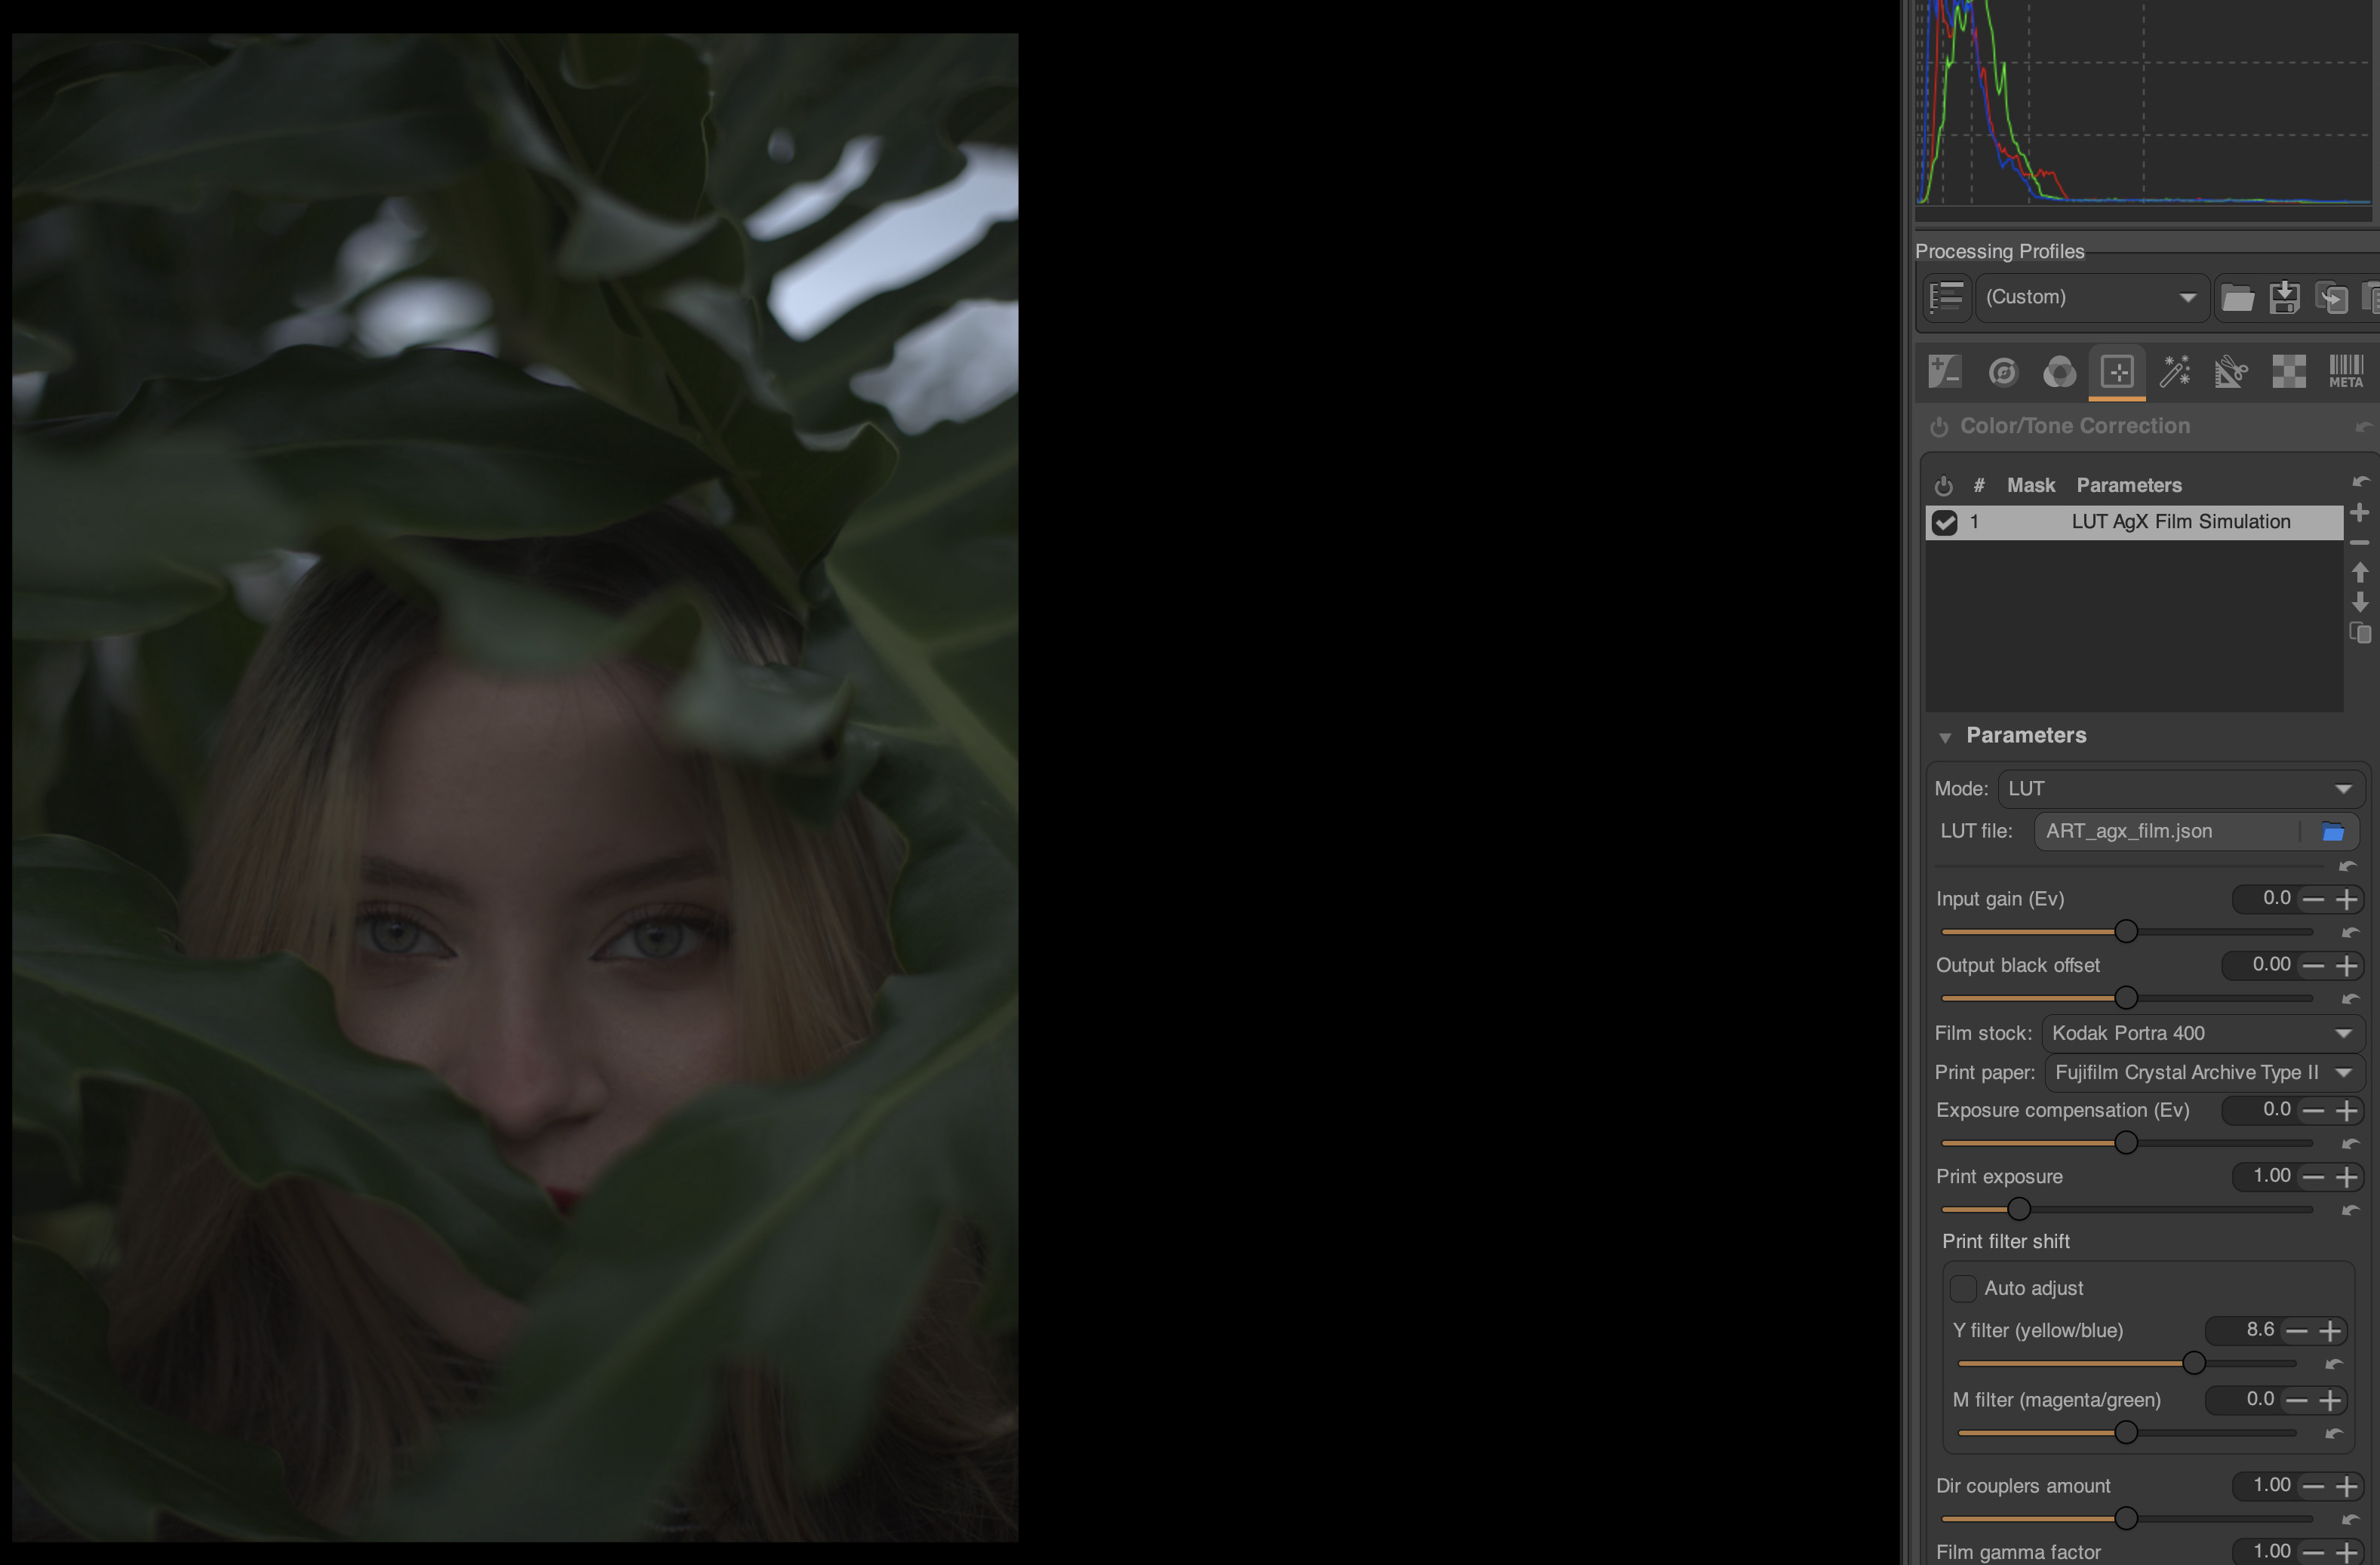
So continuing the discussion about tint etc from above. The recent spectral film simulation in ART gave me the opportunity to compare. Note that I’m not expecting the looks to be the same but I think it illustrates the tint issue quite well. Additionally I don’t remember my first tests with AGX filmsim to be this tinted.
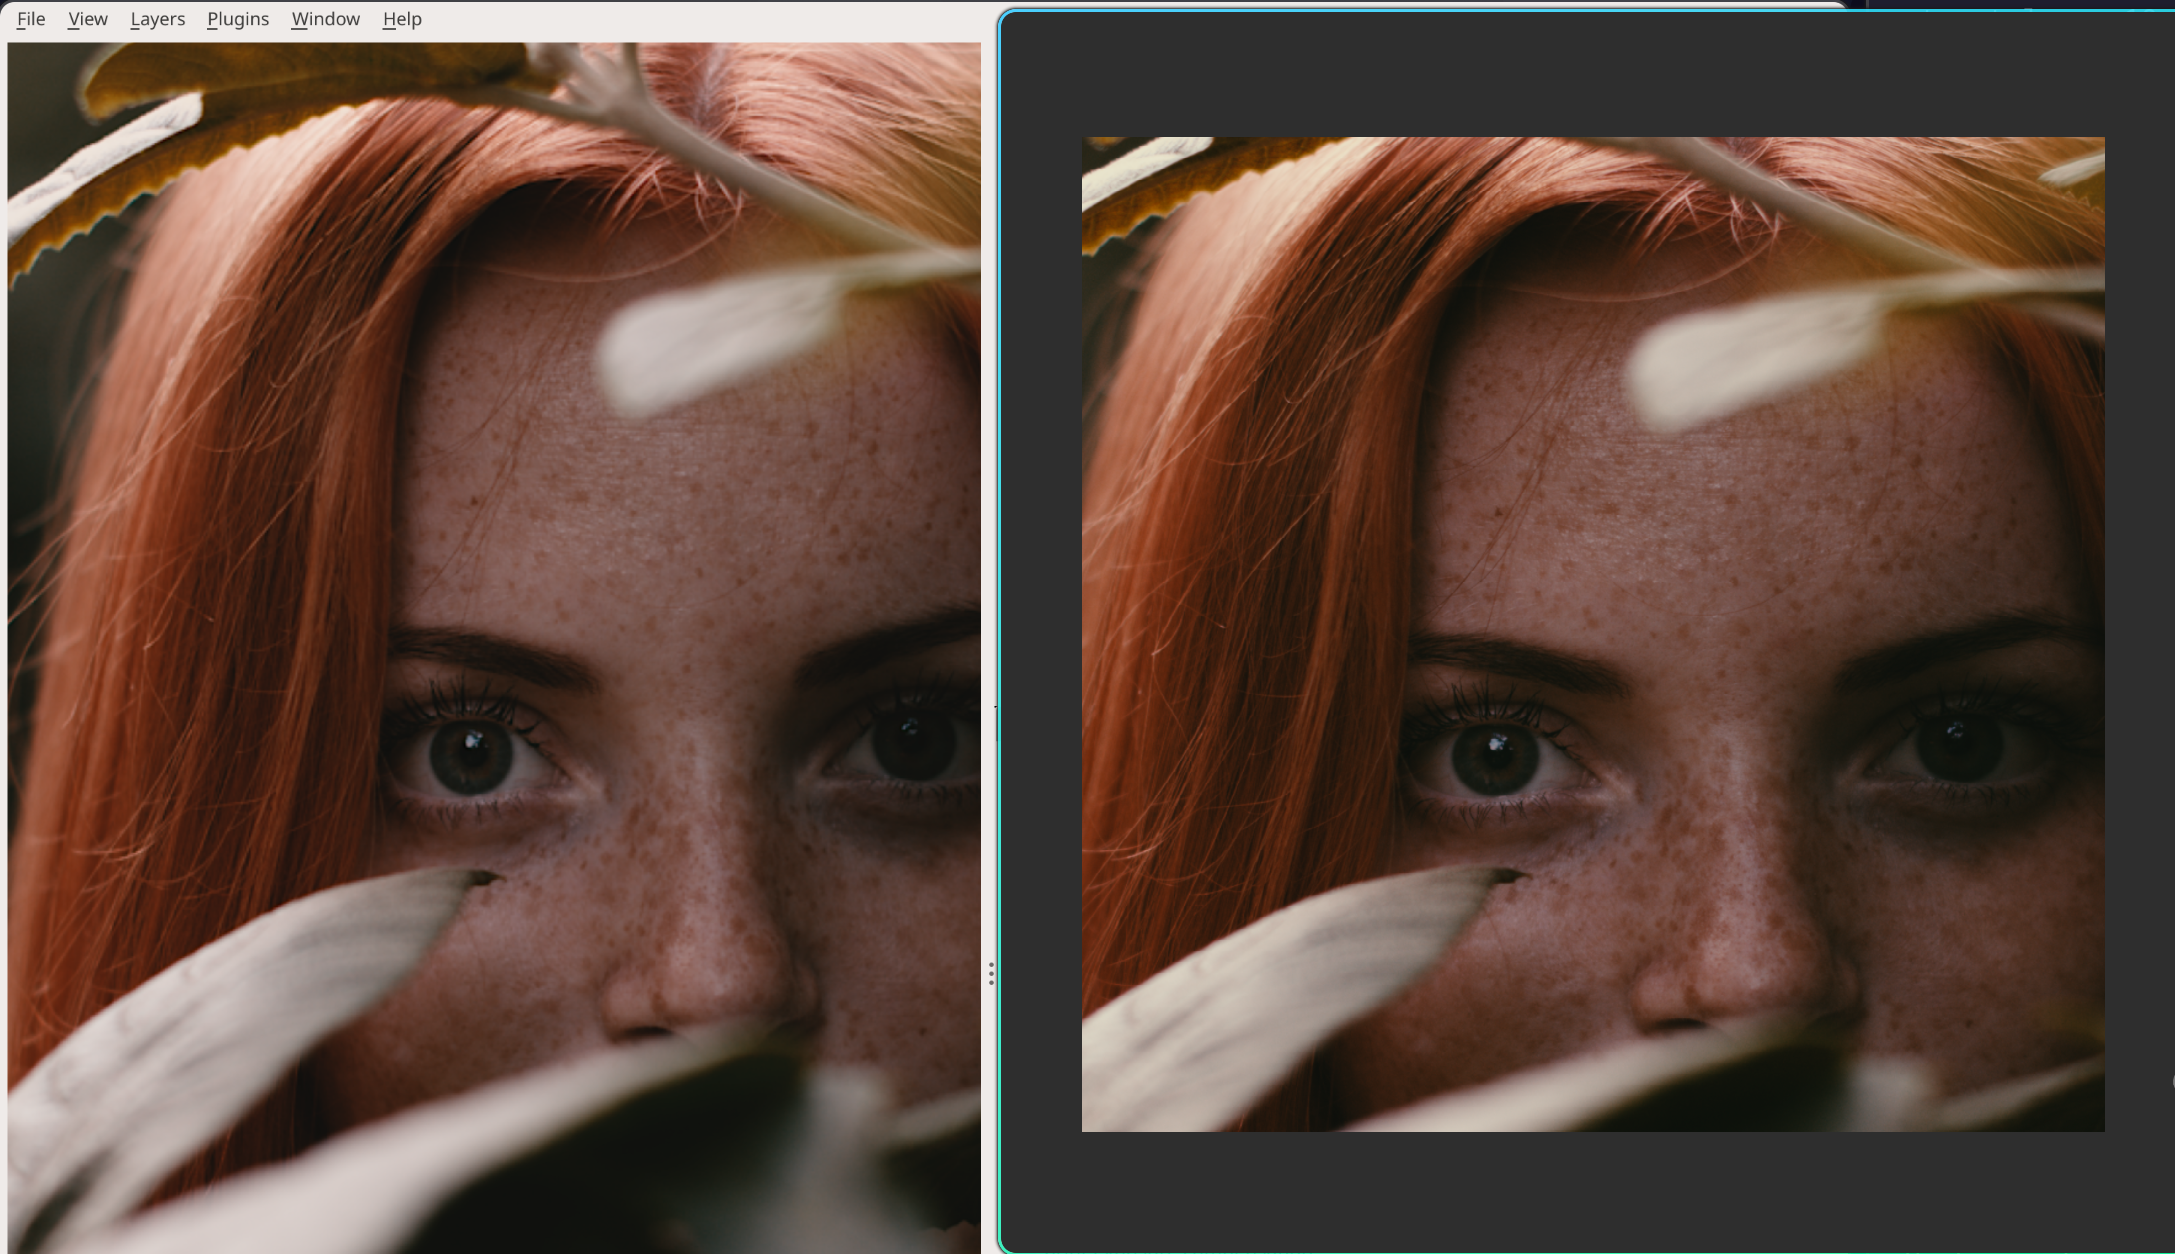
there may have been something wrong with the optimiser that matches the white balancing during printing. now there’s a bug in hyprland libdecor, hence the right image is stretched.
left: agx-emulsion original python, right vkdt (portra 160, supra endura).
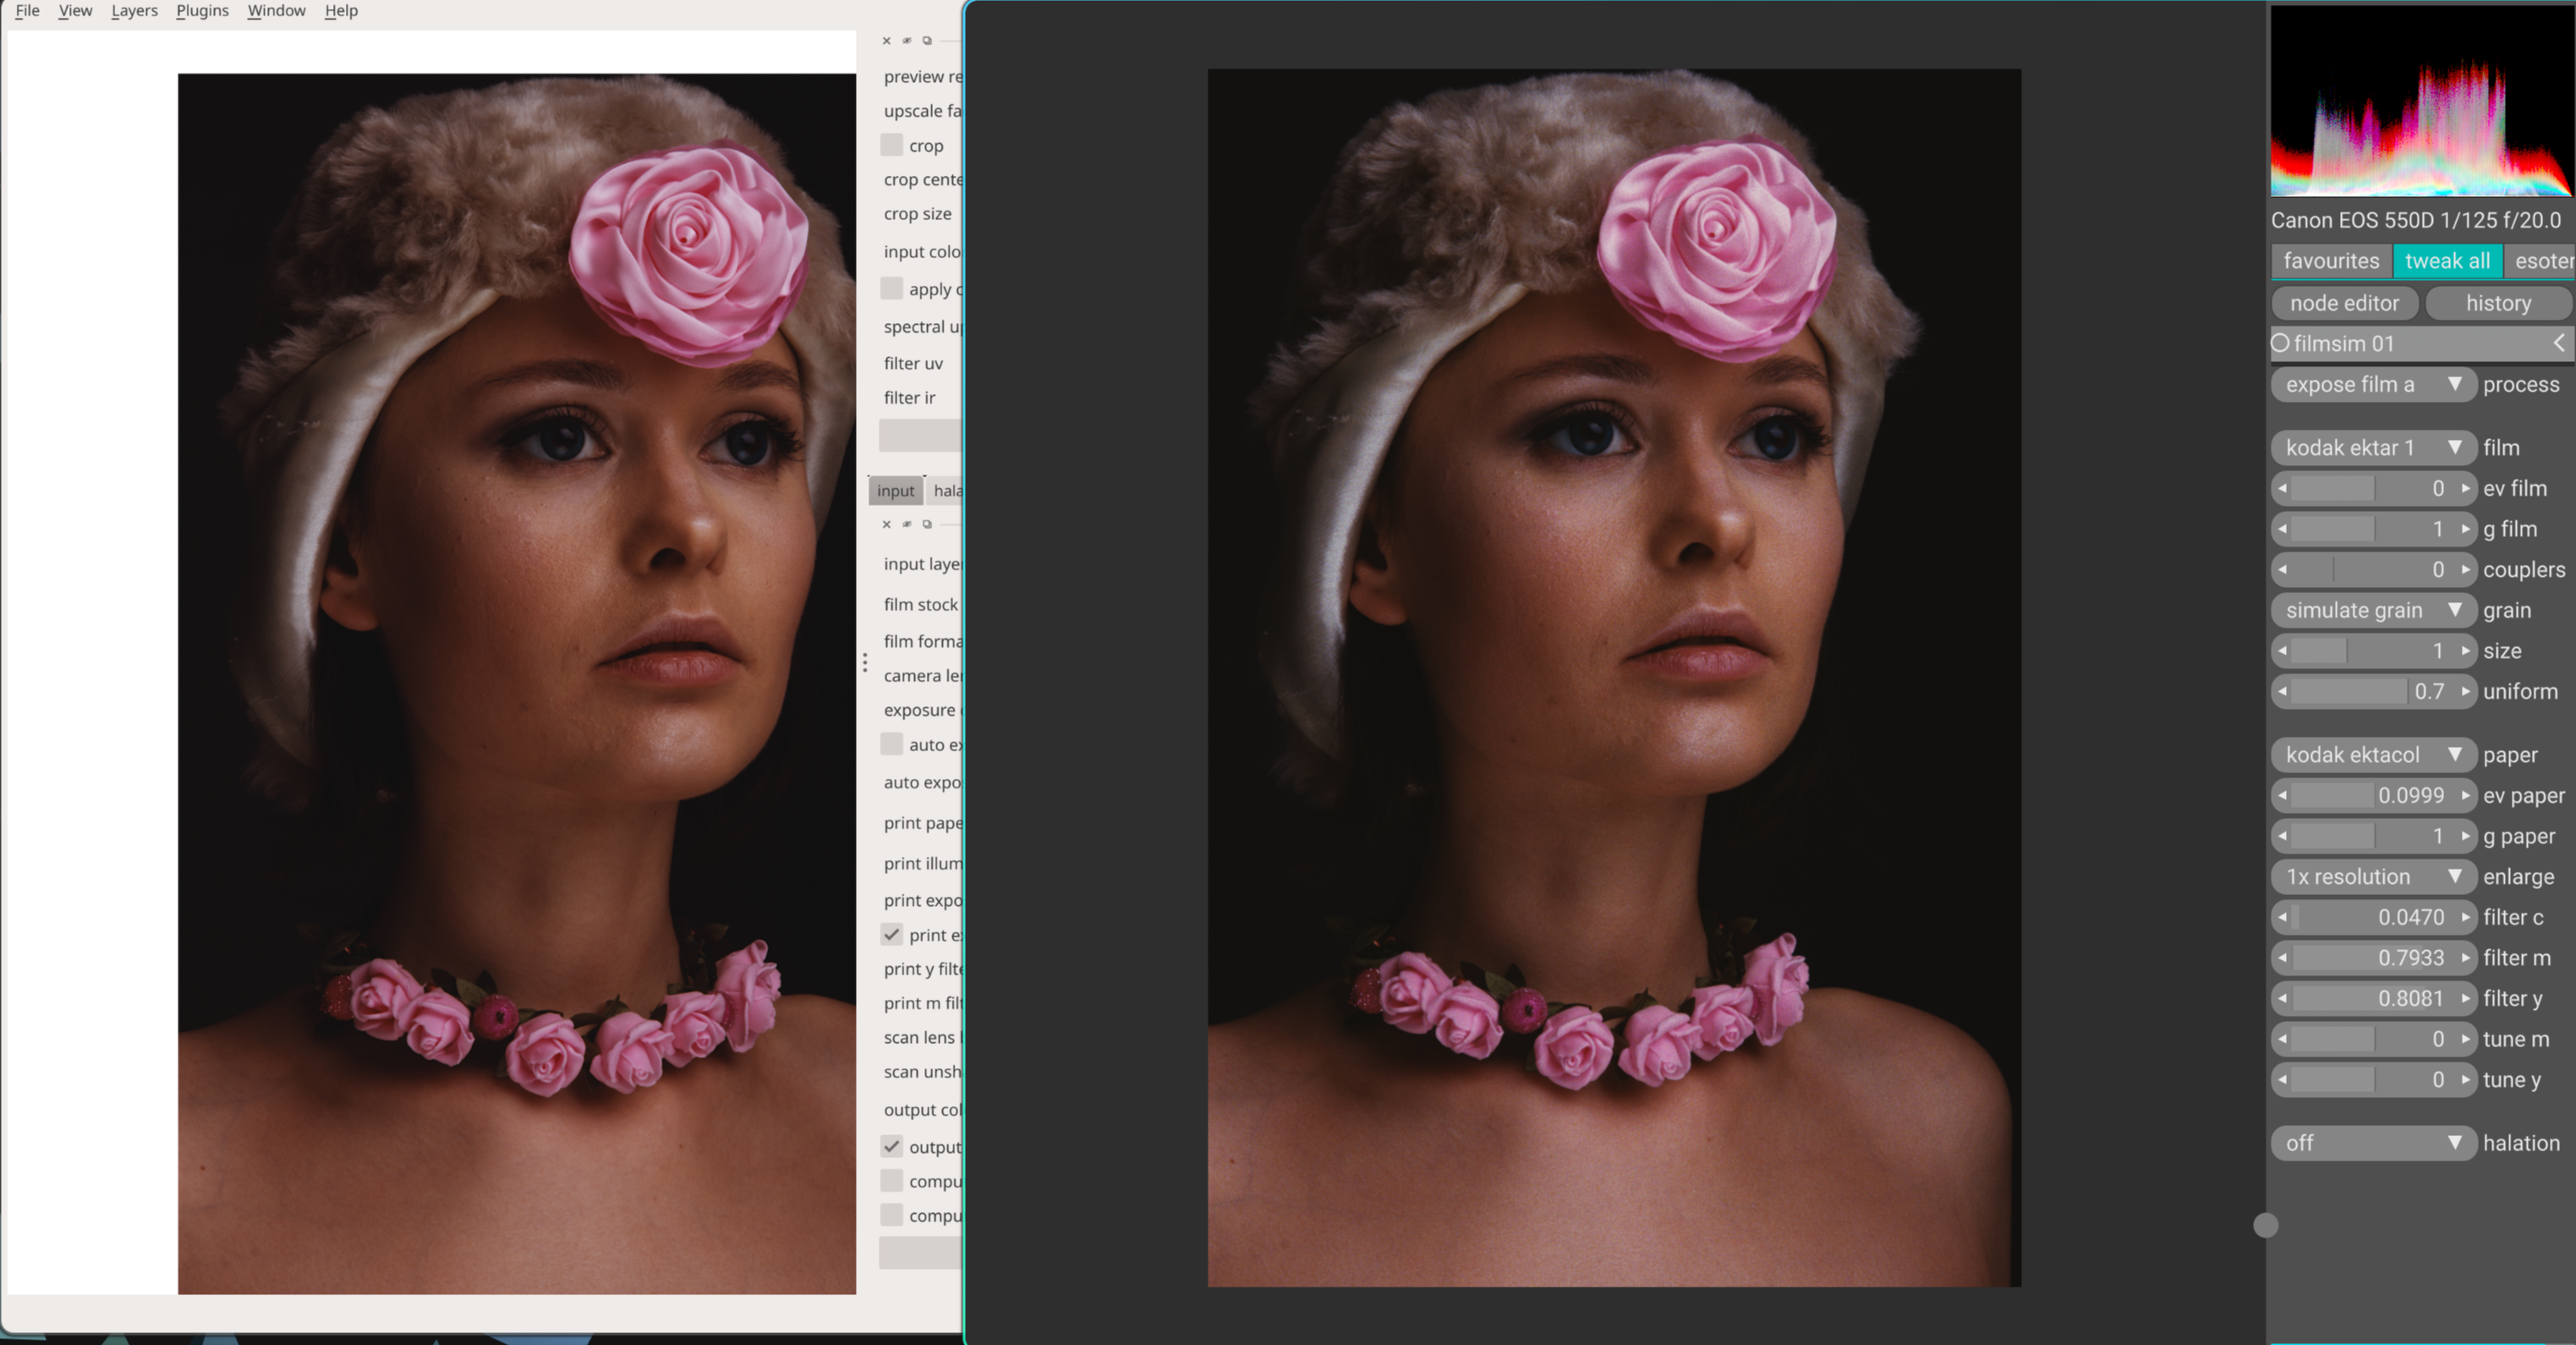
Now looking again at the set where I recently had troubles I think I know what the main problem was: I was comparing to darktable which is adding some automagic exposure and counters the exposure compensation as well. When disabling the exposure compensations and setting e.g. sigmoid contrast to 2.0, the situation is quite similar. The vkdt default tone curve just has so little contrast in comparison that the exposure difference is not so visible. The dynamic range / contrast with filmsim is just a bit limiting so some selective exposure or zone usage is often needed. Or fiddling with the parameters in film sim, but those are not orthogonal and need to be adjusted a bit back and forth (skill issue as well).
Good to hear that the WB is potentially seeing changes, been having some trouble with that as well. I’ll check with the latest changes and see if there’s some case where a playraw would be interesting (due to contrast or wb).
I’ve also experienced problems with managing the contrast in VKDT. Reducing contrast is always more difficult to do in a pleasing way than adding contrast. It does seem like the default contrast curve in VKDT is stronger than agx, when looking at your example here.
In addition to the default contrast, I also remember reading about the preflash-method in AGX being left out in VKDT. This seems like a great way of managing the contrast in high-contrast images. Perhaps it is work a re-visit?
i don’t remember that. but it’s possible that i would have ignored text if you didn’t show this with pictures. i’m a visual person…
right, certainly not out of scope not sure where the contrast difference came from though. there is no other curve involved in the two images. maybe it was a slight exposure difference that pushed values to a different slope in the film response curve.
The Demystify Color reference is probably behind a paywall. I’m a subscriber, so I can’t see what’s free vs paid. He’s mainly approaching this as a Resolve colorist. The series is ongoing. AGX Emulsion only got a brief mention in Part 1, but he compared AGX Emulsion and Spectral Film LUTs to the new Genesis plugin, which has been intentionally withholding about how it works. The hunch is that Genesis is also using spectral methods.
On my contrast issue, part of it might’ve been the stock I was testing (5207/2383). Other stocks have felt more manageable. That said, contrast still skews high for me overall. My best results I’ve got so far come from a little pre-emulation shaping, and a post-emulation node to rein in print contrast. The drawback to post emulation contrast trim is that once highlights/shadows have gone through the LUTs, that post node has a hard time pulling back shadow or highlight detail. Like you would expect, it’s like trying to undo a print. But if I put too much pre emulation contrast trim, I’m concerned I’m affecting too much what the input into the negative film emulation is expecting, giving it an anemic quality.
Two questions I’m still stuck on -
AGX Emulsion in a Resolve video workflow:
Has anyone actually exported LUTs from AGX Emulsion? I tried to make it happen with ChatGPT and command line, but hit a wall. I’m not a coder, but I can run command line tools okay with directions. Is LUT export even feasible with the current implementation? Ideally, I’d love separate LUTs for the negative and the print stages, much like Spectral Film Luts is doing, or is that out of scope right now? I really like the level of detail in AGX and it looks like it would be a more advanced tool than SFL currently is.
Tone mapping expectations for film emulations in Resolve
In Resolve, I’m converting camera → DWG/DI for processing, then DWG/DI → display. My monitoring is Rec.709 / gamma 2.4, calibrated, but set to 200 nits, because I’m not working in a dim room very often. The color space transform tools gives a few tone mapping options for log→display. ChatGPT suggested explicitly setting a 100-nit max input mapping because it assumed that matches the film emulation’s intent. I’ve setup Spectral Film LUTs output to DWG/DI, but they still have some internal assumption about scene vs display mapping and it’s undocumented as far as I could find. I’ll probably try to reach out to the developer soon.
However, generally speaking, does anyone know what these emulations expect in terms of display referred tone mapping? Should we be aiming at a strict 100-nit assumption on the display side, or does the math expect something else (especially if monitoring at 200 nits)?
Open a Hald CLUT identity file in agx-emulsion and just process that file and export it. You can then convert the Hald CLUT to cube. There used to be a script for this at https://github.com/sobotka/hald2cube
Perhaps there are other options. If not, perhaps that LLM would be willing to assist you.
…just to add to that, keep in mind to disable autoexposure/glare/halation/couplers, because these are not per pixel but act on at least a local environment.
Would love to be updated on this! The colourspace of a HALD confuses me. I’ve been trying to convert some AGX emulsion looks to LUT’s and haven’t been very successful.
Not only photography but because VKDT supports MCRAW, I and a few others have started finding immense value in Your project! It is fascinating and almost feels like magic…addicted at this point!
Hello, I happened to come across this thread while searching for articles on film simulation. Thank you so much for creating this; the final results are truly beautiful and stand out from other film simulation apps I’ve used. Like many other members here, I hope you will continue to dedicate time to further perfecting this project.
I’ve spent the past week reading through over 400 comments in this topic and experimenting with some of my own images. I am a Mac user with absolutely no knowledge of Python. This is also my first time installing Darktable and ART—which I did specifically to try out the AgX emulation after reading this post. I’ve looked through comments from other Mac users, but I still have a few unanswered questions and would appreciate help from the creator and the community.
First, I’d like to confirm the required state of the input image. From what I’ve gathered, it should be a 16-32 bit TIFF or EXR in a Linear ProPhoto or Rec 2020 color space. Am I correct in assuming that no Sigmoid, Filmic, or Base-curve transforms should be applied?
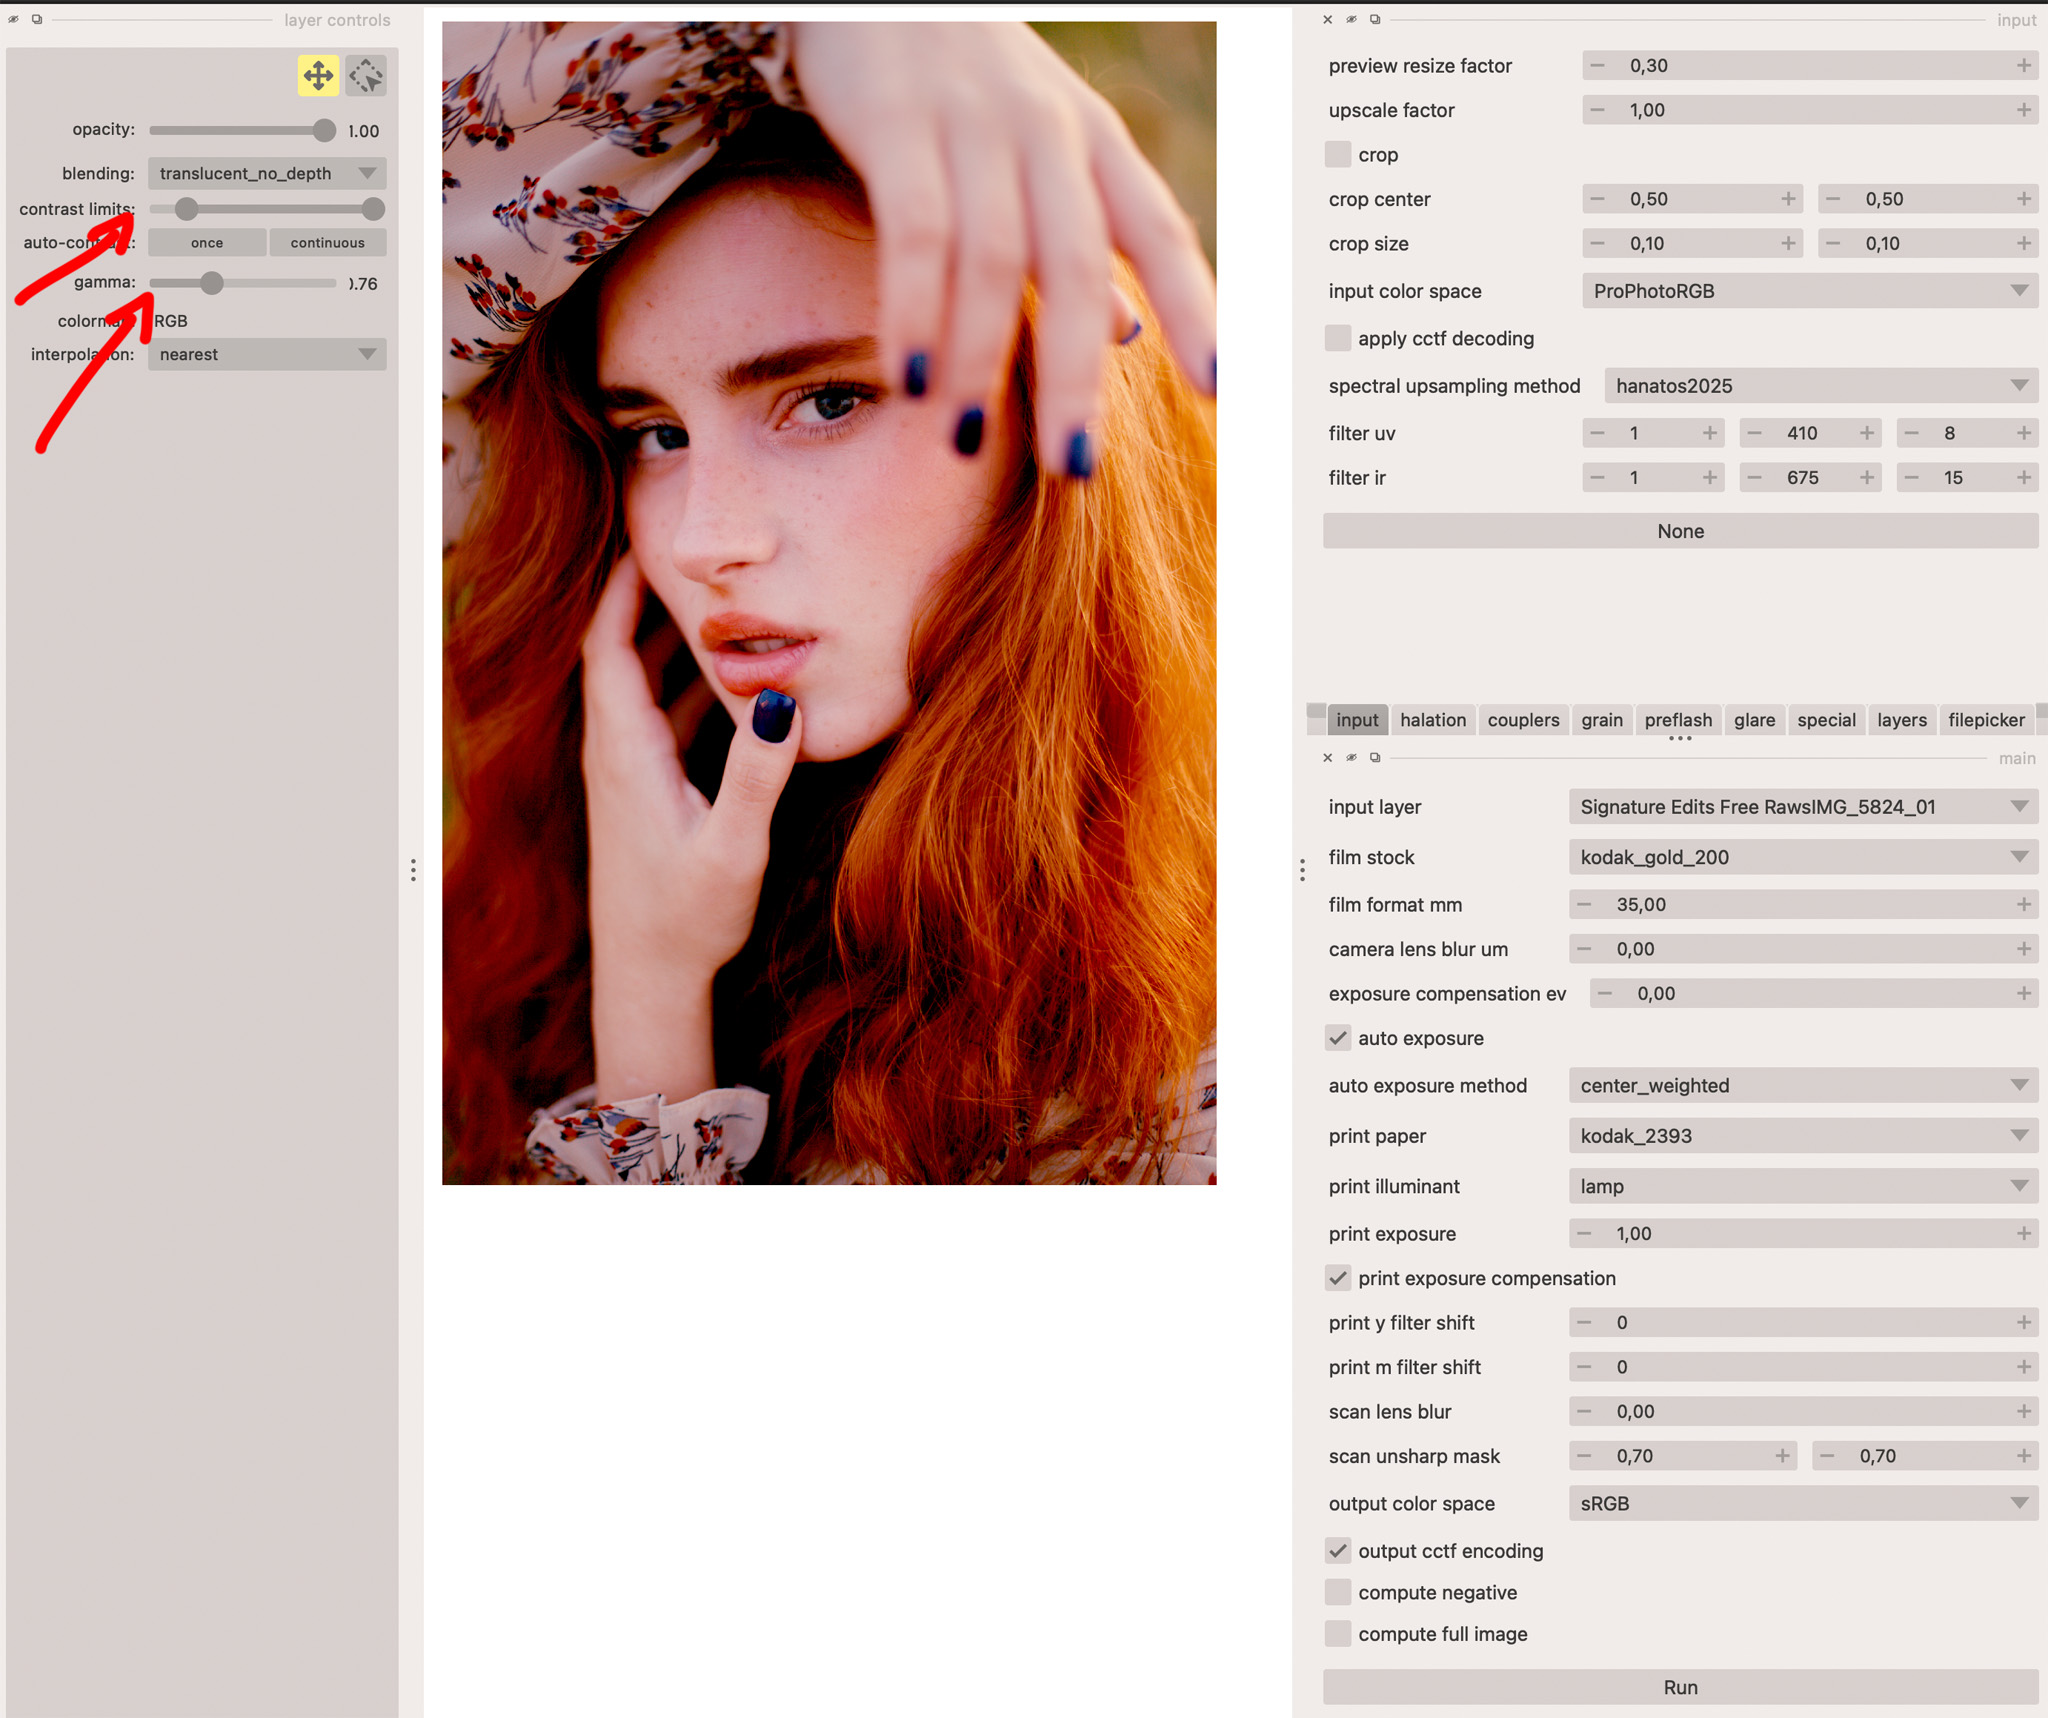
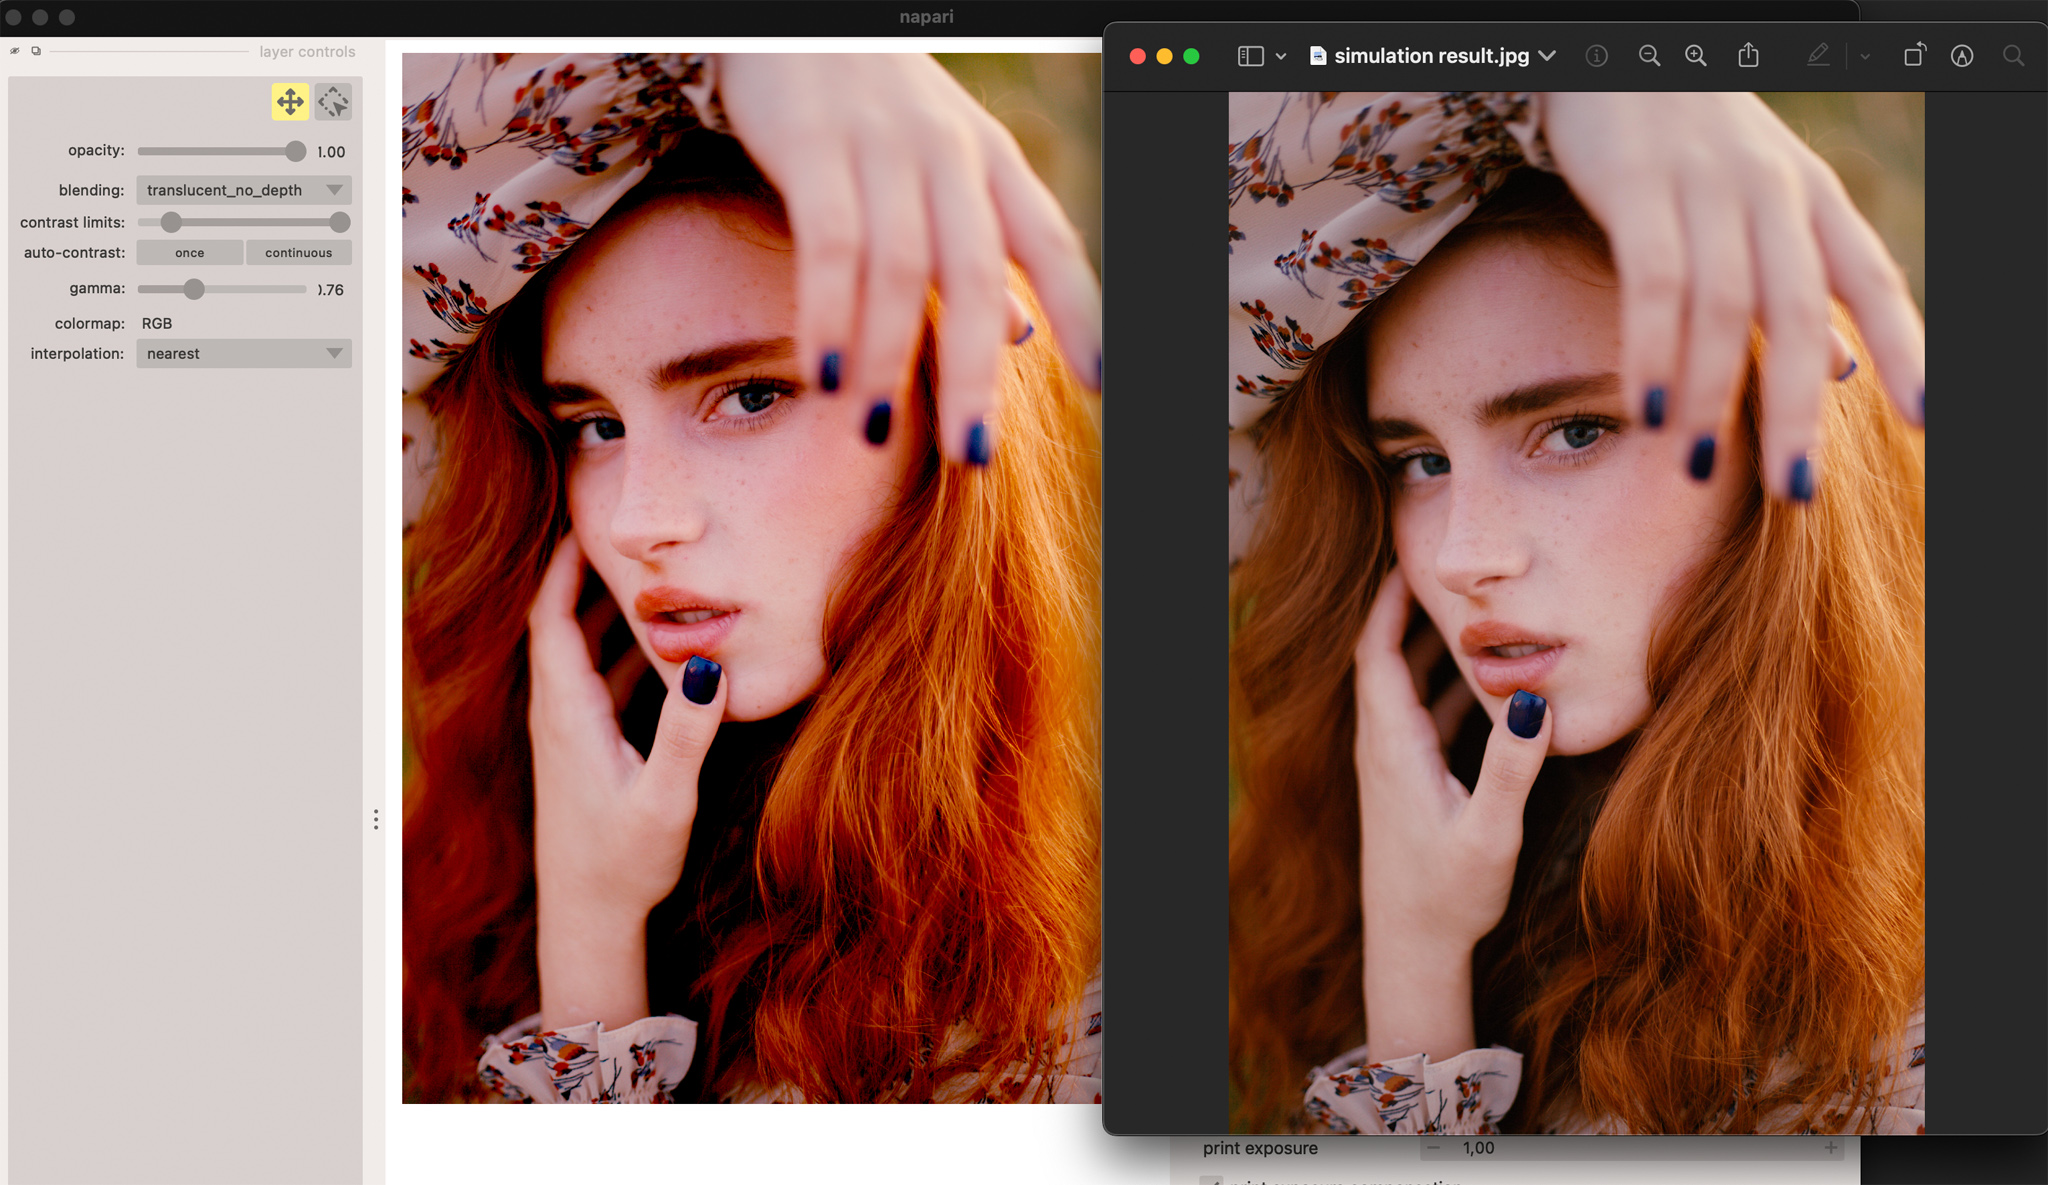
Regarding my setup on Mac: I am using “Output Color Space = Display P3 or DCI P3” in Napari. The images after “Save Layers” are often significantly desaturated compared to what is displayed in the Napari viewer. I also really like the sliders in the Layer Controls—they produce great results in the preview and are very convenient for adjusting contrast and gamma. However, when I “Save Layers,” those adjustments are not applied to the final image; they seem to only affect the Napari interface.
Has anyone found a fix for this? I’ve been struggling with this for days because the colors look perfect in Napari, but the exported result is completely different. Is this a Mac-specific issue, or do Windows users experience this as well? Could this be an installation error on my part? How can I fix this?
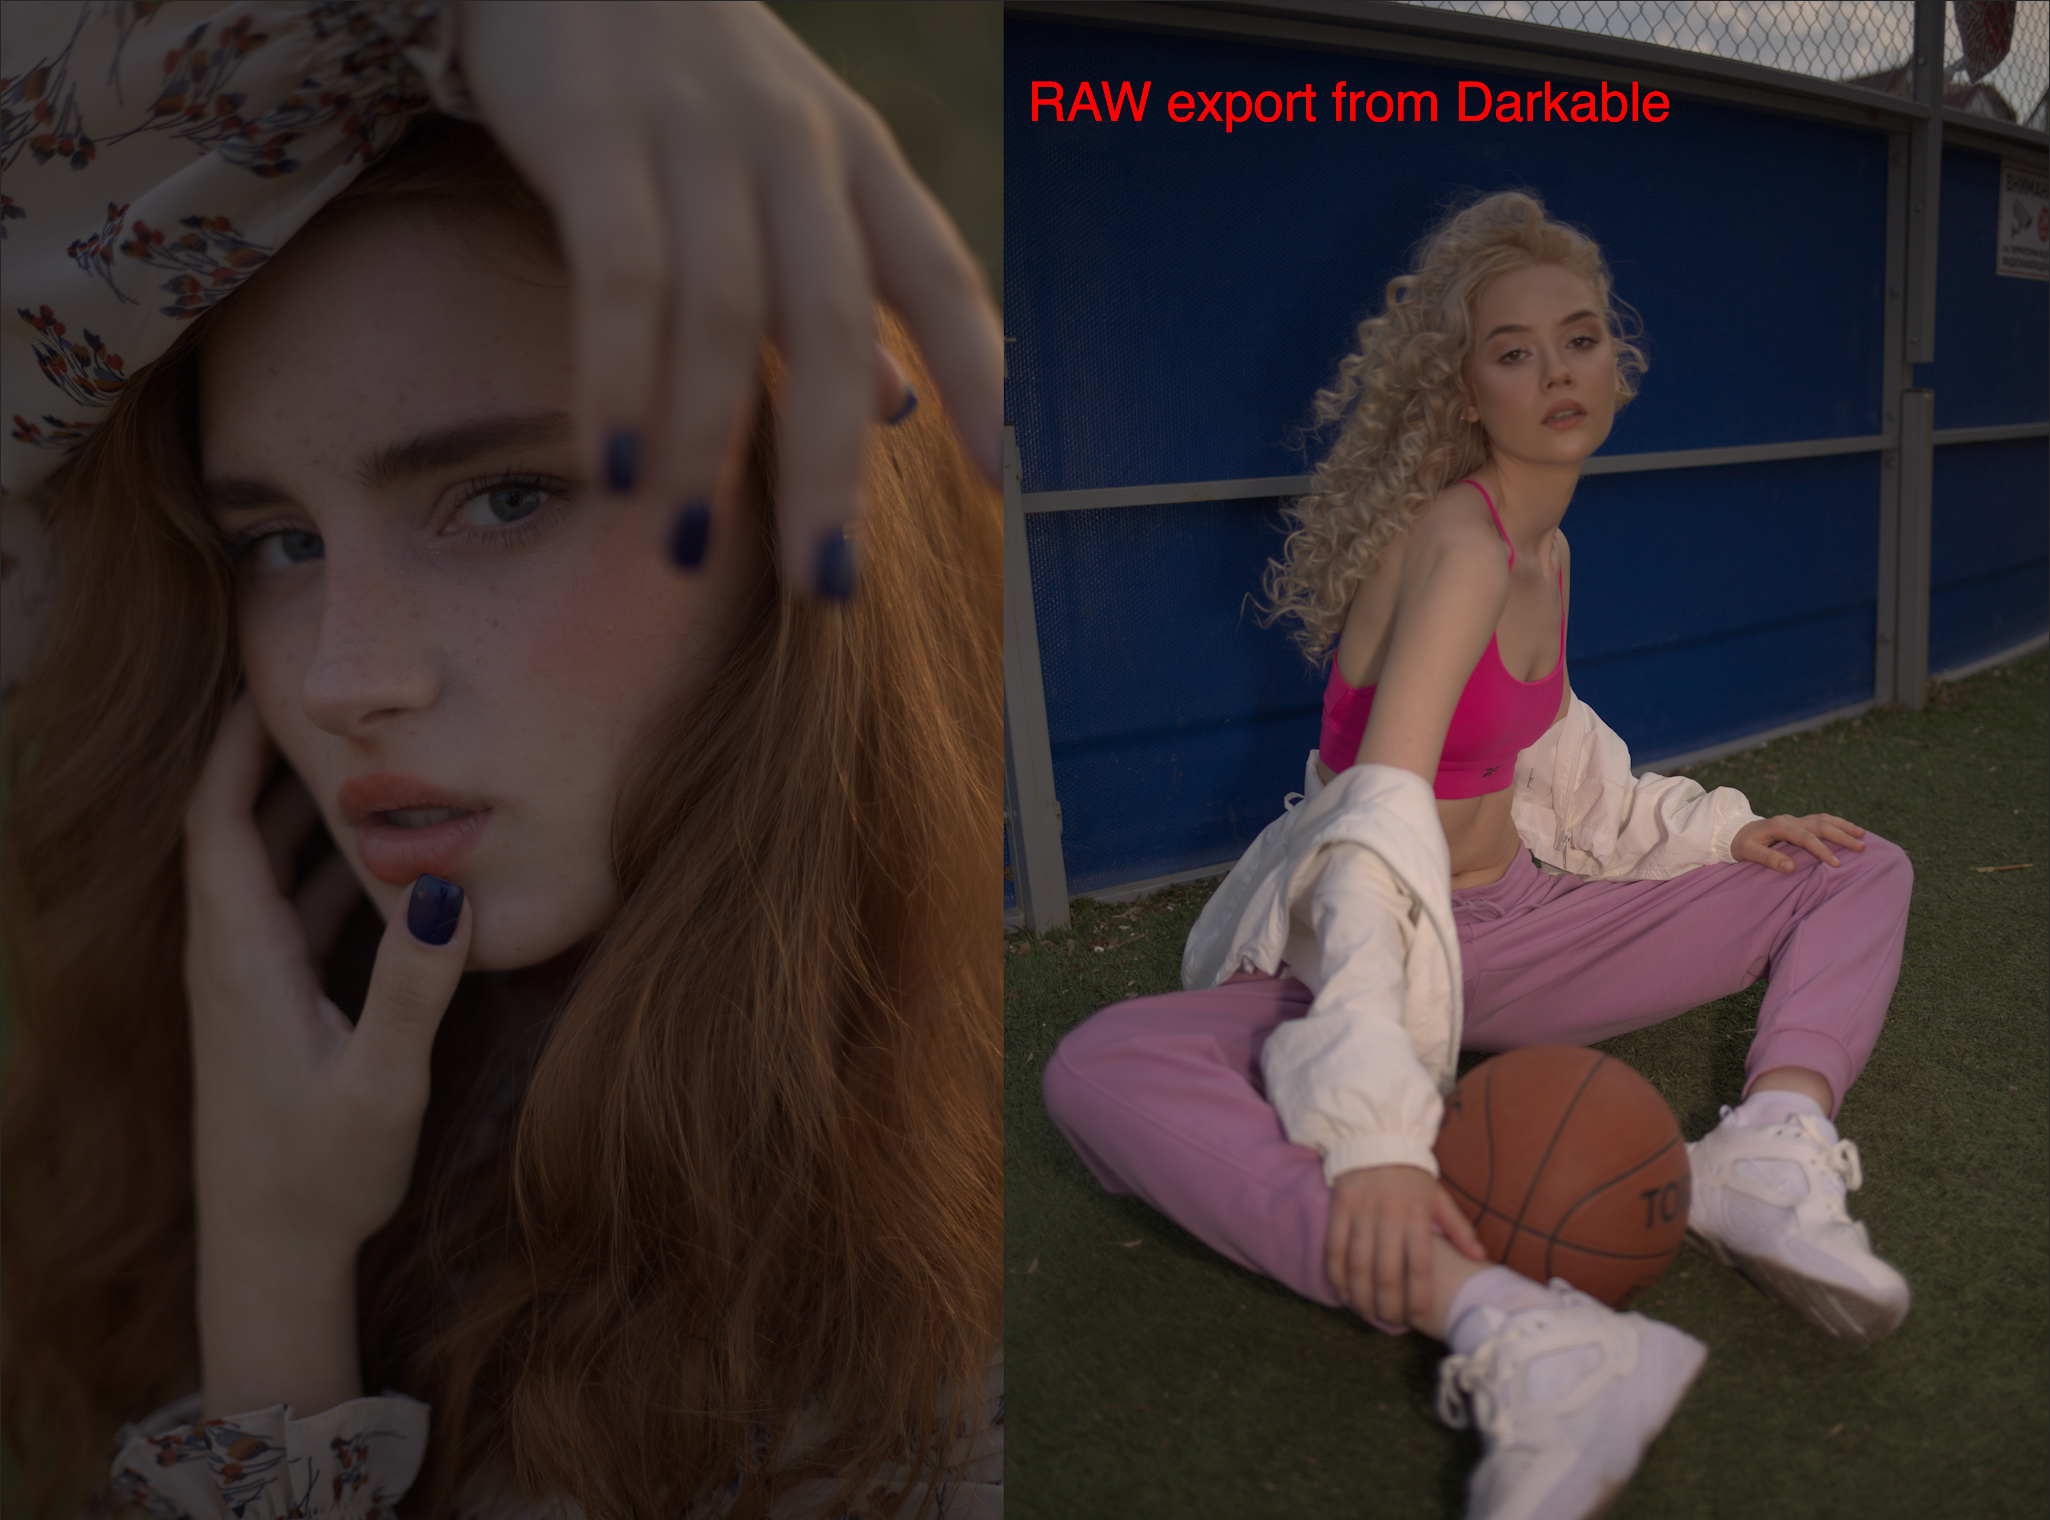
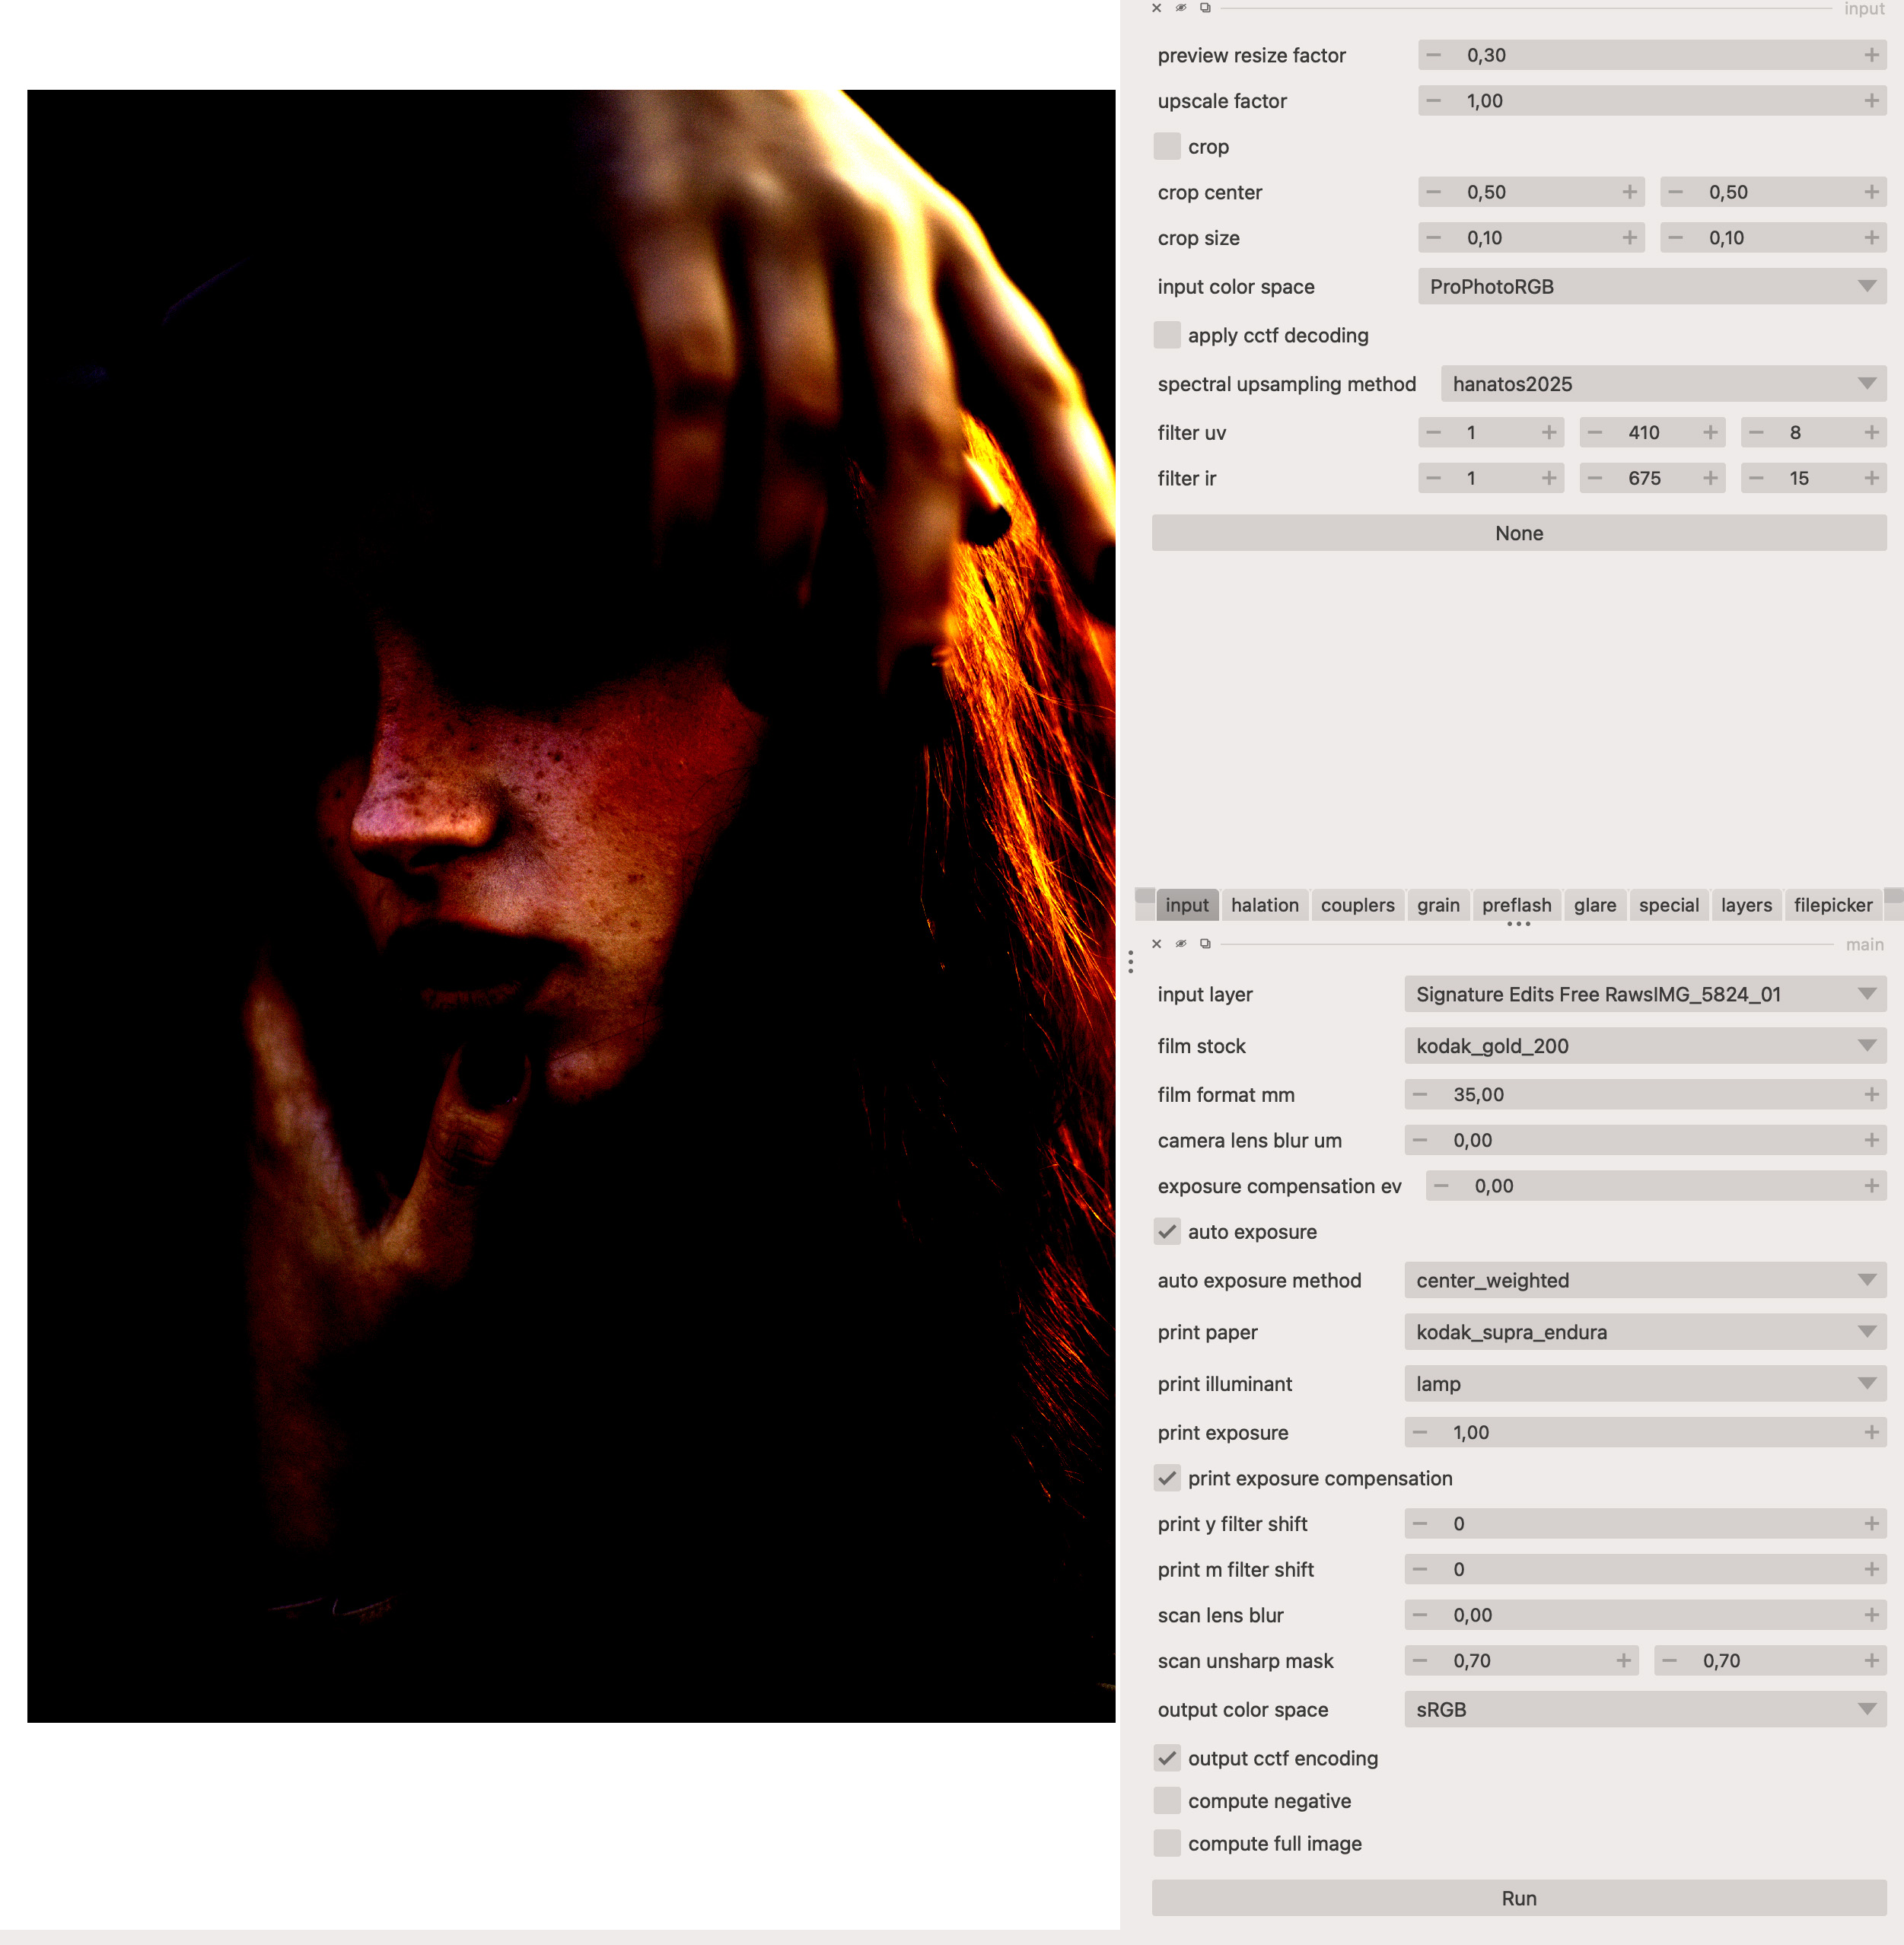
After exporting an image from Darktable and loading it into Napari via the filepicker, the image looks very different. It appears extremely high-contrast, with crushed shadows and blown-out highlights. I’m not sure if this affects the final result after clicking “Run.” Is this normal behavior, or am I doing something wrong?
I’ve noticed people often use AgX Emulsion with vkdt or ART . Can I use it directly with RAW files, or do I still need to export the RAW to a Linear ProPhoto RGB file first?
I’ve been trying to get “agx_emulsion” working in ART for a few days now. Although the option appears in ART, the effect doesn’t seem to work—moving the sliders or changing the film simulations results in no visual change to the image. Have any Mac users successfully resolved this? I would appreciate a brief guide.
My primary workflow has always been in Capture One or Lightroom Classic . Is there a way to export a file with a Linear ProPhoto RGB profile from C1 or LrC that is equivalent to the output from Darktable?
