I didn’t think it was default, but inclusion of RYB mode was a user request a few years ago.
1 Like
i think it basically boils down to “i want theses changes to take effect after/not get affected by…”
For the vignette i usually wouldnt want the vignette to get affected by tone EQ or Color balance RGB, so i put it right before the tone mapper
“Usually” coz it depends from image to image, ofc
For dodging and burning there are times where also i wouldnt want it to get affected by tone EQ. But, i too, mostly leave those where they are
Or for example for BW. I have a Color Calibration instance doing CAT, and another doing the BW conversion. But before the BW conversion i might do some changes to the colors so i move color EQ inbetwen those two.
Since i stablished this workflow ive learned to edit colors with channel mixer (quiet thanks to boris videos) so i could now probably do it without having color EQ there (specially since what i mostly use it for is darken sky lol) but point still stands
1 Like
If this works for you and gives you the results and the look that you like then you have answered your own question. There is nothing wrong with moving modules as long as the result is achieved.
I personally like to do most of these changes before the AgX tone mapper. I now use tone equalizer more since AgX because of how it ‘restores’ contrast to my image that is taken away sometimes by the tone equalizer module. I have also discovered that I can get away with moving the displayed referred module of shadow and highlights before AgX in the pipeline and successfully use it brighten shadows, but if I touch highlights the module breaks in its function. Again I do this when brightening shadows because AgX then sets a nicer black in the final image. This is just my workflow that works for me and I am not advocating it for anyone else.
1 Like
i mean, yeah, but at the same time this is more like preliminarily looking for answers. What are the limits or the tools we use? Where will it break?
I want to know this so i can be mindful of the options i choose and when it does break why it happened; but also because im curious and like knowing stuff ![]()
1 Like
I see. Thanks.
The screenshot attached shows what I had before.

I changed it to “none”, and now it appears to not have the dynamic range expansion anymore, but still it has a luminance shift (translation), so that the JPEG_XL is dimmer. See side by side screenshot attached below.
Oh I am not doing editing on the exported JPEG XL file. I know and I do intend to do editing on the raw file.
I am doing this mostly so I can use this workflow for scientific photos in the future, but I am trying the workflow using vacation photos initially. As everyone can guess, scientific photos require accuracy.
1 Like
Isn’t the tone mapping method specified in the metadata of the raw file the only processing done to display the raw file’s image? That’s sensor type dependent, and might even include a per-sensor individual calibration done at the factory to cancel out processing variations on the sensor chip. So if I accept that, and I believe it is being applied as the raw file is read in.
But that is not related to getting a JPEG XL that closely matches the raw.
OK, I see where that setting is, and here is my current setting, which I bring up by right-clicking the right-most icon on the bottom row inside the lighttable screen:
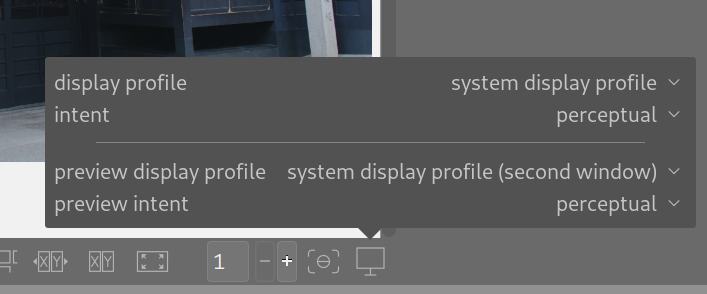
But you didn’t mention what I should set it to.
The previous reply to your same post mentioned possible settings, but I don’t know if they are addressing perfect tonal reproduction between raw and JPEG XL (my goal), or addressing some other issue.
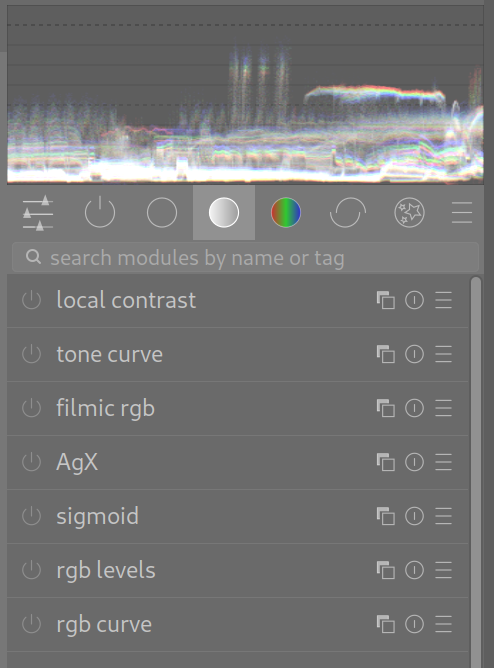
Also, in the darkroom screen, this is what I see, which I think means all the processing has been turned off, since the on/off buttons to the left are all grayed out:
The camera’s WB setting is fixed to full daylight, which I read on the camera’s GUI is R:0 G:0 B:0 , meaning no adjustments. It’s fixed to that setting for every shot.
“As shot” simply means how the camera’s lens delivers the image onto the sensor. I know editing is optimal on a raw file, but I am not doing editing at all.
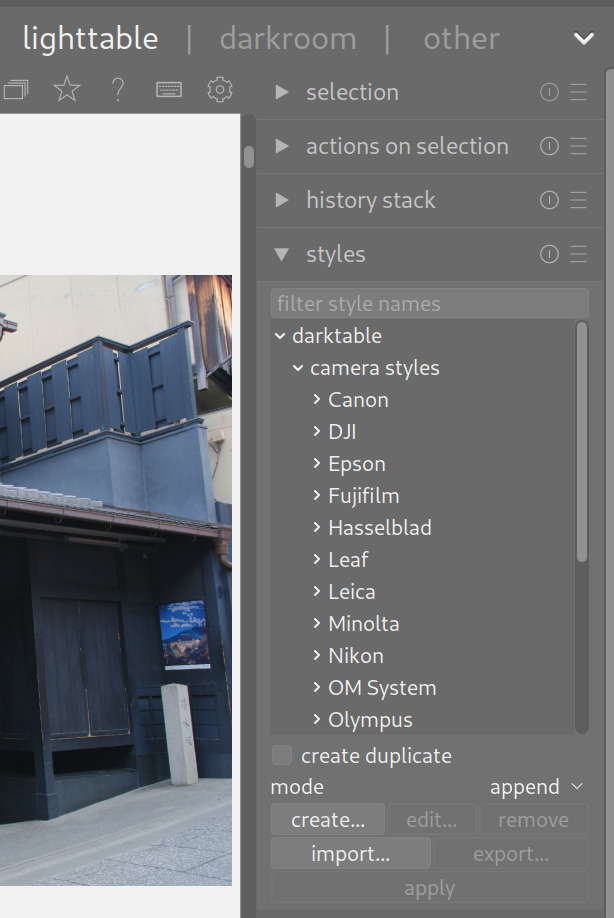
Are you talking about the “styles” setting? I have turned that off, meaning I did not select a style at all, and that definitely made a difference, although I did that much before I ran into this unsolvable luminance difference between raw and exported JPEG XL.
This is the styles setting in which I have not selected anything:
So can you point out where in the GUI are the defaults that does what you mentioned?
I need full accuracy so that for scientific photography what the lens delivered to the sensor is what’s in the exported JPEG. I’ll not do editing at all.
Can you expand on “accuracy” please? Is this for documentation or some sort of photo-metrology? Are you interested in correcting for lens distortion? Do you want DT to do colour space conversion, or stick with what the sensor captured? I’m not familiar with the dynamic range of JPEGXL. Does it exceed that of your sensor? Is this for human use, or machine use?
I do not need correction for lens distortion at the present time, as it is more important to get every pixel out with as few changes as possible. Color space conversion should not affect the RGB of each pixel that much, provided the source image as it hits the sensor is wholly within the dynamic range of that sensor and of the ability of the color spaces used during processing to represent those RGB values.
I realize one of the purposes of photo editing is to do the most visually pleasing thing for those out of gamut pixels, but my source image should not rely on that type of processing, since out of gamut refers to the ability of a reproduction device – screen or printer – to generate that color, and not to the ability of the color space scheme to represent the RGB of a pixel.
Maybe my next step is to take a picture of a smoothly graduated gray card with 30% to 70% intensity levels and see what I can get out of DT? I still need the ability from either DT or GIMP to see each pixel’s RGB value, which I still have not found how to do yet.
I prepared many images for scientific publication and taught the use of GIMP and ImageJ to PhD students in my University role. Scientific images can be manipulated and in fact should be manipulated but only to the extent to make clear the truly accurate information contained in the image. Not to add or subtract information from the image. So with a histology slide it would be appropriate to enhance the staining to reveal structure but would be inappropriate to enhance staining to manipulate expression levels.
Keep in mind that tiff file or Jpg file out puts from instruments are manipulated. It can not be avoided. It sounds like you want to setup a standard RAW file style to initialize editing that is faithful to the image captured.
I appreciate you mentioning the helpful vs misleading manipulation of scientific images.
Yes indeed that is exactly what I want to do initially before I go further in DT: learn the mandatory details of JPEG output before I apply enhancements. So that was why I initially expected to get exactly what I sent in minus compression artifacts, but I am not getting it.
Since you mentioned your career, I’ll mention a strange occurence in my own career. I once explained my completed electronic design to a verification engineer who continued to raise his eyebrows throughout the session when I started at the lowest level of hierarchy and finished at the highest level of hierarchy. Oh sure I explained the whole design, but I don’t know why I chose to take that direction instead of the customary top-down method. Thus that relates to how I am approaching my learning of DT: know the basic processing path first, get it running clean, and then add enhancements.
My suggestion would be this then:
- Open a raw image in the darkroom view of darktable.
- Adjust exposure to your liking.
- Open color calibration and adjust to correct white balance if you need too.
- Open AgX and click on the auto relative exposure picker for white/black points.
- Your done.
This will get you a correctly exposed and white balanced image whose dynamic range is properly fitted to an initial output format like jpeg or whatever. It won’t have the best saturation or contrast but if you want you can add those steps later.
However I’ll say this: exporting raw images after a partial edit just to edit the resulting jpeg image later, will not result allow for as much “latitude” during the overall edit.
But since darktable is non-destructive, you can edit your raws, export jpegs for immediate use, and then come back to the raws and keep editing with additional modules later.
1 Like
OK I will definitely follow the flow you mentioned to calibrate my JPEG output to what’s in the raw.
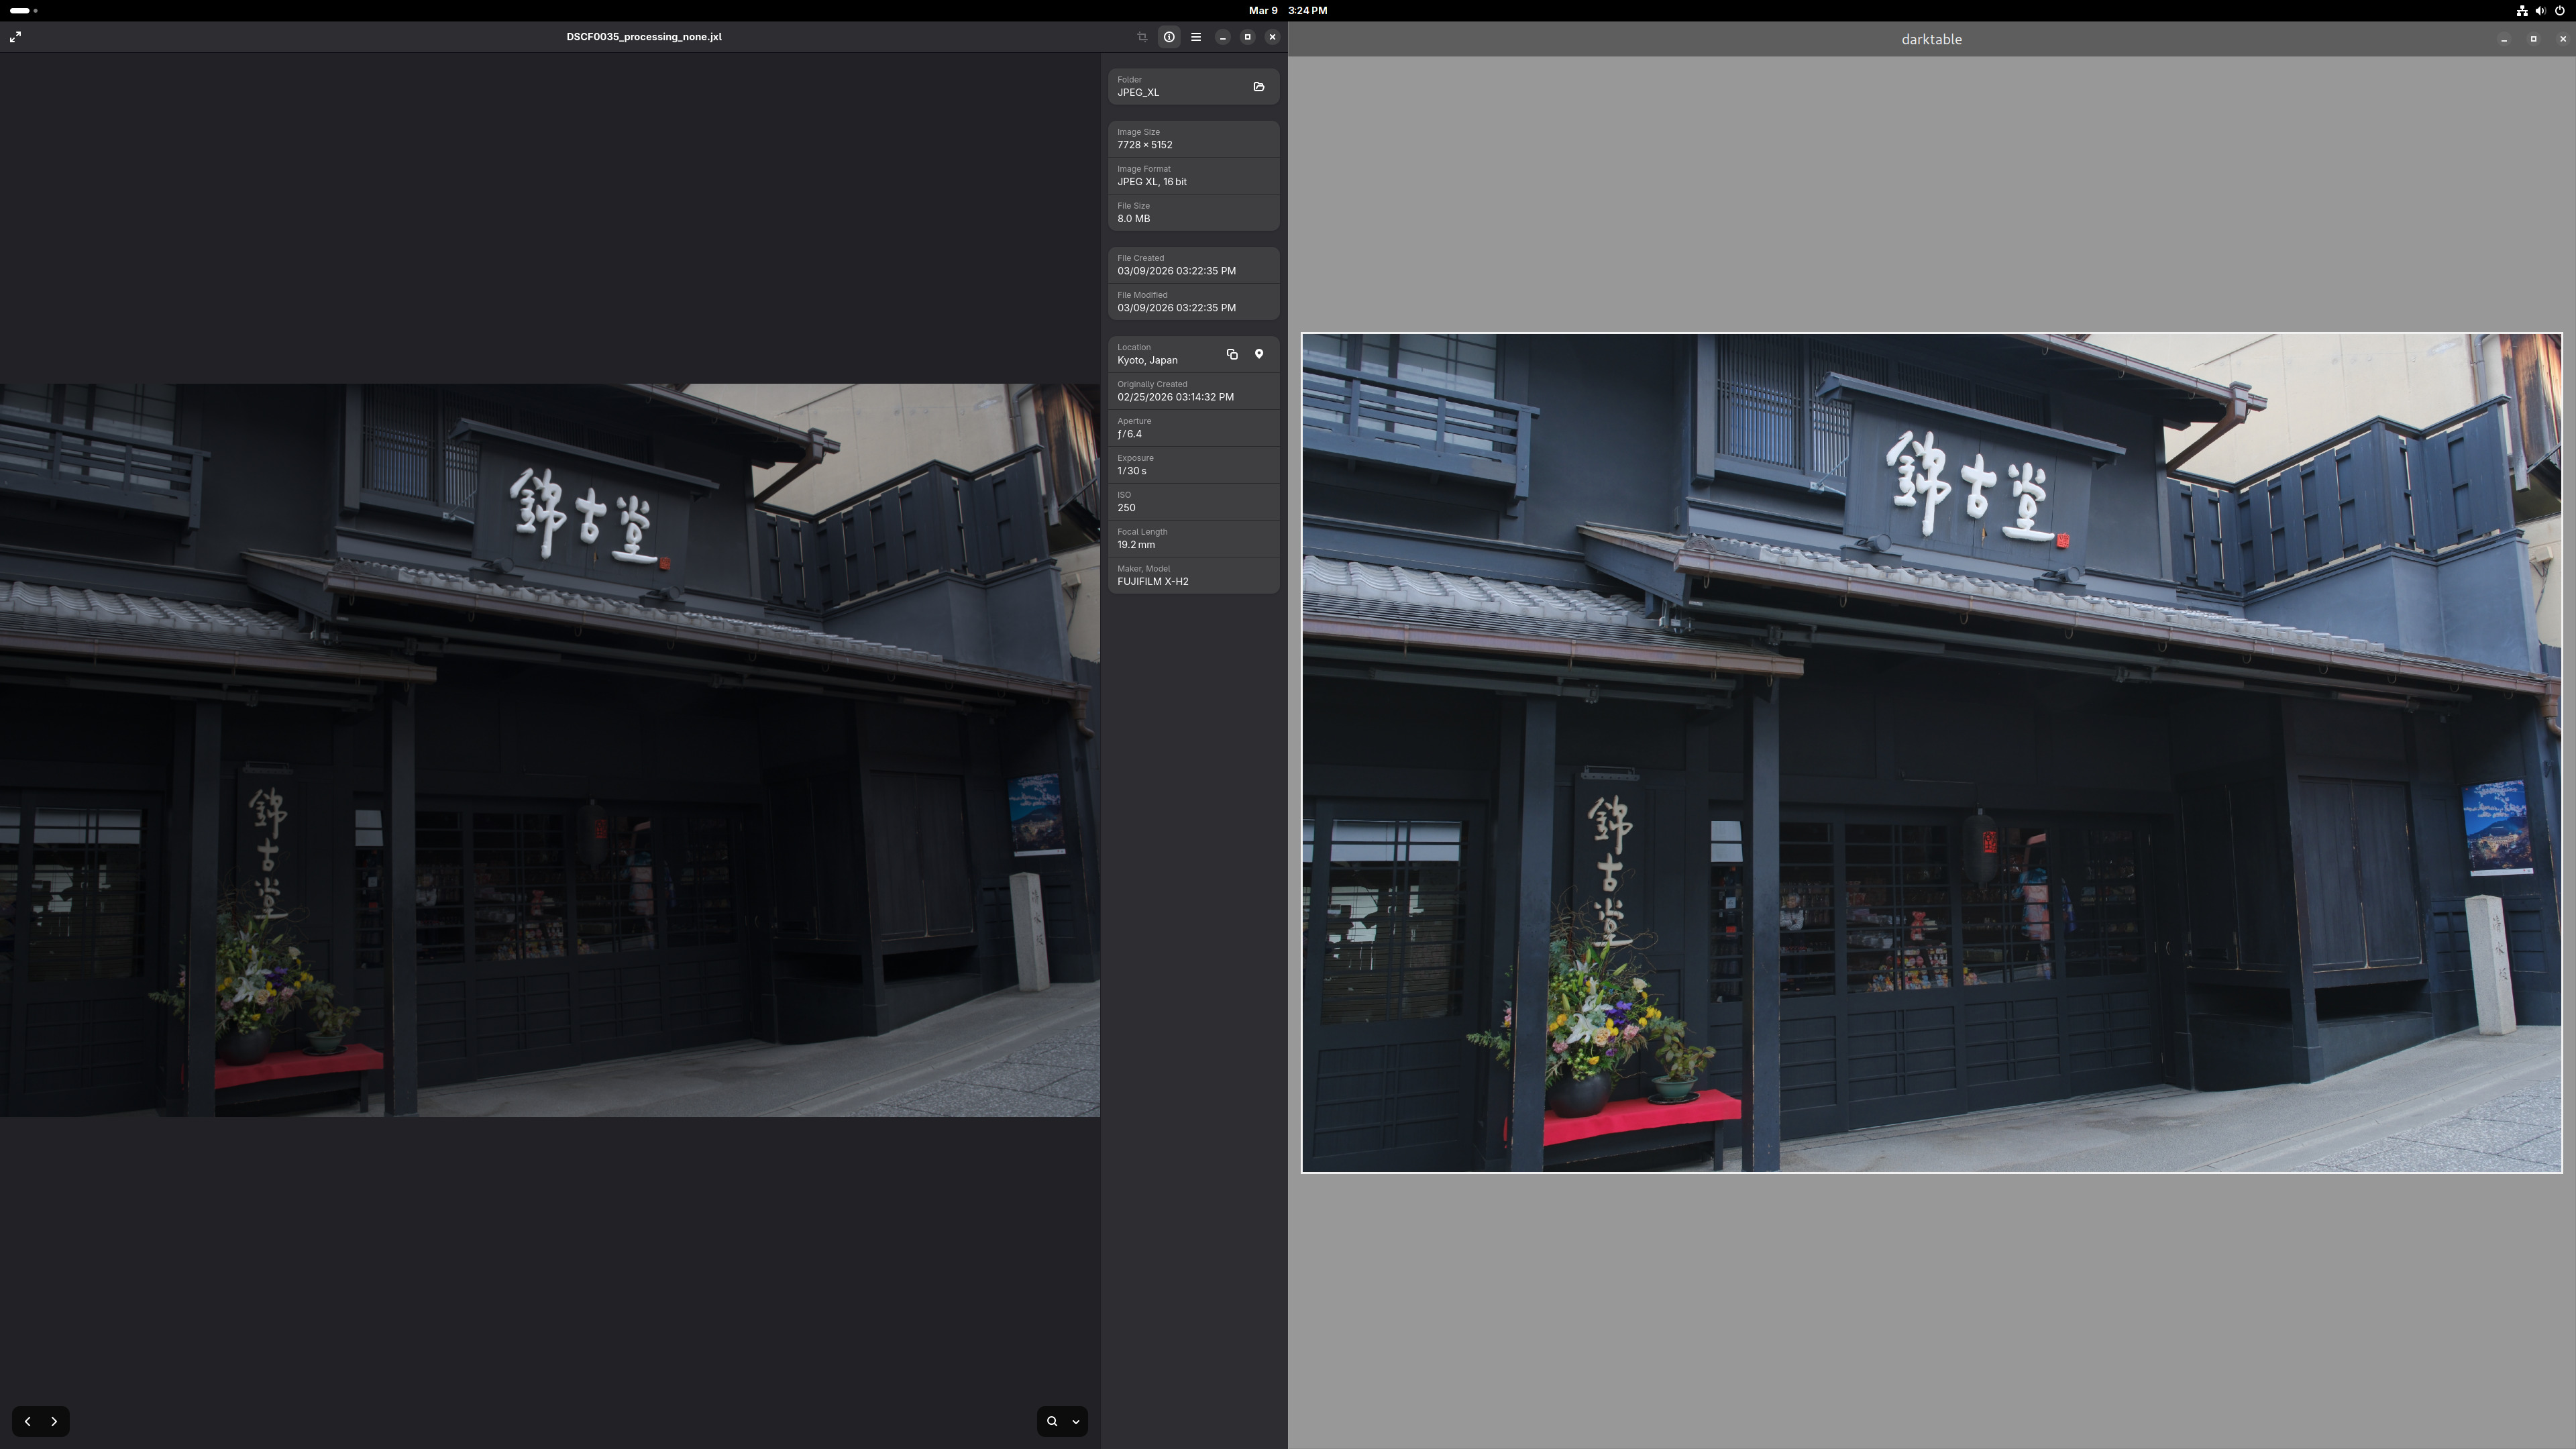
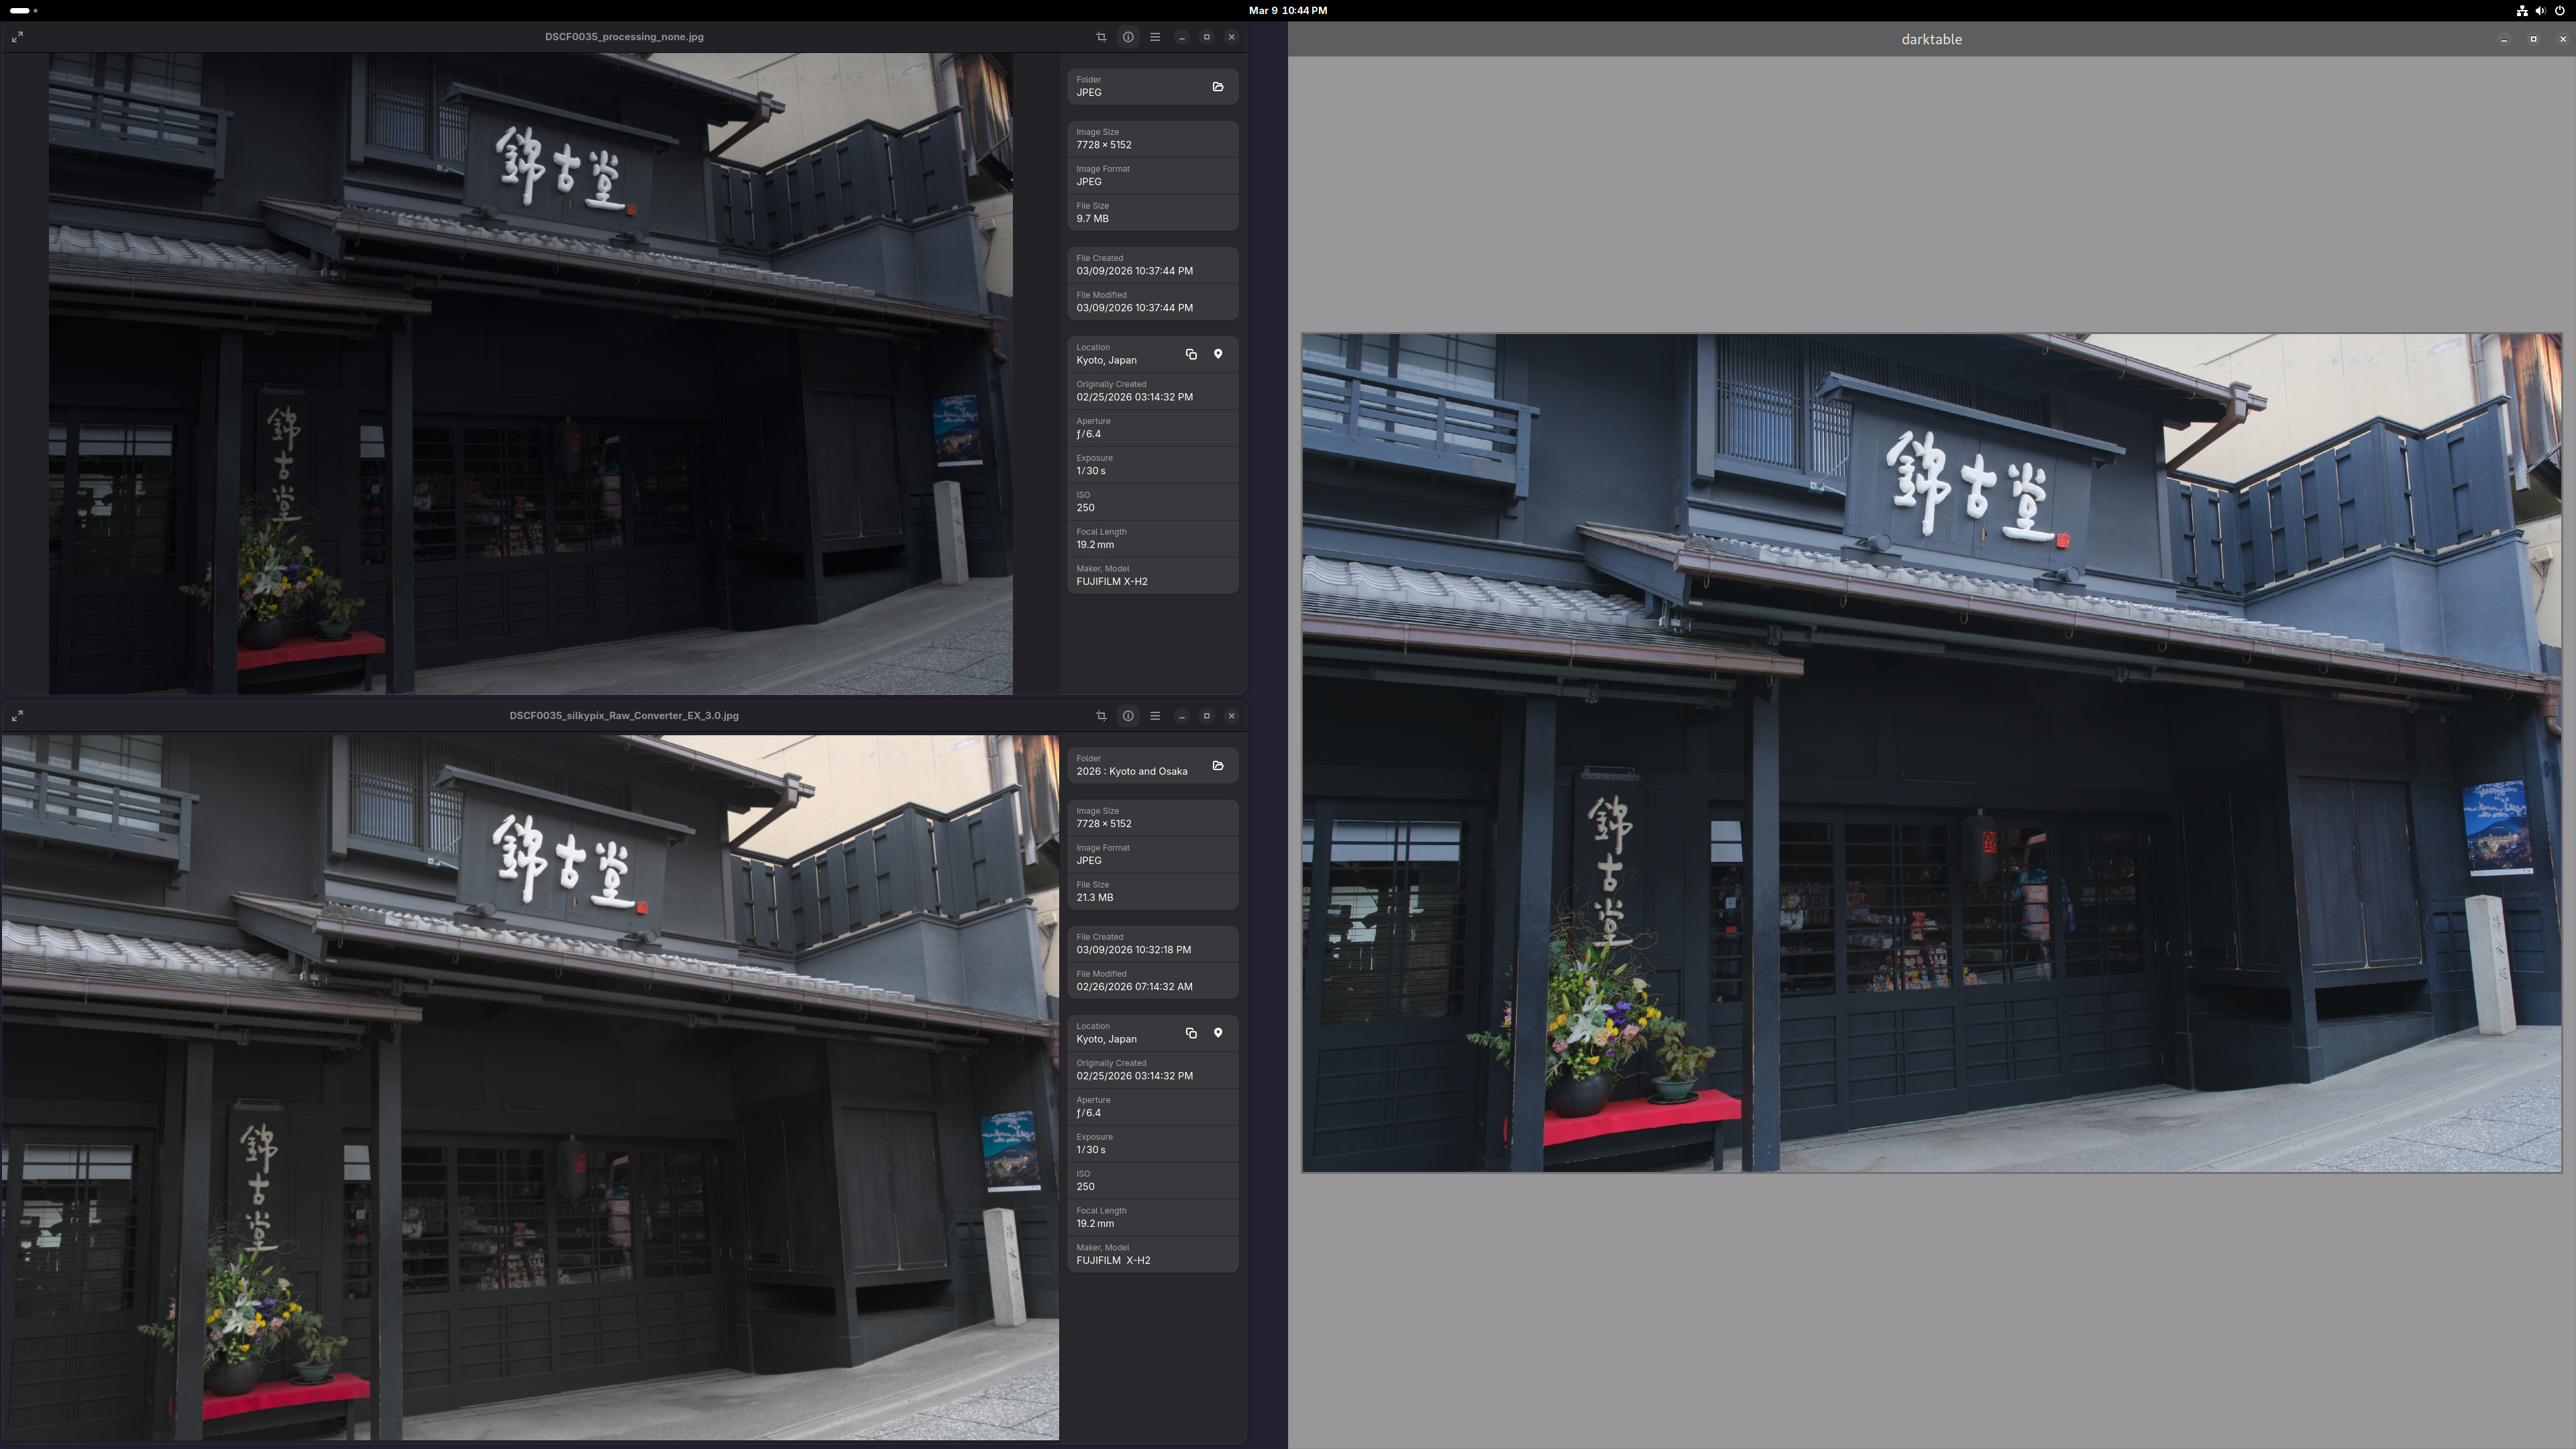
My camera is a Fujifilm X-H2, and that manufacturer has an official supplier of raw to JPEG software called SILKYPIX Raw Converter 3.0.
The lower left output is from SILKYPIX. The upper left output is from DT with all processing turned off based on recommendations so far. The right side is DT displaying the raw. The raw looks just right, doesn’t it? Both JPEGs are displayed with GNOME’s Image Viewer and all three windows are (of course) displayed on the same monitor screen.
I do not intend to further edit the converted JPEG. Eventually I intend to further edit the raw within DT, to build upon the history I have recorded to getting the raw to look the same as the JPEG.
Here is the raw file:
If anyone can get DT to exactly replicate it into JPEG minus compression artifacts but without these steps:
then please let the community know, as I’m sure it’s an important step towards happy editing.
I believe an alternative next step I should try is what another poster said: try generating TIFF instead of JPEG. Maybe that’ll resolve some or all of the problems.
That’s not correct. darktable just displays its processed image. You can’t see the raw data as an image. You need to check the color profiles used for display and for jpg export. These might be not equal if you select ‚system display profile‘
In that case, you should not use jpeg, as it throws away some of the data (in fact, any lossy compression throws away data), and you may want to look for some other program to do the conversions, where you know exactly what happens to the image.
And you’ll need a full chain of calibrations to make sure that what the camera captures is what was in the scene…
As said by others, you cannot avoid some editing if you want a viewable image:
- you need demosaicing, and most algorithms “blur” the image to some extent;
- you need some form of white balancing (or accept green images).
That’s a rather big assumption when you are using sRGB for export… Also, linearity is lost if you go to sRGB… (sRGB, as that is the standard export color space for jpeg). One of the reasons many scientific programs still use TIFF.
On a side note, there is no one way to do “scientific imaging”. What you need to capture and how you need to process depends on what you want to measure/show.
You don’t always need strict linearity, or “correct” colours. What’s important in many cases is that there are no details added and as few details lost as possible (e.g. micrographs often need enhancemant to show the relevant details, B&W can be clearer than color, astrophotography often uses false color by necessity, …).