There is no such thing as “matching the raw.” It is not an image until it is processed, albeit minimally.
Please refer to the manual, and relevant tutorials as to the meaning of “style” in darktable. They are very useful. They are applied per image or group of selected images. Nothing shows in this section that indicates the style has been applied.
Select the second tab, with the switch icon. This is showing you what dt is doing. dt does not hide the initial inevitable steps of making an image out of a raw file.
Do a reset here. You have to take the overview, and the general knowledge of darktable before delving into fine detail.
You have not understood the basic interface matters of darktable. Do please, look at the opening sections of the manual and other online sources.
Go back even further: re-evaluate what you need from your images, and decide from that whether darktable is the right program to use. E.g. matlab might be better (but very low level…). From what you told us so far, I have no idea what you need to do with the images.
It would be interesting to share a suitable image as a play raw to try and create a style that lets the RAW file closely replicate the JPG output. I have done this with my Canon R7 to speed up my editing. However, my concerned is that JPG outputs from cameras are not faithful to the scene captured anyway.
BTW, most of the scientific images I prepared for publication were immunohistochemistry slides and confocal microscope images. I used ImageJ and GIMP for most of my editing of those images. I never saw a ‘raw’ file from any of my instruments. Tiffs or Jpgs. I preferred tiff. Even setting the black and white point in the capture was an art to be faithful to the truth.
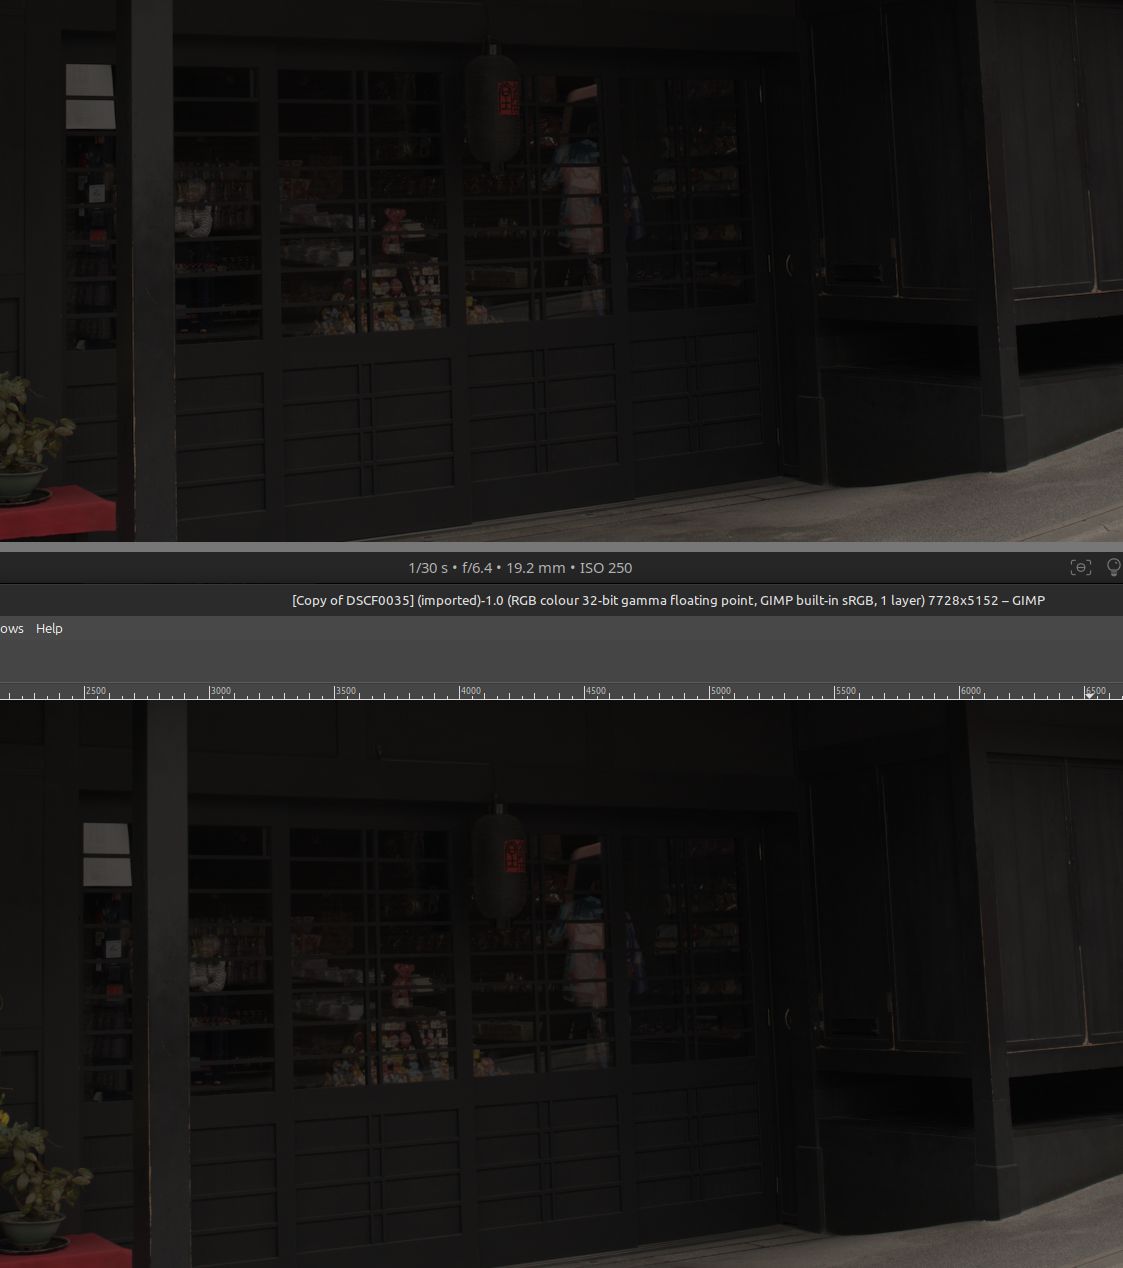
processing this image with just mandatory modules (pixel workflow none) and exporting it the image is displayed identical in darktable and gimp.
So best provide the xmp sidecar file with your settings - so there’s no misunderstanding on your processing steps (scrennshots aren’t useful to reproduce a processing)
Maybe also check your jpeg viewer, if they handle embedded profiles in a correct way.
btw: if you need even least possible editing then use module raw black/white point to set black points to 0 and white point to maximum value and also disable whitebalancing and highlight reconstruction - but don’t expect this looking fine
I also get no difference between DT and the JXL viewed in GIMP with this image, and that doesn’t look like a colour management difference. (I can’t view JXLs with other viewers, Pix just crashes if it’s even in the same folder)
Here’s a comparison and the xmp (it’s just white balance as camera reference).
To add to Martin’s comment above, you could use ‘passthrough’ in the demosaic module to really get a feel of what each sensor pixel is recording.
Could you supply the JPG image from the camera for this RAW file that you shared.
I note you took an image with a fuji camera. I don’t own a fuji camera but I am known to say they are one of my favorite cameras that I don’t own. Aren’t there JPGs very stylized to simulate film?
no, those are the settings that get applied with the option that you turned off here
the scene referred do what i mentioned and indeed none does none of those things
about the comparison between the jpegXL (which can be used as lossless, like tiff too, its not the, usual, old jpeg; but i suspect you already knew that and thats why you picked it; although to export jpeg xl lossless you need quality to 100 which i see you are not doing from here)
do check the color profiles, and if your image viewer can use them too, like some people mentioned, but, maybe what youre looking at in darktable is the fullscreen view in the lighttable? if that were the case: if there are no changes to the history darktable shows the embebed jpeg that the camera produces AND, the jpeg the camera produces are heavily processed.
but you only shot in raw? doesnt matter the camera is still processing it and setting it as a thumbnail
but it looks like it looks in the camera? the camera is showing you the thumbnail
maybe you already knew this but doesnt hurt to mention it
i would bet its not about the color profiles but what i just mentioned is whats happening. The exported jpeg xl does look to me like the raw minimally processed from DT would look
The raw image displayed by DT is the input to the JPEG compression pipeline. The processing you refer to in order to display the raw image is the first step towards generating the JPEG. What processing is used to generate the raw is not relevant towards how to get to a neutral JPEG processing flow.
I can find 45 references to Style in the manual, but not one direct explanation of what it is. I clicked the “i” inside the circle right next to the Style bar and it didn’t give me any response.
I tried using a style before I made my initial post, and the one style I found under the camera I am using, a Fujifilm X-H2, it produced a yellow cast with a slight increase in saturation, and was nowhere near matching the raw.
This passage shows what a style does in a roundabout way:
It’s a LUT to match the JPEG processing in the camera specifically on contrast, brightness, and saturation only.
Fujifilm X series cameras are unable to generate a neutral JPEG output where no film simulation is used. It forces the user to select a film. So the style I tried (the only one in the library) was from a film simulation.
I mentioned it earlier and someone has already pulled it and did processing on it. It’s 34.4 MB.
You mentioned TIFF. Yes that’s what I prefer to use as well. But TIFF is 239 MB uncompressed and 190 MB compressed at full resolution, albeit I don’t need to keep it at full resolution.
One important update: I generated TIFF without changing any other processing parameter, and the output looks the same as JPEG and JPEG XL: a darker look, with some hue changes especially on the red tabletop on the left of the image.
What I set out to do is to take vacation pictures that are as realistic as possible: i.e. the raw must match what my eyes saw. When I checked the camera’s screen after taking the picture, it was indeed really close, so I know I got the shot.
But I also realize getting a neutral JPEG conversion flow is useful for many other types of photography, so that was why I pursued it.
Yes the print property tab should be touched because it is optimized for image from a negative film. You shouldn’t use a tone mapper after negadoctor. Negadoctor is already a kind of tone mapper.
No, a negative image from a raw file doesn’t need a tone mapper at all when you use negadoctor.
I didn’t know lossless output from JPEG XL was possible. Thanks for the tip.
The image viewer (Image Viewer under GNOME on Fedora 43) is using the same color profile as DT, since as far as I know there isn’t a per-application color profile facility in Fedora Linux.
But can you please elaborate on what you said below?
I agree with your last statement though … the raw image shown by DT looks compressed, and the JPEG XL, JPEG, and TIFF outputs all match each other quite well. So maybe all those three files are doing the right thing, and it’s DT’s raw display that’s not showing the true raw file?
The default Image Viewer I use on GNOME can load both JXL and TIFF, and they look almost identical, thus it’s not the JXL compression doing the changes.
Also, the red table cover on the left side of the image is a much fresher red in the raw view.
Others have explained that the RAW file is not a usable image without processing. But your reply suggests that you think dt is showing you a raw file on your monitor. Unless you turn off all modules (follow the steps from @MStraeten), that is not the case. Instead, what you get is a minimally processed image.
Since you are a beginner user, I think it might be more helpful to you to review some beginner resources. It’s clear you are reading, and you know some things already, but I suggest you look at basic workflows as a starting point.
is most likely responsible for why DT is showing a compressed dynamic range image of the true raw, since that’s an easier to edit and view image compared to the true raw:
Fortunately, the dcraw program has another mode which converts to a more “useful” but still barely-processed image. This adjusts the level of the darkest black and brightest white and rescales the data appropriately. It can also set white balance automatically or from the camera setting recorded in the RAW file, but in this case, I’ve told it not to since we want to examine the least processing possible.
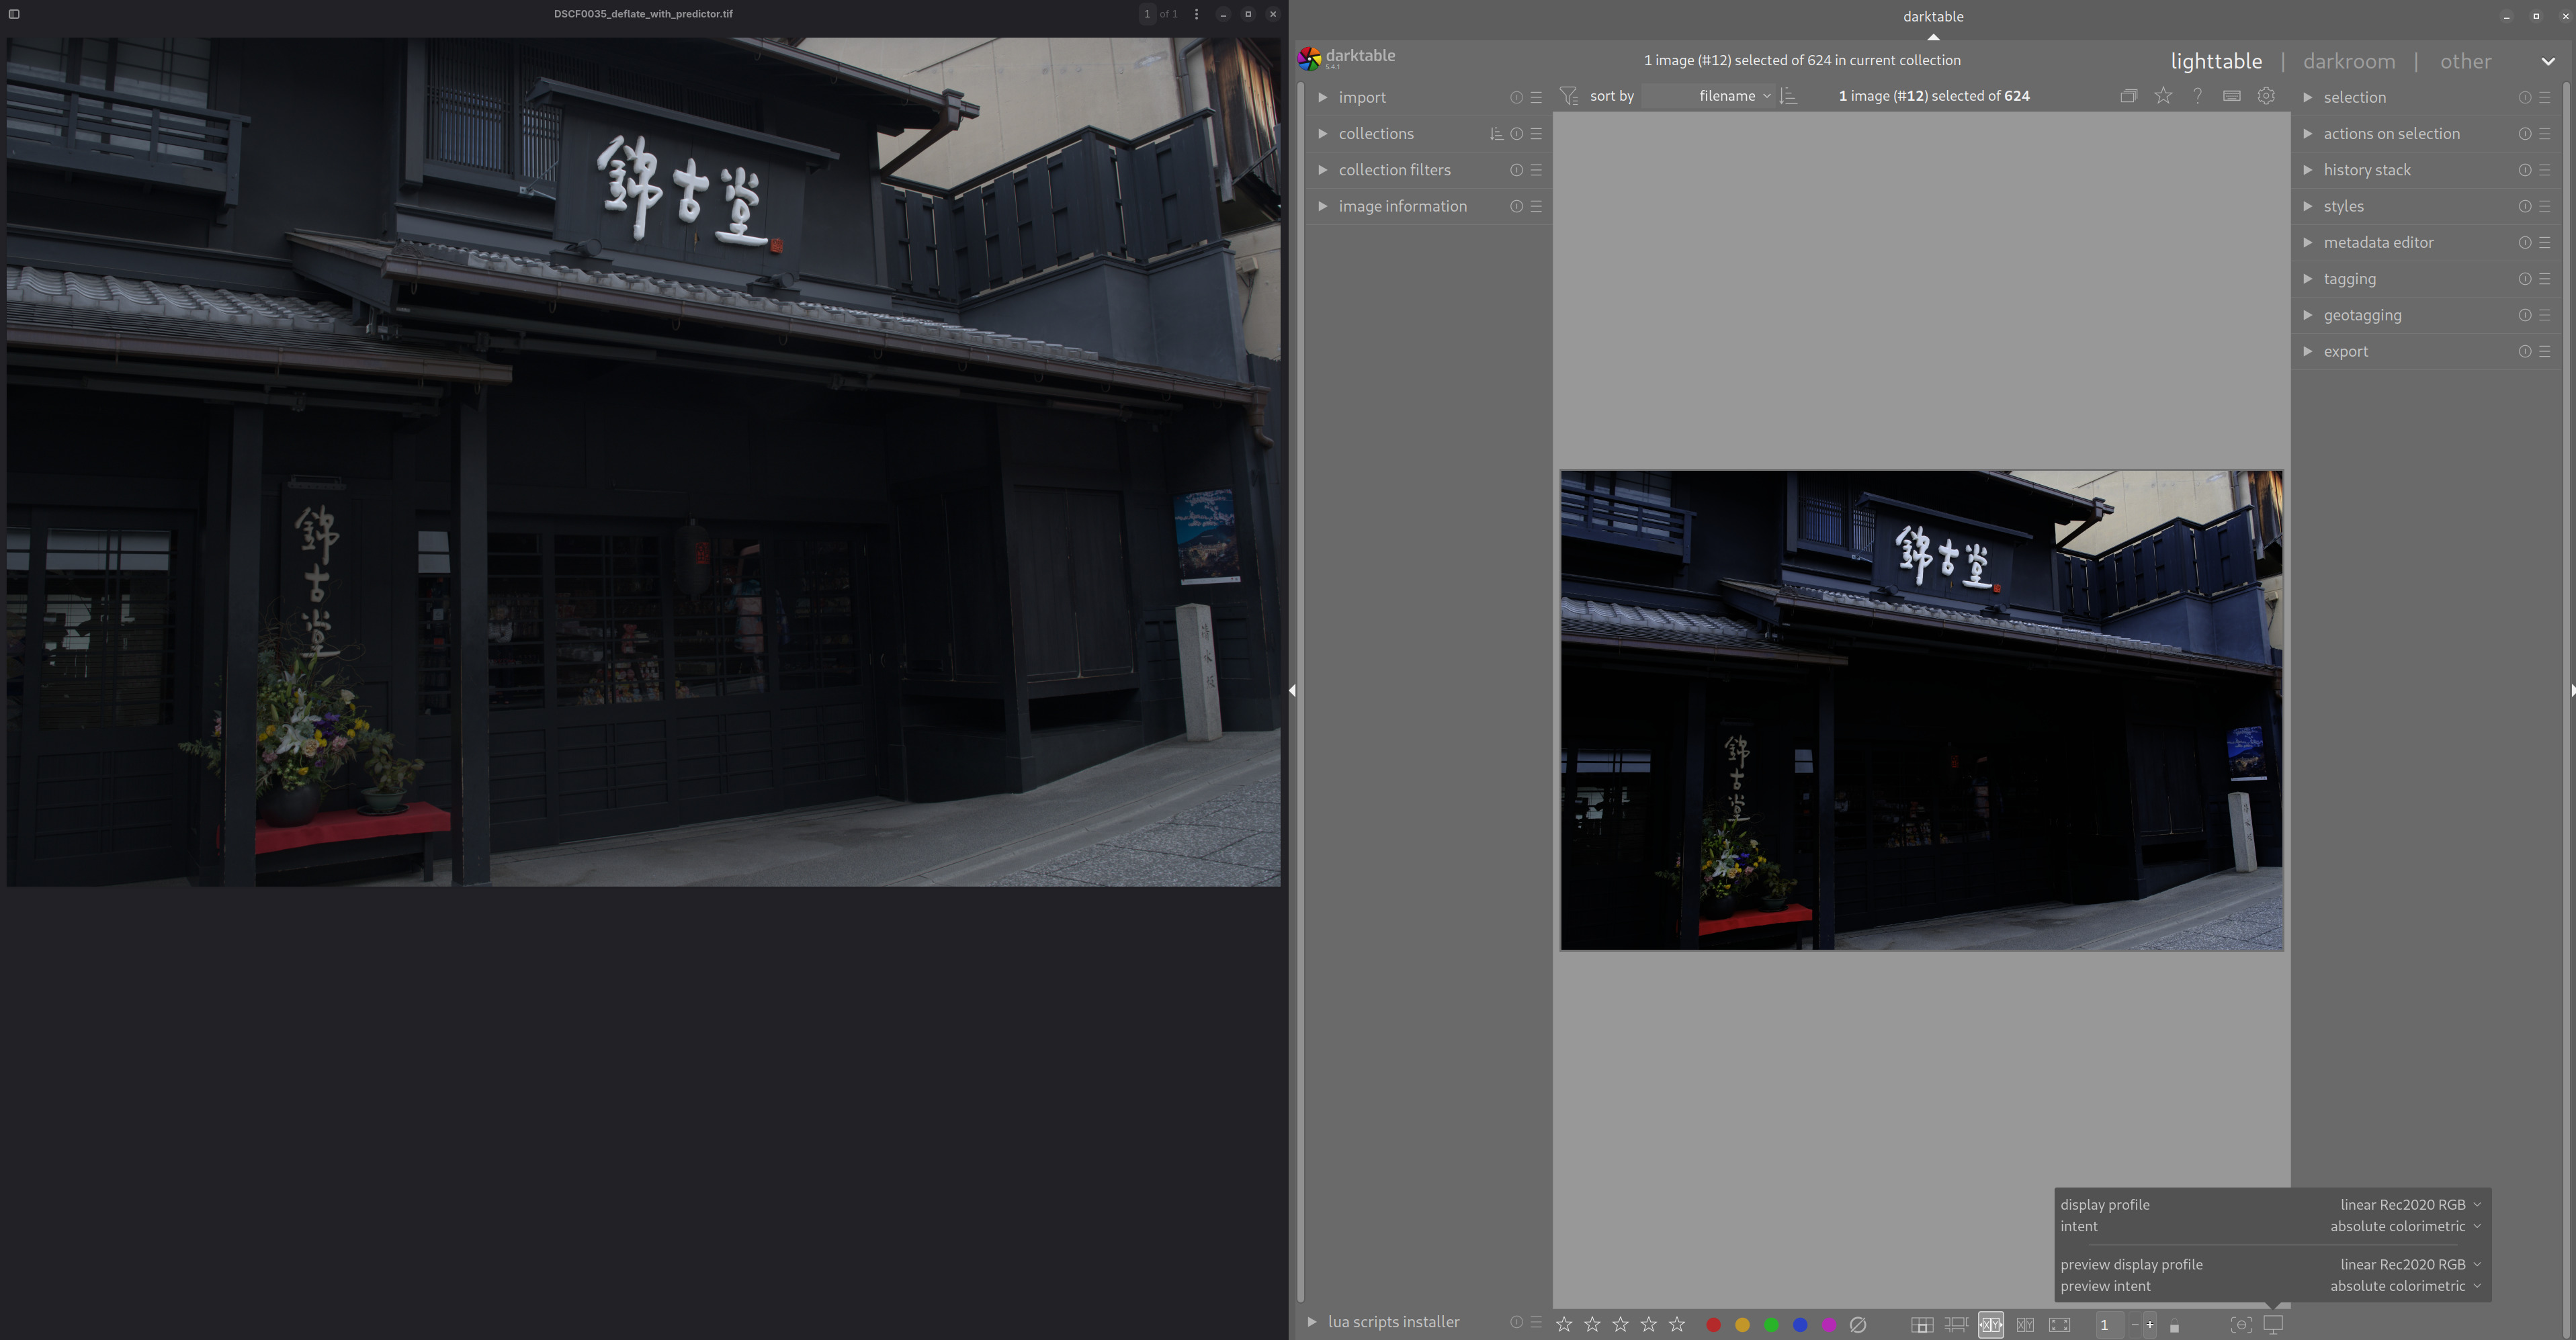
You are correct: I select display profile = “linear Rec2020 RGB”, intent=“absolute colorimetric”, and the DT raw image is slightly darker than the generated JPEG, JXL, or TIFF.
I still think you have some miss-understandings of what a RAW file is and what unprocessed means. In camera JPGs are heavily processed and are not a true reference. RAW files are just a collection of numbers which need not just processing, but subjectively interpreting before they can be viewed.
Please start from the beginning, leaving aside “neutral”, “unprocessed” or any other descriptions on how you want things done, please start from what do you want achieve by using a photo and do you want that done by a person or a machine?