By request, I am creating a tutorial to add lens flare in RawTherapee Dev using local Adjustments.
The image is by @Jade_NL image posted here under License: CC BY-NC-SA 4.0
flares.jpg.out.pp3 (40.0 KB)
Before:

After:

My starting point is Neutral, Auto matched tone curve, and Soft Light cranked all the way up.

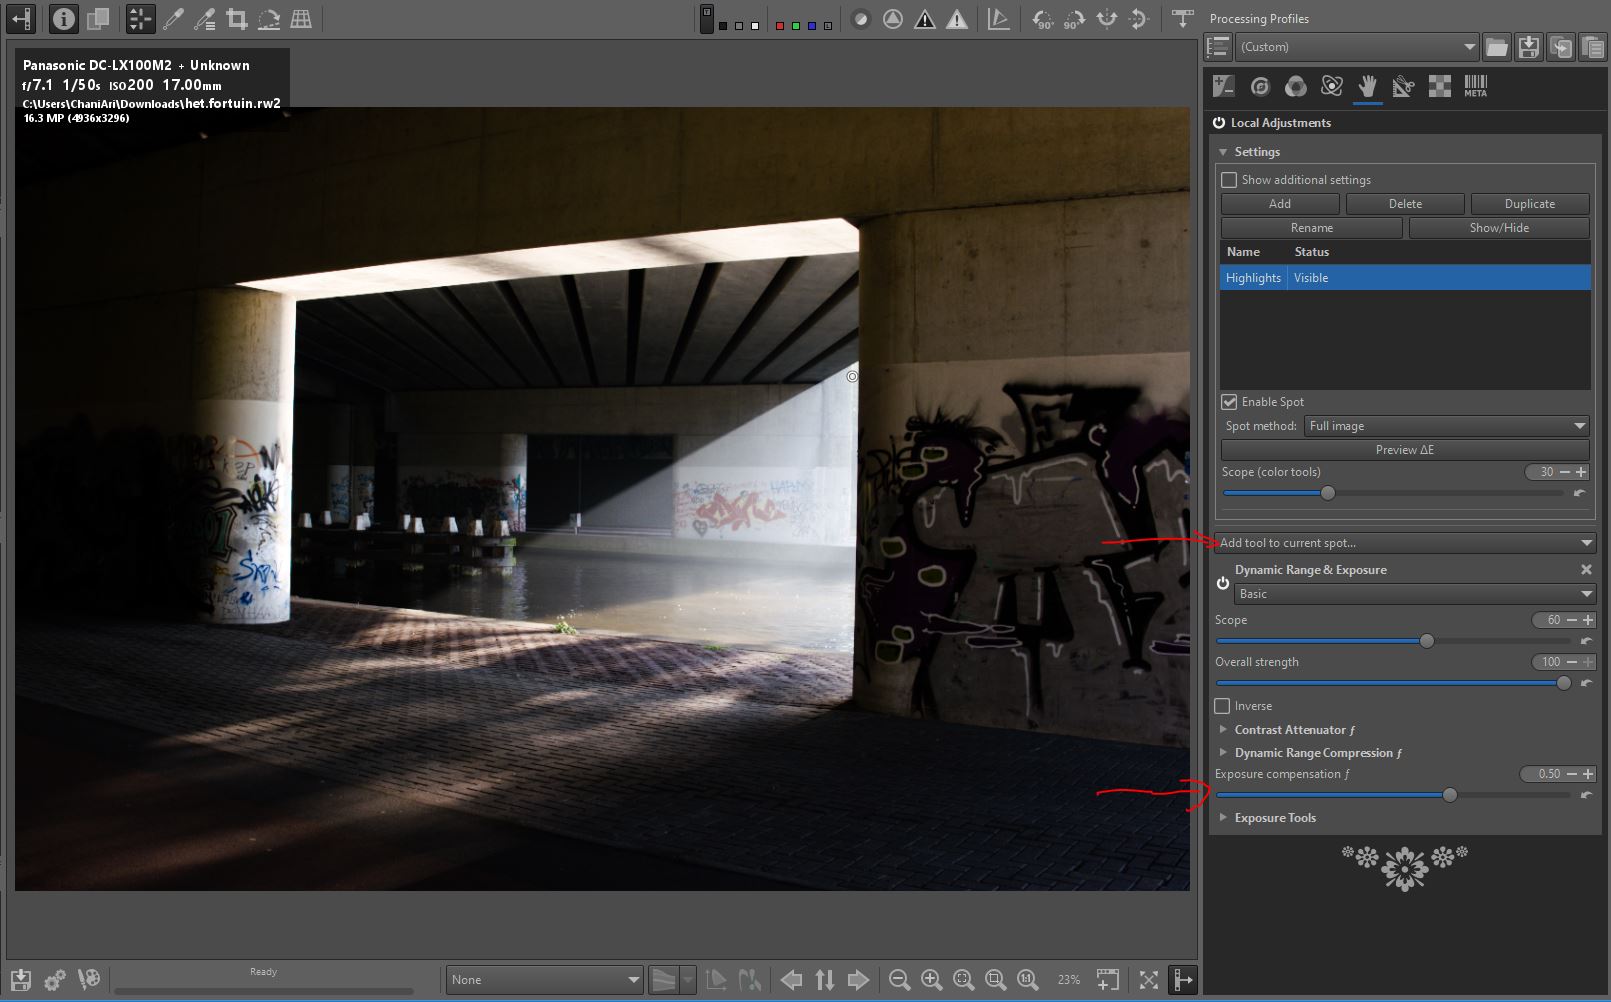
Push highlights: Add a full image spot to a bright point. Add Dynamic Range & Exposure and push the highlights. We are making the image super high contrast to make flares more believable.
Round flares
Step 1: Add a regular spot. Using Dynamic Range & Exposure, set the scope to 100 (to affect all tones) and increase exposure.

Step 2: Change the transitions. Click the box to Show Additional settings (sorry, I forgot to add a pointer). Increase the transition value to create a more round shape and lower the decay to soften the edges a bit. It also helps to make hide the spot while doing this so you can fully see the effect changes have.

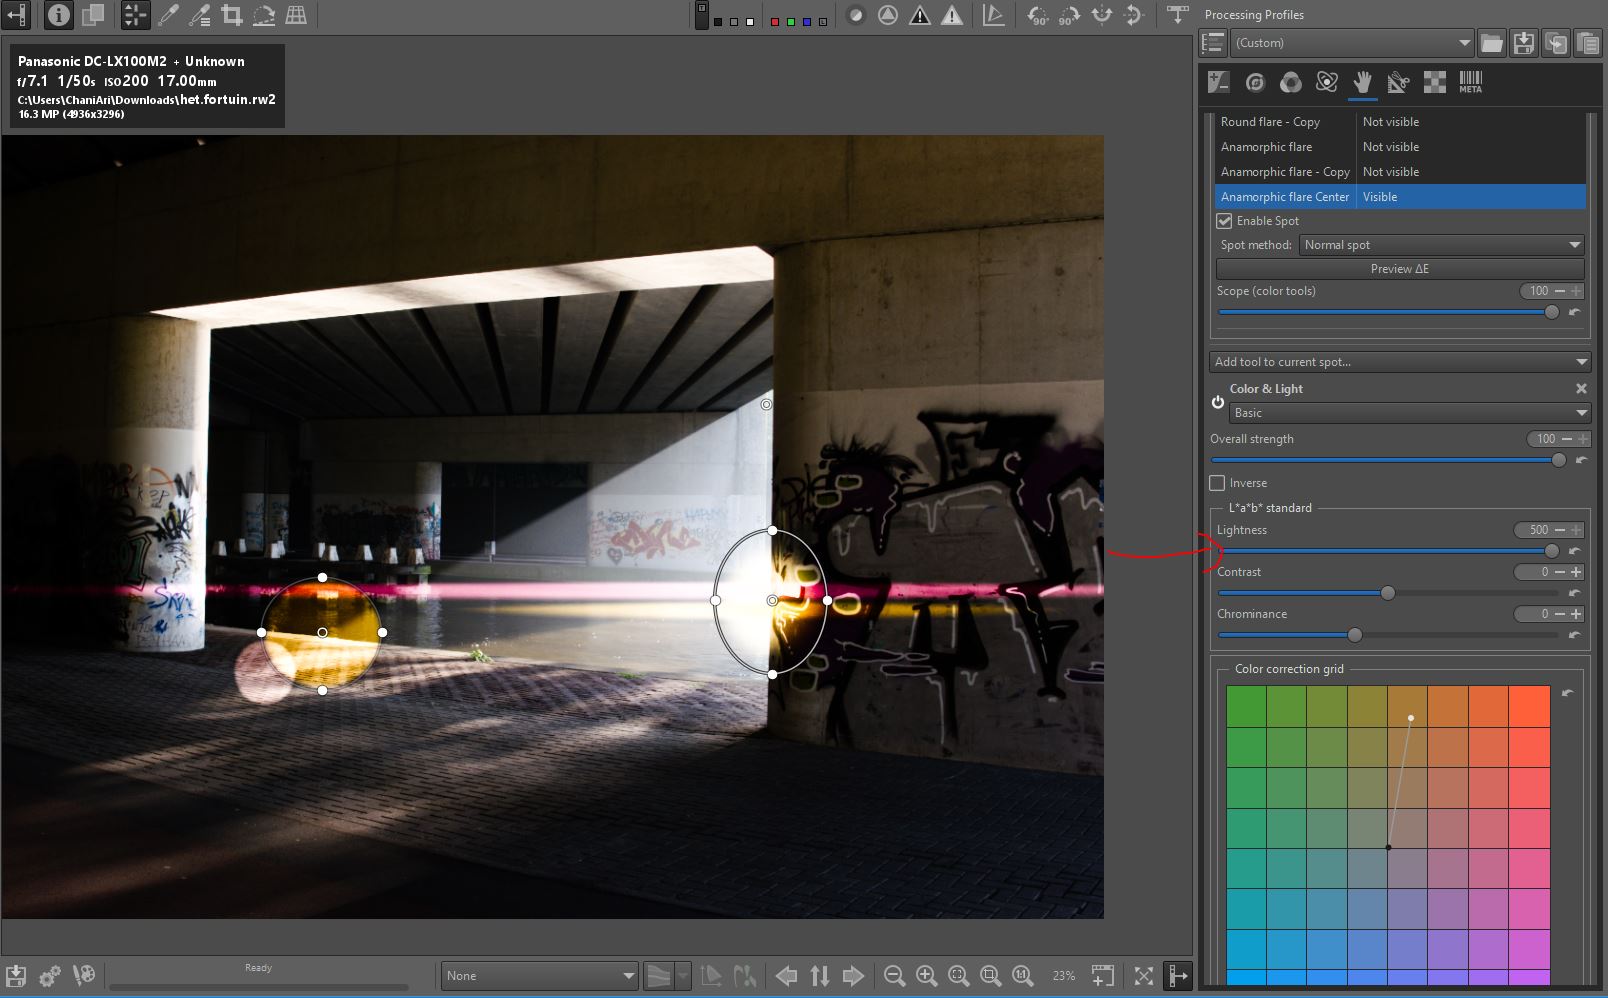
Step 3: Add color. Using the Color & Light tool, increase the lightness and pick a color. It got cropped from my screen shot, but I used Direct instead of Color toning in dropdown below the color grid.

Step 4: Add a second flare. Click on the Duplicate button to copy the flare. Show the spot so you can move and resize it.

Step 5: Tweak it. For this flare, I decreased the strength of the Color & Light tool and changed the color.

Stay tuned for the next episode when I add anamorphic flares.


 )
)