My view on this is start with the HLR module, then if it’s still not right, add the filmic reconstruct as well. I think thats how it’s intended to work…
Opening the image with defaults:

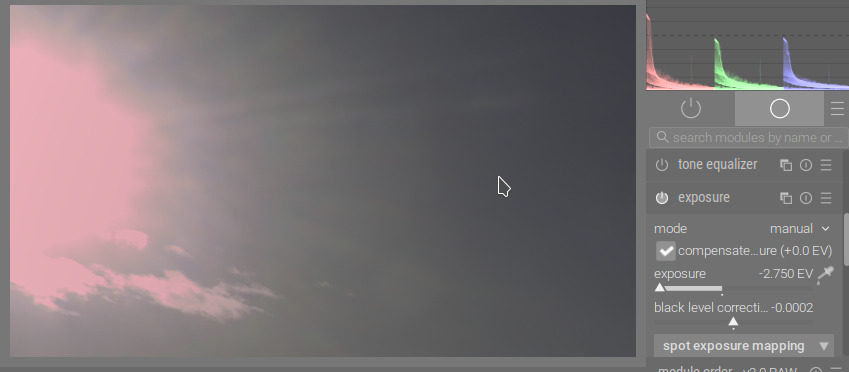
Disabling filmic and dropping exposure shows that there is magenta in the highlights. filmic will then take that as input and tone-map it. Maybe this is less visible with sigmoid due to it desaturating the highlights.
Dropping the recovery threshold does not help in this case:

Changing the method to clip highlights or reconstruct in LCh still produces coloured highlights.

Since recovered (or clipped) highlights in the output of those modes is guaranteed to be neutral (R=G=B), we can deduce that this is a case when color calibration, when adapting the white point from D65 (camera reference in the white balance module) to the value read from the camera shifts the colours.
This is a known problem of the modern chromatic adaptation method.
Falling back to the legacy white balance method (disabling color calibration and setting white balance to _as shot) results in neutral highlights with recover in LCh:

Switching back to inpaint opposed, restoring exposure and turning on filmic, after these changes:

I never got the bright red line on the edge, though.
You may also try guided laplacians as the reconstruction method (it really needs a GPU, or lots of patience, though). The following screenshots were made with the modern chromatic adaptation method, so white balance set to camera reference and color calibration enabled. The trouble is, we have 2 magenta spots: the Sun and the lens flare, of different sizes:

The radii that work on the lens flare (64 or 128) do not work on the Sun:

Large radii, which (more or less) work on the Sun propagate false colours don’t fix the lens flare:

The following is the image with defaults (modern chromatic adaptation, filmic as tone mapper), filmic auto-tuned, then preserve chrominance set to no. Note the desaturation:

Conclusion: all those clever algorithms cannot fix the data that is gone (due to sensor clipping). You can choose between different methods and pick the one that provides the best compromise.
3 Likes


In my hands this image worked best in Sigmoid (see top image posted here). This shot is a crazy ask for any software to handle. I am not surprised when we ask software to fix totally blown pixels that something will go wrong. I don’t see any bugs with the software, just asking too much of DT or any program with an image like this.
@kofa sorry for misinterpreting your previous comment. BTW, I could not replicate the red line and suspect it may be some user settings that created it. The bottom image is using filmics highlights reconstruction in my hands. I feel it did reasonably well under the challenging circumstances.
Sigmoid version.

DSC00057.ARW.xmp (5.9 KB)
Filmic Highlight reconstruction

DSC00057.ARW.xmp (5.9 KB)
Thanks for the note. Perhaps I’ll reinstall my version of darktable and see if the issue with the red border persists. Are there any preference files that I should try and purge manually considering I’m working on a mac and downloaded darktable via homebrew?
I’m not aware of any related preferences.
If you want to try that route, don’t reinstall darktable: that is unlikely to fix anything. Simply rename darktablerc in your .config/darktable directory. To start anew, rename the directory itself.
Ok. Just out of curiosity, what actually does this do?
If you are responding to @kofa…I think he is just suggesting a way to not have to reinstall but to check things out with a new fresh database and config files…
There are a slew of command line options you can add when you run DT … one is --configdir “path” if you run this you can use it to 1 specify where your config files live instead of the default location… B run DT and point it to a new clean folder and it will create fresh brand new config files…this can be good to test for an issue with corruption… or you can use this to run multiple versions of DT on the same machine… directing each to its own config folder… most common would be when you have the release version install and also you check out the current master code and or any PR that you are interested in testing…
It answers the question:
![]()
Uninstalling darktable, at least on Linux and Windows, does not remove those files, so if you think your issue is due to corrupted configuration, reinstalling won’t help (if Mac behaves the same way). It would only help in case darktable itselft were damaged (due to file system corruption, for example).
See the files mentioned here:
https://docs.darktable.org/usermanual/4.2/en/special-topics/program-invocation/darktable/
.config/darktable/library.db
.config/darktable/darktablerc
The most important files:
- darktablerc: configuration (the stuff you can adjust from darktable 4.2 user manual - Preferences & Settings, as well as some hidden settings, default mask opacities and the like)
- data.db: tags, styles, presets, locations
- library.db: editing history of imported images
I get what you’re saying. However, I’ve renamed the whole darktable directory to invoke the creation of a new one and the issue persists. Could it be a system compatibility problem with the M1 Pro chip? Anyone else having this problem?
I doubted it was due to a preference. You should probably file a bug report:
1 Like
Thanks for the support over the past few days Kofa. I’ll probably do it in the next week or so since I’m pretty busy with other work too and I’m also not too familiar with Github yet ![]()
One thing maybe worth trying, (although I’m far from an expert) if you have OpenCL available, might be to try disable it, or enable it if it’s available but turned off. Edit… wonky grammar sorry! At least on Windows it’s in the preferences here: “activate OpenCL support”.
OpenCL utilizes the GPU to speed up processing, and at least on some modules it uses a different processing path I think.

Steven, thank you so much for the suggestion. It fixed my problem!

Just out of curiosity, is there why the OpenCL and larger resource limit helps to eliminate such artifacts? Is it something to do with the computer having sufficient computing power to finish all required calculations within the processing modules?
Its explained pretty will here including the options…
https://docs.darktable.org/usermanual/4.2/en/special-topics/mem-performance/
2 Likes
I don’t think those tuning params should influence correctness.
I’ve tried with different settings (OpenCL on/off, resources = large & small), but was unable to reproduce the issue. I’m glad it works for you, but it’d be good if you could provide an XMP and the darktable settings that recreate the issue, and opened a bug.
I think it actually indicates a bug in darktable, as @kofa was saying. It’s interesting! I suggested it as I’ve seen one or two unrelated issues before which behaved differently with OpenCL off/on, so I thought it worth trying.
Thanks for attaching the Raw, it would be useful if you could also upload the xmp file from the image, i.e. the “sidecar file” that darktable produces alongside the RAW file. It would need to be with settings applied that cause the issue (or caused it when you had OpenCL off). If you have dt set to not write XMPs you can hit this button in lighttable to write one.

Well you could run the xmp in both cases and see if one invokes some cpu or tiling and perhaps that is not handled correctly on the machine/OS if the resources are too low??