Still a few improvements :
Here is the code source.
@grosgood may be interested by that, I’m using a lot of diffusion tensors to achieve the painting simulation 
paint :
  +diffusiontensors 0.1,1,0.5,2
  +b[0] 10%

  f=0
  repeat inf,t
    beta={1-exp(-$t/70)}

    100%,100%,1,4
    {u(16,512)},1,1,1,"*
      const da = 10;
      const dl = 1;
      const beta = $beta;
      const bs = lerp(80,2,beta);
      const anisotropy = lerp(0,1,beta);
      lmax = u(lerp(1,20,beta^2));

      X0 = round(u([w#0,h#0]-1));
      RGB = [ I(#0,X0),255 ];

      for (a = 0, a<360, a+=da,
        X = X0;
        U = [ cos(a°), sin(a°) ];
        for (l = 0, l<lmax, l+=dl,
          C = I(#1,X,1);
          T = [ C[0],C[1],C[1],C[2] ];
          eig = eig(T);
          l1 = eig[0];
          l2 = eig[1];
          u = eig[2];
          v = eig[3];
          ellipse(#-1,X[0],X[1],bs,bs*lerp(1,(1 - l1 + l2),anisotropy),atan2(v,u),1,RGB);
          nU = T*U;
          X+=nU*dl;
        );
    );" rm.

    sh. 100% distance. 0 n. 0,1 pow. {u(0.5)} *. 255 rm.

    opac={lerp(0,0.5,$beta)}

    blend[2,-1] alpha,{u(0.15,$opac)}
    w. # on. frame.jpg,$f
    f+=1

  done
As it happens, I am stepping though the pastebin version now. +diffusiontensors being catnip. Alas, may be mute on this topic for a few days, but I have promised playtime for myself this weekend. Which. Does. Approach. Ponderously.
This — I find — is the useful bit, in conjunction with tracking orientation, as in the physical effort a painter expends is much in the thought of laying down the brush stroke in ‘just the right way’. The merit function (mse) may also invite creative debauchery, choosing to customize it away from Old School mean square to something more peculiar. Must run now. City calls.
Wow, this one has minimal detail but captures lights and shadow very well for a 3D effect.
I think I’m done now with the prototype for this algorithm.
I’ve tried a lot of different things, and this is what I get at the end:
paint :
  +diffusiontensors 0.01,0.95,0.5,1
  +gradient_norm..
  # +f[0] 255
  +b[0] 10%

  f=0
  repeat inf,t
    beta={1-exp(-$t/100)}

    100%,100%,1,4
    {u(16,512)},1,1,1,"*
      const da = 15;
      const dl = 1;

      const beta = $beta;
      const bs = lerp(60,1,beta);
      const anisotropy = lerp(0.5,1,beta);
      const opac = lerp(0.5,1,beta);

      X0 = round(u([w#0,h#0]-1));
      RGBA = [ lerp(I(#0,X0),u([255,255,255]),0),255 ];
      lmax = lerp(1,10,beta^2);

      for (a = 0, a<360, a+=da,
        X = X0;
        U = [ cos(a°), sin(a°) ];
        for (l = 0, l<lmax, l+=dl,
          C = I(#1,X,1);
          T = [ C[0],C[1],C[1],C[2] ];
          eig = eig(T);
          l1 = eig[0];
          l2 = eig[1];
          u = eig[2];
          v = eig[3];

          RGBA[3] = opac*lerp(10,255,min(1,i(#2,X0)/10));
          nbs = bs;
          nbs*=lerp(3,1,min(1,i(#2,X0)/20));

          ellipse(#-1,X[0],X[1],nbs,nbs*lerp(1,(1 - l1 + l2),anisotropy),atan2(v,u),1,RGBA);
          U = T*U;
          X+=dl*U;
          U/=max(1e-9,norm(U));
        );
    );" rm.

    opac={lerp(0,0.5,$beta)}

    blend[3,-1] alpha,{u(0.05,$opac)}
    w. -1,-1,0
    on. frame.jpg,$f f+=1

  done
Next step would be to convert it to a filter for the G’MIC-Qt plug-in…
If only I had the courage to do it! 

Bonjour,
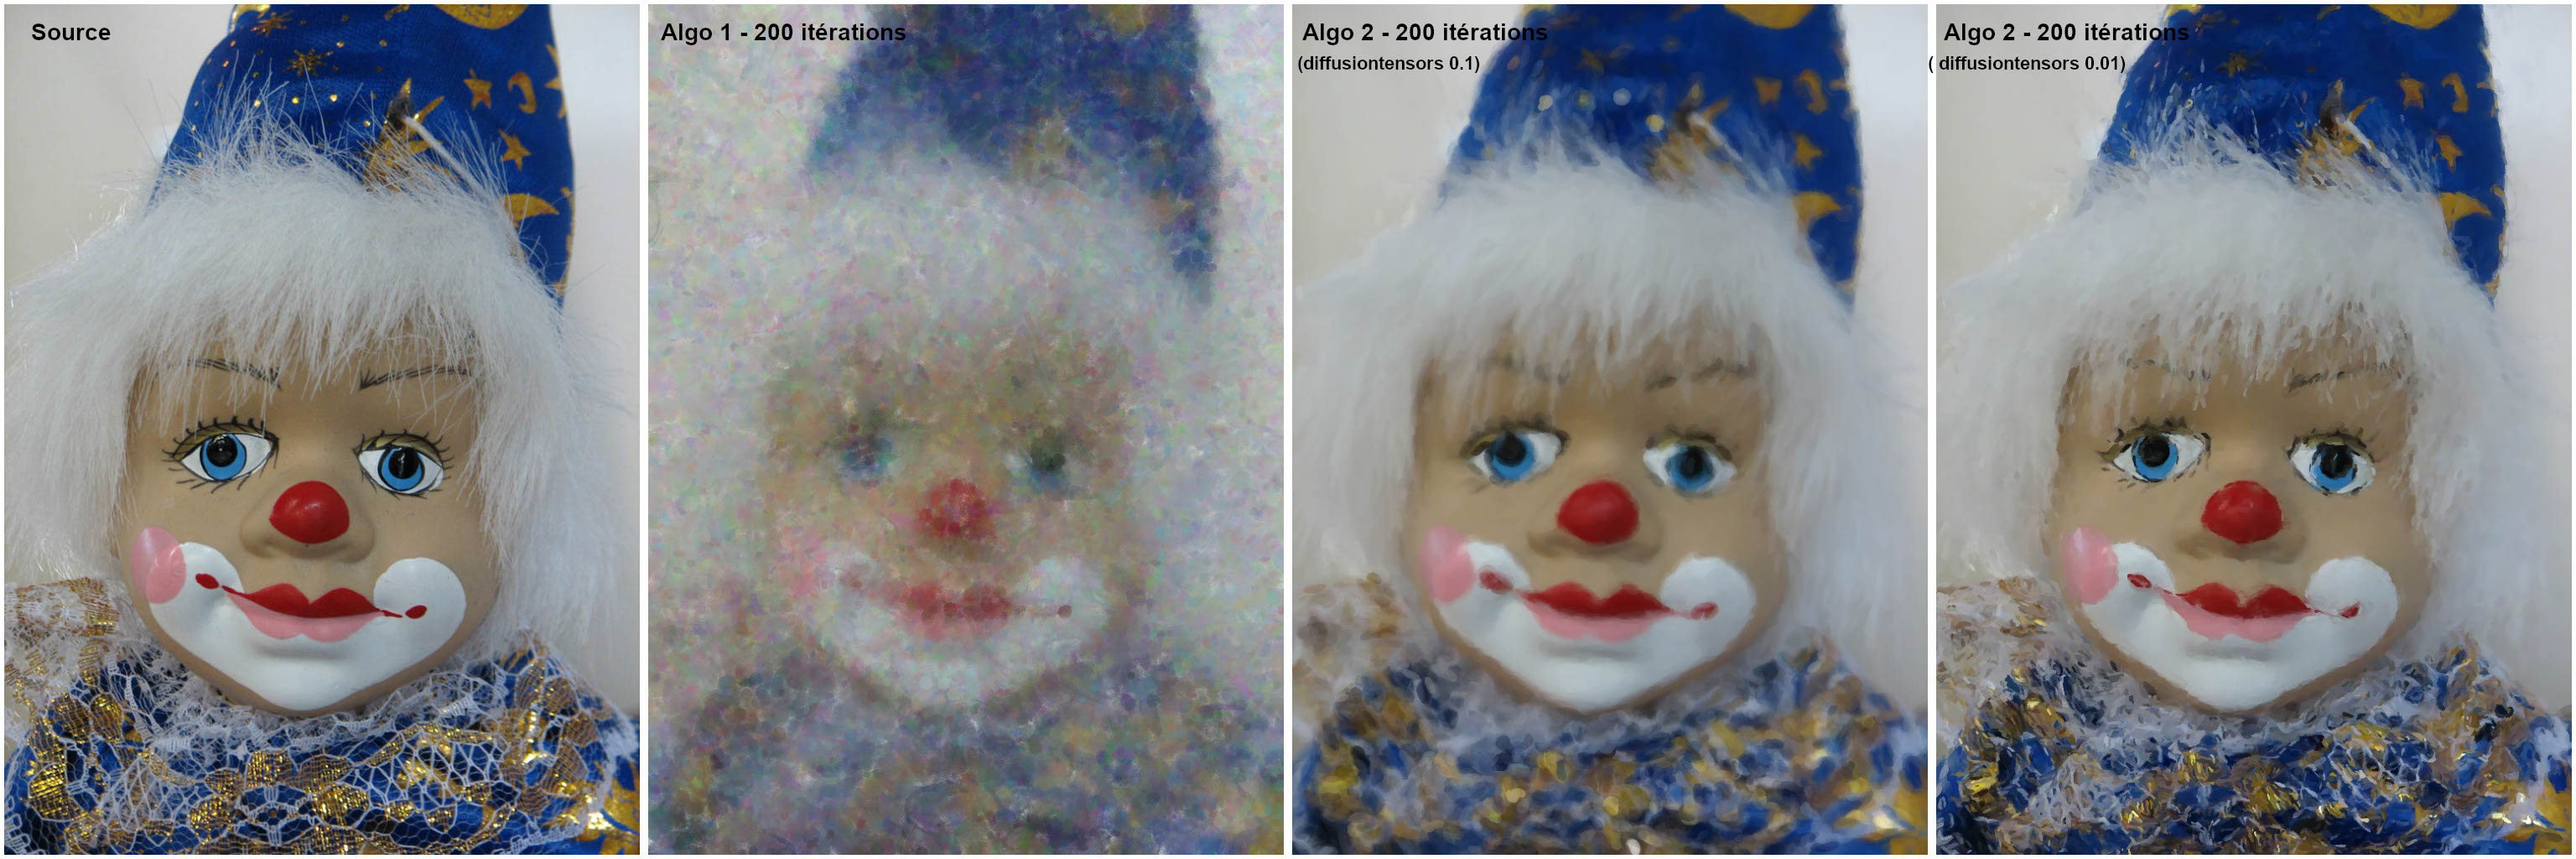
I did some tests on 3 versions of the ‘Paint’ program with a limited number of iterations.
I like the rendering with program 1 at the top of this thread with a more surprising and richer rendering.
Thank you for all this beautiful work.
:o)
This looks like a reverse explosion of the trees, very beautiful
Thanks for sharing!
That’s a nice one.
As far as I know, the GitHub wiki is the only place where there are development examples for writing a gmic-qt compatible plug in, to wit:
The gmic-qt adaptation of this could serve as an illustrative example in a third, grande finale “Making even more interesting custom filters.” It is a robust example and makes use of math expressions in an interesting way.
Possibly there is a place for such a “1. 2. 3.” series in the tutorial conglomerate, a Cookbook, as there is nothing there at the moment which connects G’MIC scripting and writing a gmic-qt filter, though just that task, and no other, is what might likely motivate most (potential) script writers. Probably save further remarks on this for my end-of-month “Tutorial Fragments” write-up.
Bonjour,
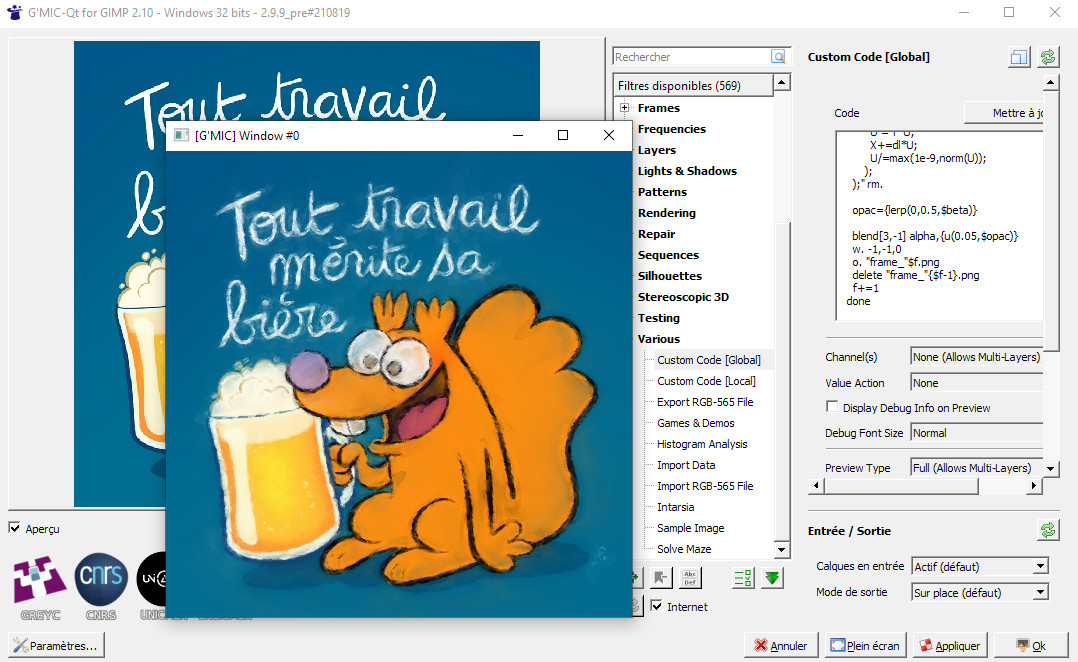
It is possible to test the last filter created by David on G’MIC-QT for GIMP 2.10 - 2.9.9_pre
It is necessary to update.
You can place a command in ‘Various> Custom Code’, for example :
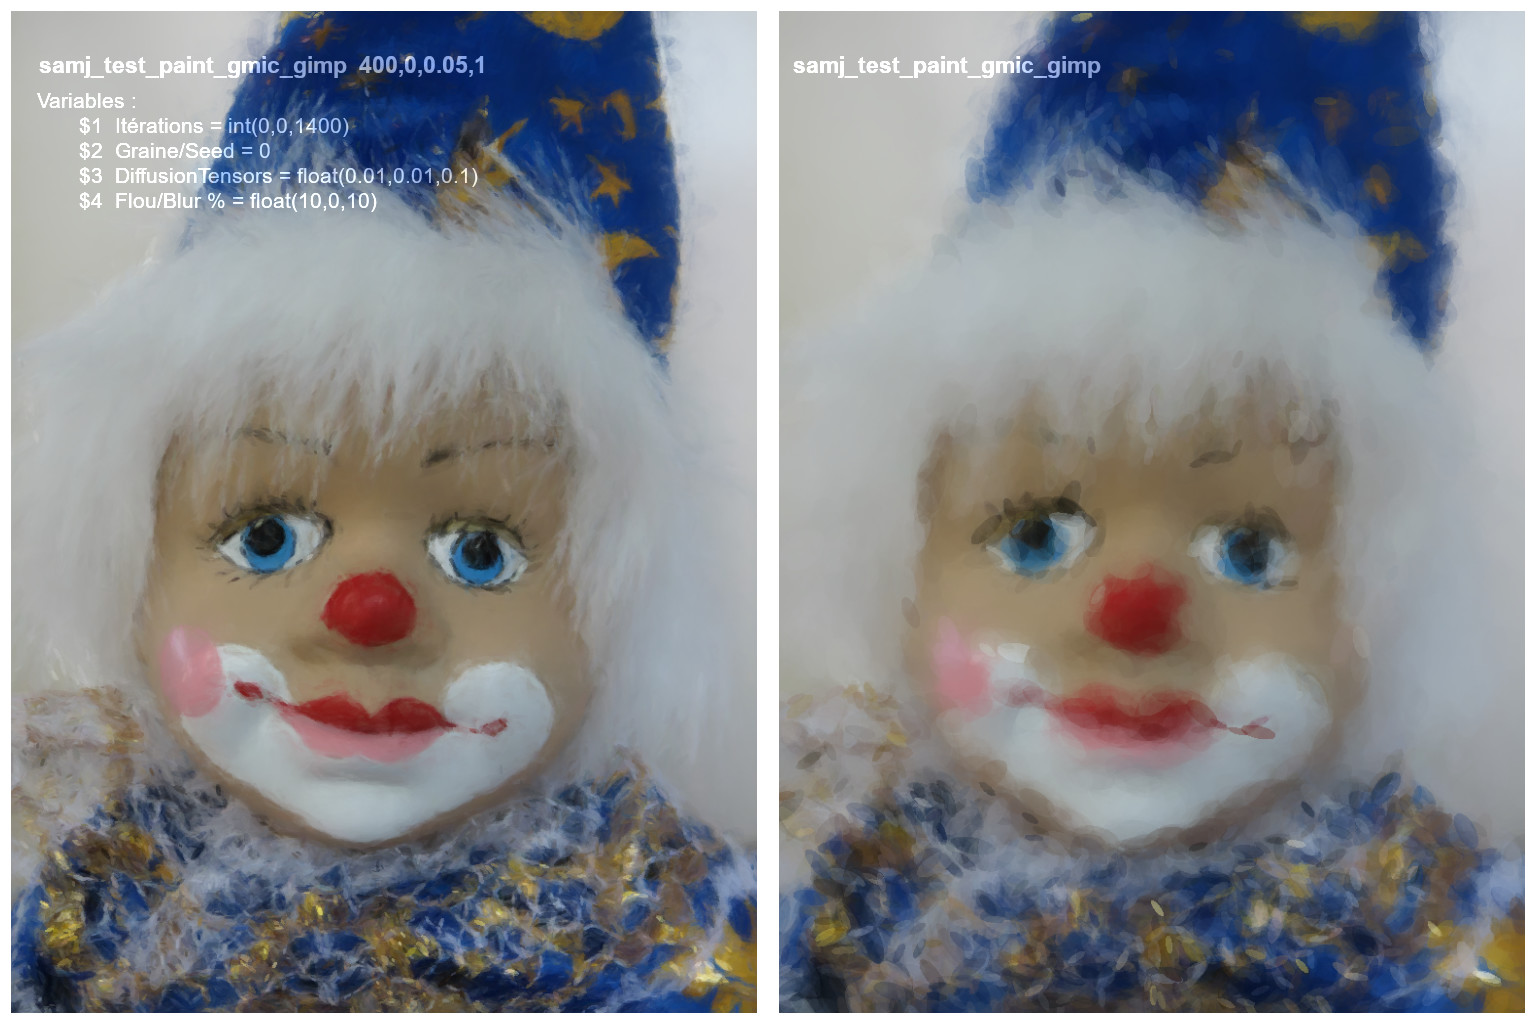
samj_test_paint_gmic_gimp 400,0,0.05,1
Variables samj_test_paint_gmic_gimp $1,$2,$3,$4
$1 Itérations = int(0,0,1400)
$2 Graine/Seed = 0
$3 DiffusionTensors = float(0.01,0.01,0.1)
$4 Flou/Blur % = float(10,0,10)
There is no GUI because it’s a test.
2 examples:
Still working on this painting algorithm, and many changes have been made so far.
Hopefully, it will become a usable filter for the G’MIC-Qt plug-in soon
@David_Tschumperle
Bonjour,
Thank you, It’s very appreciated and very nice of you to create this new filter.
:o)
I love this!
(is there any handholding guide to create render animations like those here? I love them and want to try them on some of my pics!)
Bonjour
Do you want to create a video when using the filter (sample paint_3_test.mp4) ?
If this is the case the frames saved during the operation of the filter under ‘GMIC-QT-GIMP Win’ must be in .png format.
I need to check how to do that on linux
Here is a quick-and-dirty way:
- For a starting point, take the version in the inclusion of Post 11.
- Cut/paste the inclusion contents into a file. Call it
mypaint.gmic.It can be used as a gmic command file. - For
ffmpeg(discussed later) Choose/scale an image to animate to a 16:9 aspect ratio with an evenly divisible height: perhaps 720×504. Other tools may not need this requirement. - Run the command file in a shell:
gmic mypaint.gmic input <path_to_the_image_file_to_be_animated> paint.
- A preview appears on your screen. Observe the image as it forms.
- After a minute or two, depending on the size of your image, the image stabilizes.
- Hit CTRL-C in the launch shell. Your shell prompts returns.
- Your current directory will have a number of image files of the form
frame_xxxxxx.jpgwherexxxxxxis a six digit sequence number. These are your animation frames. - You could use a tool like
ffmpegto composite the sequence. See restriction in step three. Try, for example:
ffmpeg -framerate 30000/1001 -i frame_%06d.jpg -c:v h264 -bf 2 -g 30 -crf 18 -pix_fmt yuv420p -c:a copy -movflags faststart paintanimation.mp4
This creates an h.264 encoded .mp4 file with a framerate of 29.97, suitable for uploading to Youtube.
The line on. frame.jpg,$f f+=1 sets the counter and output format. Change to foobar.png,$f f+1 if you prefer to output .png files with the foobar prefix instead.
Other ways to do this, but this is a quick start. Have fun!
I’m currently writing a full-parameterized filter for the plug-in. Hopefully, it will be ready before tomorrow
Bonjour,
A sixth parameter is added to the test filter (samj_test_paint_gmic_gimp) to create a PNG image sequence.
We must put 1 as the value of the sixth parameter to obtain a sequence.
This change is tested under GIMP 2.10 / GMIC 2.9.9_pre Windows and Xubuntu. Necessary update of GMIC filters.
These images are found in the temporary directory :
Xubuntu : /tmp/\\frame_000000.png
Windows : C:\Users\[user]\AppData\Local\Temp\frame_000000.png
Command lines under GIMP 2.10 / GMIC 2.9.9_pre for obtaining the image sequence :
rm
fx_gmicky 0
resize 480,480
samj_test_paint_gmic_gimp 300,0,0.05,1,1
Terminal FFMPEG command lines to get the video :
Xubuntu : ffmpeg -i "/tmp/\\\frame_%06d.png" -c:v libx264 -vf "yadif,fps=25,format=yuv420p" "/tmp/test_paint.mp4"
Windows : ffmpeg -i "C:\Users\[user]\AppData\Local\Temp\frame_%06d.png" -c:v libx264 -vf "yadif,fps=25,format=yuv420p" "C:\Users\[user]\AppData\Local\Temp\test_paint.mp4"
Under Windows Replace [user] by the user’s name.
I’ve pushed a first version of the filter in the latest filter update for G’MIC 2.9.9 :
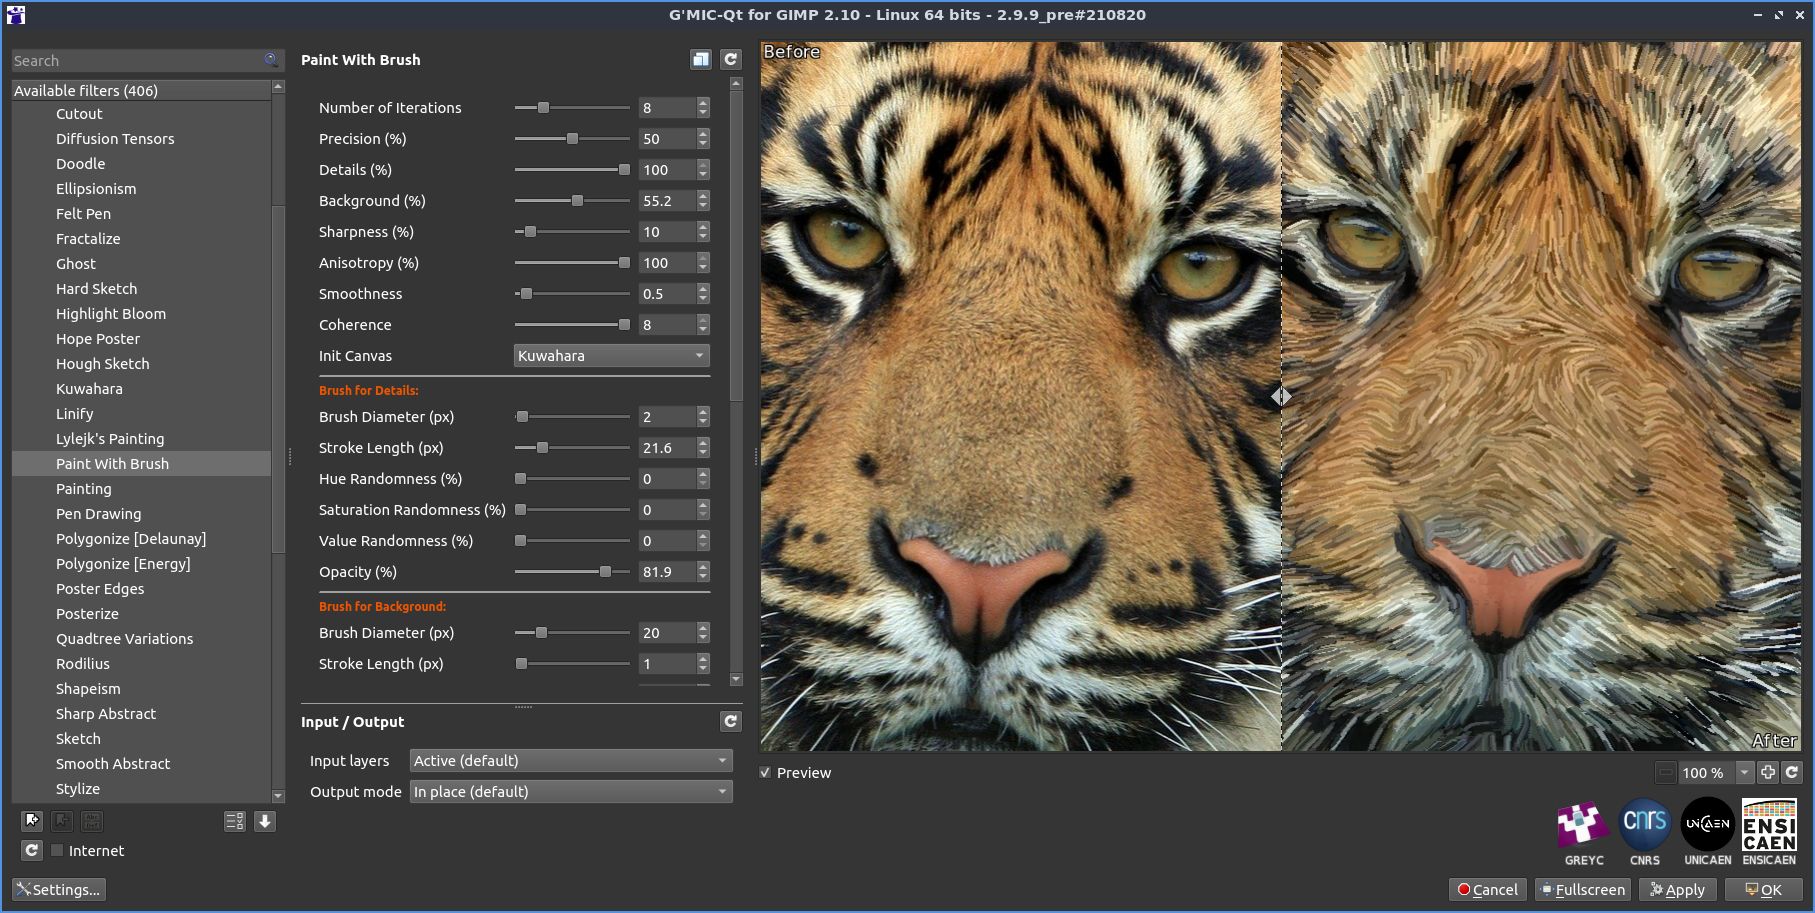
Feedback is welcome.
Be aware that:
- This requires G’MIC 2.9.9_pre (current development version) to work.
- This is a slow filter, even though it uses all your CPU cores when available.
- There are tons of parameters to set (and basically no documentation about them right now).
As the number of parameters is quite large, I’m planning to add a “Predefined Style” combobox, that would be used to choose between different set of parameters for this filter. I’d be interested by any cool style you may achieve playing with these sliders (as well as a corresponding style name).