I have a lot of old 35 mm negatives which I am trying to archive.
The scanning process is done with a mirrorless camera, macro lens and combination of film holder and light (valoi easy35). This is a fast, streamlined process and gives good consistant results. I scan with fixed parameters (f8, 1/80s, iso100)
There will be a lot of negatives to process, which is why I want to reduce editing every photo to a minimum.
For a single photo, I am able to achieve good results with negadoctor, which come close to the photos straight from the lab.
However, as soon as I try to apply these settings to the other photos from the same roll (by pressing ctrl c+v), I almost always have to readjust those values heavily to get a proper result (esp. colour cast and too dark/bright), in the end basically resetting negadoctor and starting all over again.
Of course I realize that I have to adjust every photo, but I thought that I could at least transfer some values over to the other negatives from the same roll of film (I mean, at least the base colour of the negative shouldnt change?)
Apart from the modules I cannot deselect, I only use negadoctor (+ crop/orientation) modules for developement.
In negadoctor I often rely on the dropper function to set the colour base and dMax. I am not sure if ctrl c+v copies the absolute values of negadoctor, or if it copies the selected area of the dropper and calculates the values again for each photo? Maybe that is the problem?
I am relatively new to darktable in general and much more used to Capture One where I usually edit my RAWs.
(I tried Filmlab for negatives as an alternative, which works really well regarding automation and consistency but lacks fine tuning and is a subscription based app. But at least I could confirm that the RAWs and roll of film are fine)
Module settings are the values you see in the UI, not their sources (at least I have never seen a module that stored a picker position). It is strange that the negadoctor settings vary from frame to frame.
Try getting consistent results by only adjusting “film properties”, maybe “paper properties” before touching “corrections”
Don’t correct anything in negadoctor that is specific to the individual photo
For individual, artistic corrections, use other darktable modules and move them up in the pipeline above negadoctor.
The autolevels Lua script currently neither supports negative images nor camera RAW formats. What you could try though is to post-process the exported positive images with RetroShine, which also uses AutoLevels as a backend and would do the automatic color correction for you.
I am also in process of archiving my negative films and by no means I am an expert.
Why don’t you check and compare the negadoctor values for each image to see if they are same?
In my case I made a preset for it and apply it that way. It be it on small sample, so far I am getting good result. Of course you know as @kofa mentioned in one of inquiries that I made some of modules like exposure needs to be after negadoctor in order for them behave normally. So I also made module order for my negative processing.
Hi. I’m in the same process of archiving a lot of negatives from my old man. I already did a few thousands pictures and negadoctor is imho the best tool for this (and I have lightroom and Negative Lab Pro, Smartconvert, and a few others). First of all, deactivate the color calibration and the tone mappers.
Before negadoctor, be sure to use a constant white balance for the entire roll. I use the neutral of my camera. It could also be taken on the film base directly, or on the light that you are using to backlight your negatives (official recommandation from the darktable doc). I saw a few debates online about this. Some purists even totally deactivate it. The most important thing : copy paste the white balance to the entire roll.
Fix the Dmin (film support color or whatever it is called in english, the first item) on a portion of the film base (unexposed). I shoot a picture only for that, with a good portion of the film base between 2 pictures. My advice : don’t rely on 3 pixels on the border of the frame, use a large area. This part will adjust the channels R, G and B so the film base is black. Copy paste to the entire roll.
For the Dmax, I use the picker on the brighter picture of my roll, sometimes I correct the value a little bit, and copy paste it to the entire roll. Most of the time, it’s good enough for every picture.
I don’t touch the exposure bias.
Here comes the tricky part : the color correction. Most of the time, I don’t really really need to correct the colors of the shadows, it’s not mandatory. The corrections of the shadows are already imo partially covered with the Dmin, but you can do it. If your film is old and damaged, you maye have to do it.
The white balance of the highlights will be the most important part. Now you have to chose a frame with something in it that you think is white. Ideally, for a daylight film, a daylight picture of course. You may have to do some trial and error to achieve this. You can use the picker, then modify the R, G and B values, of course. Copy paste the value to the entire roll. You will very quickly see if the value makes sense or if there is a noticeable color tint remaining. Adjust, copy paste to the roll, adjust, copy paste to the roll, etc until you think that it’s a good base to begin with. By copy pasting this unique value to the entire roll, you will discover for each picture if the light was warm, cold, etc. You will be aware of the mood, then how much you correct it is up to you :
Here come the indivual adjustments. Personally, I still use the highlight white balance inside negadoctor to color balance the individual pictures if they need it. It gives way better results for me than a color calibration instance put after negadoctor in the pipeline. It’s roughly equivalent to the color balance tool, but for various reasons I prefer to correct in negadoctor as well.
I use the 3 sliders like I would use a white balance tool to correct every normal, positive raw file. But most photographers are not used to use 3 channels like that, we are used to the 2 sliders : Kelvin and tint. A rule of thumb to use the 3 sliders without getting lost :
If you want to make your image warmer, add +1 on the red channel and -2 on the blue channel. Or +2 and -4, + 5 and -10. This “-2 ratio” will give you roughly the equivalence of a movement of the kelvin slider toward a warmer picture. Do the opposite if you want a colder white balance.
use the green slider like you would use a tint slider in a classic white balance.
Then use the print properties (third item) to individually adjust the tonality of your picture.
After that, use whatever you want in Darktable to fine tune your picture. But I almost never use anything else to correct the colors.
A bonus tip about the color profile that you could use inside darktable, that is not related to the consistency that you’re looking for. The official recommandation is to use the standard color matrix. I think that it often lead to some nuclear greens. For several reasons explained here : Input color profile to use for negatives I use linear REC2020 as both the working profile and the input profile. It’s way smoother. I use it with some corrections using the RGB Primaries module placed just before negadoctor in the pipeline. I give you the values :
EDIT : and no, negadoctor doesn’t copy paste “measurements”, it just copy paste values, you can indeed check what the values are. Copy pasting the use of the pickers would require a lua script, and it’s usually very slow.
I discovered this too back when I digitized my old negatives 5-6 years ago. I posted about it here and it turned into a discussion mostly about light sources. It might or might not be of interest in this discussion: Negatives and color profiles
Thank you all for your advice, much appreciated!
Sorry it’s taking me some time to respond, I will try out all of your suggestions and post again with some sample jpegs/RAWs, hopefully this evening.
Now That seems some season negative film editors are present.
Let me ask you @Ayoul@hpbirkeland where do you put the negadoctor?
Do you pull it down to just before exposure? or pull up exposure and tone equalizer above the negadoctor? Does any other modules rearrangement necessary?and in what order?
Turn off white balance and color calibration?
Note that I am bringing all my negatives as scanned in photo scanner in dng format.
I am reading the manual and trying to understand input color and all other early and initial modules. I think it is essential to understand them fully before any attempt to start rescanning all my archives. It is big task and I want to start on right footing.
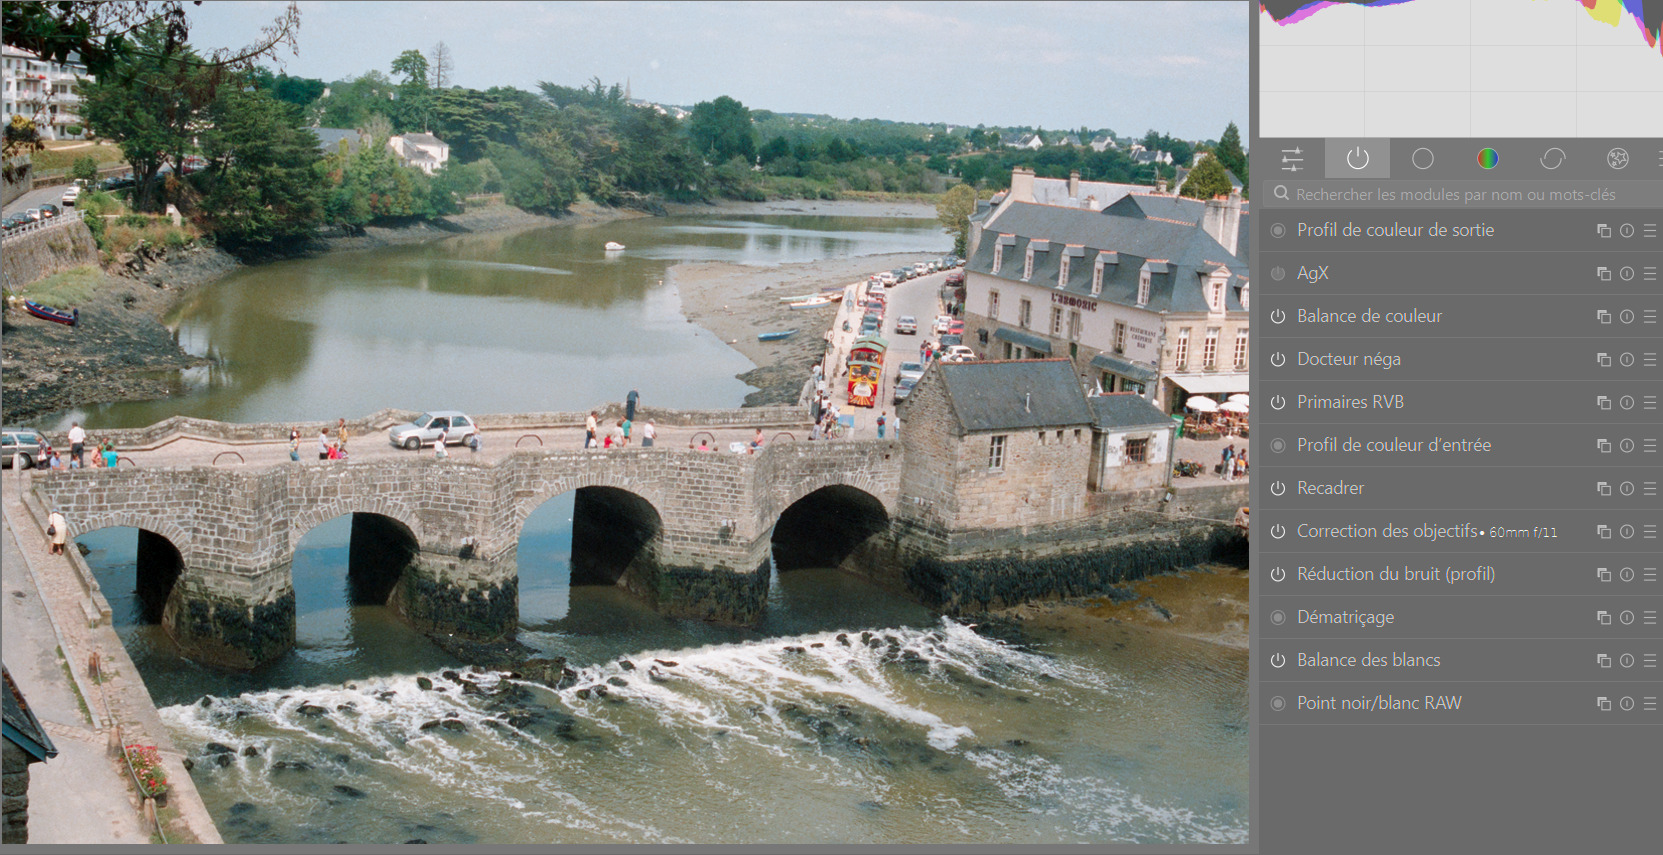
Negadoctor is on top, as you can see. With the white balance tool inside negadoctor, the black, gamma and exposure, I have almost everything I need. You can put an exposure after it if you want, I prefer to use an Agx to correct exposure even if it’s not the main purpose of this tool.
Definitely , simpler with least amount of change.
Did not look at negadoctor like that before.
I will study your earlier post to understand it more.
Thank you.
I forgot the most fundamental part if you want a copy paste of negadoctor to produce a decent first result : your shooting parameters should be of course identical for your entire roll : same f stop, same (low) iso, same shutter speed. Otherwise a copy paste don’t give consistent results. And use the crop tool before negadoctor otherwise all the pickers will get lost if some borders are included in the measurements.
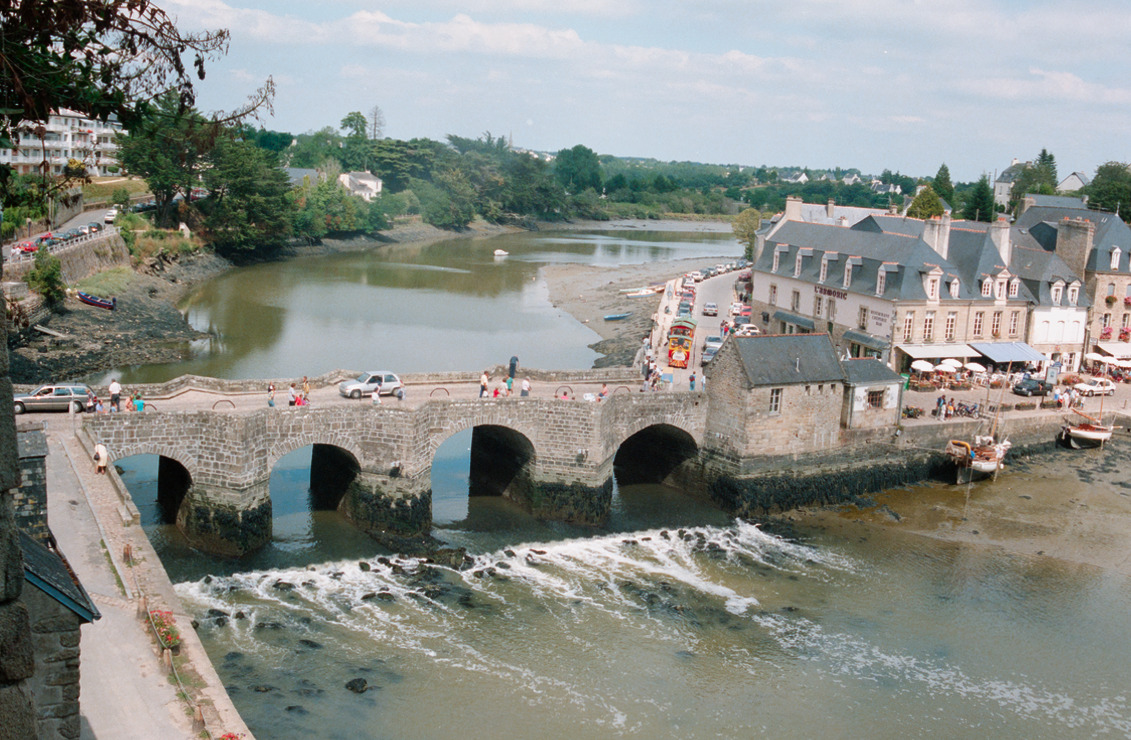
I guess that I can share here a file for you to inspect it :
In this roll, all the other pictures have exactly the same :
film base
dmax
scan exposure bias (default value)
shadows color cast (none)
highlights white balance
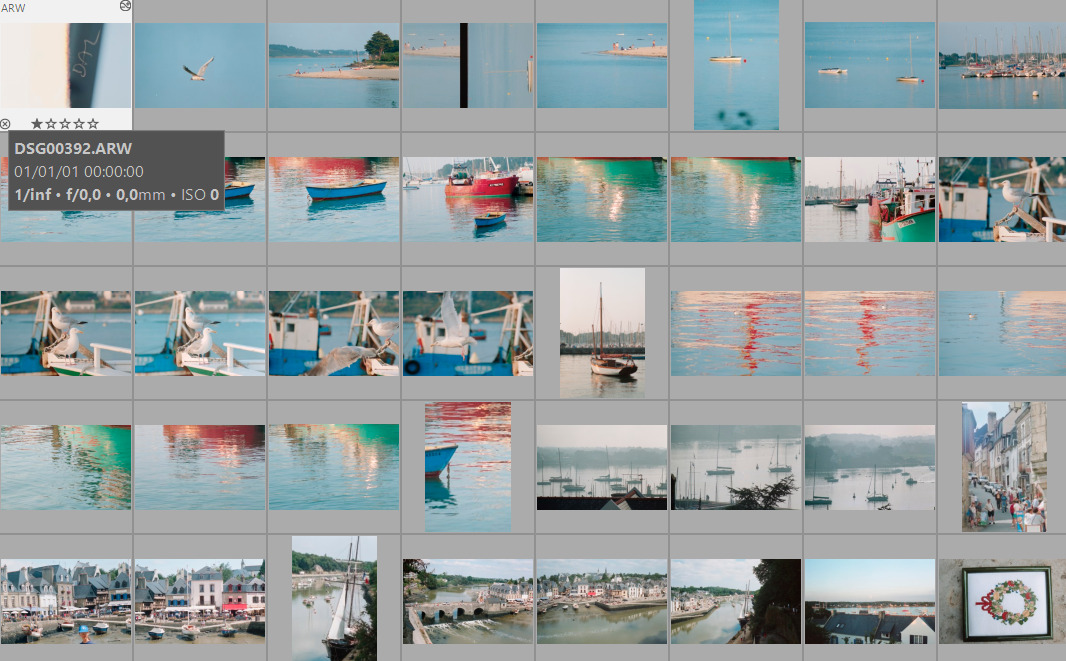
Only the print properties are differents. Of course, I would have corrected the highlights white balance if there was a few indoor shoots in the roll. A screenshot / contact sheet of the roll, you can see that the 4th picture is the one that I used to pick the Dmin, I always shoot a frame like that for each roll
You need to make sure crop is above negadoctor in the pixelpipe order. In the module group, click the icon that looks like a power button at the top to show just the active modules. Make sure crop is above negadoctor so that you don’t crop off the film stock that you may want to sample to get the film stock color.
Attached is a style, Negadoctor.dtstyle and a modulegroup preset, modulegroups_Negatives.dtpreset that will give you a pixelpipe order and group of modules for editing a negative.
Use preferences->presets->import to import the modulegroup preset and the import button from the styles module to import the style.
To use, apply the style in overwrite (set in the styles module) and then apply it to the negative. Open the image in darkroom. Select the module groups preset Negatives if it’s not already selected. Display the active modules, then click again to display all modules in the pixelpipe. This shows several modules that are turned off, but in the pixelpipe to be used and at the correct (IMO) place.
To use:
open the negadoctor module, but don’t enable it. Click the color sample, which should them pop up a dialog box over the image allowing you to select the appropriate film stock color. You can drag the box over a film stock region to help with matching. Click on the color and hit the select button to turn negadoctor on and see the positive image. Make any adjustments in film properties or corrections that you think you need to. I usually skip corrections because I’ve included the color calibration module in the style to correct the color (and in testing it did well).
adjust the exposure with the exposure module.
adjust tone with tone equalizer or color balance rgb brilliance settings.
use color calibration to correct the color. If it’s a black and white negative then set adaptation (in the CAT tab) to bypass and use the gray tab to adjust the black and white image.
Turn on the diffuse or sharpen instance before the input color profile to add sharpening to compensate for the AA filter.
Adjust color and contrast to suit. Keep an eye on the histogram to make sure it doesn’t go overexposed or check in other ways.
AgX is there is you need it, but in all my negative edits I didn’t. Since it’s film, it already has a film curve so adding another on top of it may not be productive. However if you edit is too much then you may need it.
I’ve included contrast equalizer. The clarity preset sometimes helps.
These tools are not necessarily “the way”, but it is one way.
@wpferguson Fantastic and thank you for sharing these presets.
The preset and style files that you shared has a “txt” extensions. Is it meant to be removed before import and use?
I finally had some time to try out the suggestions and play around with different modules and settings for a bit longer.
I think I found the reason for my problem - it’s probably a very basic one:
I saved my basic settings for developing a negative as a style (only minimalistic modules as explained by @Ayoul - thanks again!
When I apply the style in ‘darkroom’ on a single photo, everything works as intended.
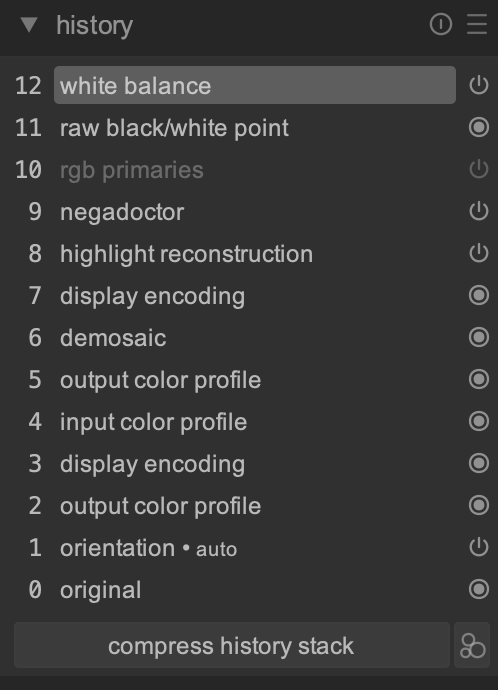
However, if I apply the style to many unedited (never opened) photos under ‘lighttable’ (mode:overwrite), it somehow auto-applies other modules to these photos - color calibration, sigmoid and exposure - which are not included in my style, thus ruining the colours and exposure.
How do I prevent darktable from doing this? I cannot find a button to turn it off, ‘mode:overwrite’ doesnt seem to help.