Batch denoise_cnn using BIMP not working

New to G’MIC from a curiosity on whether there were some open-source denoise solution powered by machine learning, giving all the AI buzz around photo editing world.
And it’s such a good learning along the way just by reading the thread: https://discuss.pixls.us/t/machine-learning-library-in-gmic/25746 Kodu to David the G’MIC team!

While trying to play around the plugin from a flatpak installed GIMP(2.10) and G’MIC(3.2.4), it worked quite well for single image processing. But at the same time, it seems to have issue working with BIMP for batch imaging processing. Below are my steps trying to using denoise_cnn to process a series of jpegs shot with high ISOs.:

  1. Open the 1st image into GIMP.
  2. Go to “Filters” → “G’MIC-Qt…”
  3. Type “denoise” and navigate to “Denoise” plugin which was powered by CNN.
  4. Modify the “Output Mode” as “New Image”. All others leaves as default.
  5. Click “Copy” icon on top-right of parameter panel to copy the command to clipboard.
  6. Close “G’MIC-Qt” window and open BIMP from main GIMP window in “File” → “Batch Image Manipulation”.
  7. Click “Add” and select “Other GIMP procedure” in newly opened BIMP dialog.
  8. Select “plug-in-gmic-qt” from the list.
  9. Paste the command into “G’MIC command string” text box. It’s like fx_denoise 0,1,0,6,50,50.
  10. Put “1” for “Input layer mode” and “3” for “Output mode”, matching the plug-in setup.
  11. Then add a series of JPG images and hit Apply.

After a couple of minutes hearing CPU fan spinning, I could find a new JPG created in the output folder. But it didn’t have been denoised at all and was just a smaller sized of the original file.

Since denoise a single picture with gmic-qt plugin went well, I’m pretty sure the generic g’mic running environment should be all good. The way I configured BIMP procedure seems all right.

Hence any clues on what might be wrong?

Thanks a lot!

I suspect it is the flatpak Gimp to blame, however you are one up on me, I can’t even get gimp_gmic_qt to work in a Mint21 (VM) flatpak. Tried the flathub options, admin / user / version 2.40 / version 2.36, in all permutations and gmic always crashes.

Using a regular Gimp 2.10.34 (from PPA) / kubuntu 22.04 and BIMP / gimp_gmic_qt (from gmic.eu)

I would suggest trying without gmic outputting to a new file, leave that up to BIMP. BIMP defaults to the same format as the input but you can always add a “Change format & compression” after gmic procedure if you want.

That is 1 for input / 0 for output and the gmic command copied straight from clipboard

One minute video demo: might / might-not work imgur refusing videos for some reason so an alternative

For me on Windows 10 64bit it also doesn’t work with BIMP (as well as with ExportLayers).
It also doesn’t work using custom code.
Another thing is that the preview works capriciously, e.g. when Zoom=100% for the same image it looks different. (e.g. “Denoise” with setting = 100% gives actual preview = 200%, custom code set to preview = 200 ends up with = 100% at display = 200%).
The screenshots will explain what’s wrong:

It does not work:

Wrong magnification display:

@David
Was it (is) intended?

Welcome aboard!

Perhaps you might consider using the CLI command input_glob as your batch fetcher. For this:

  1. Set up an input directory for incoming work. Say: dn_in.
  2. Set up an output directory for images that have been denoised. Say: dn_out
  3. Write this G’MIC command module file; name it batchdn.gmic:
batchdenoise : skip ${1='denoise_in'},${2='denoise_out'}
   in,out=${1-2}
   input_glob $in/*
   foreach
      basename {0,n}
      nm=${}
      denoise_cnn. 1,32             # Adjust these two arguments as needed
      output. $out"/dn_"$nm
      }
  1. In the top-level directory containing batchdn.gmic, and directories dn_in and dn_out, run:
$ gmic batchdn.gmic verbose + batchdenoise dn_in,dn_out

verbose furnishes something of a progress report.

This is a linux flavored script, but I don’t think translation to Windows terms would be that hard. In any case, this approach bypasses BIMP and keeps the jumping-through-hoops count down to a fairly low level.

Hope this helps.

Thanks for your detailed video walk-through!

I have been using flatpak version for majority desktop Apps(including GIMP) for quite a while and seldomly had any issues.

The G’MIC offered by my distro(Fedora 38)is a bit behind the current official release(3.1.6). To avoid introducing version difference in this troubleshooting, I booted into Win11 on the same machine with a fresh installed copy of GIMP 2.10.34, BIMP 2.6 and G’MIC 3.2.4, all from official site binaries.

Following what you suggested, I left 1 for input and 0 for output in GMIP.

bimp-custom-procedure-win11

bimp-dialog-win11

For my 33M JPG, it took one minute longer than Fedora on the same to finish. Still it finished without error. Unfortunately, what I got is another smaller JPG without denoise

I guess this may not just be a problem exclusive to Flatpak Linux.

Thanks a lot for providing the script, particularly in the g’mic module fashion!

I had considered using G’MIC CLI interface to test during the troubleshooting. But the release packaged in my distro is a bit behind at 3.1.6.
I will surely tried your script later.

What are those two parameters for? I tried to guess based on denoise_cnn. But the value doesn’t seem to match either.

Ah. A terminally curious insomniac. Such questions will, most certainly, play hob with your circadian rhythms — too much, and you’ll turn into a technical writer. From there, you will lose all contact with your kith and kin; but if you must know:
TL;DR

  1. Argument one: picks a neural network and associated weights.
  2. Argument two: sets a patch size.

Read after breakfast:

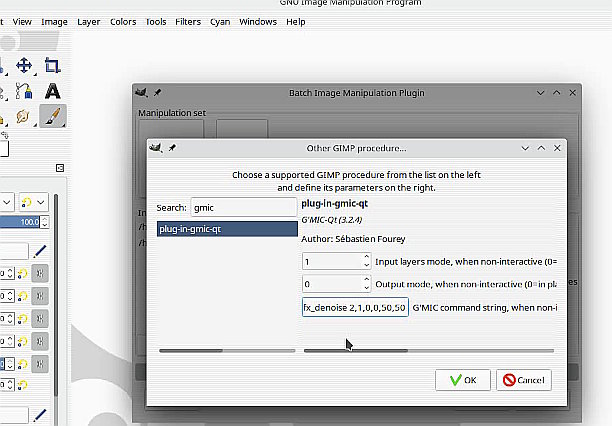
Try (in a linux bash shell; with Windows, your mileage will vary):

gmic input_cached gmic_denoise_cnn.gmz k[1] unserialize. ot. /tmp/gmic_nnet.gmic

which (hopefully), in your world, dumps out in a manner similar to this:

[gmic]-0./ Start G'MIC interpreter.
[gmic]-0./ Input cached file 'gmic_denoise_cnn.gmz'.
[gmic]-5./ Keep image [1] (1 image left).
[gmic]-1./ Unserialize image [0].
[gmic]-1./ Output image [12] as text-data file '/tmp/gmic_nnet.gmic'.
[gmic]-13./ End G'MIC interpreter.

And then:

$ cat /tmp/gmic_nnet.gmic
nn_init nn_layer_input X,32,32,1,3 nn_layer_clone X0,X1,X nn_layer_conv2d BLUR,X1,3,5,1,1,0 nn_layer_append X2,X0,BLUR nn_layer_conv2d C1_0,X2,32,3,1,1,1 nn_layer_nl C1,C1_0,leakyrelu nn_layer_conv2d C2_0,C1,32,3,1,1,1 nn_layer_nl C2,C2_0,leakyrelu nn_layer_conv2d C3_0,C2,32,3,1,1,1 nn_layer_nl C3,C3_0,leakyrelu nn_layer_conv2d C4_0,C3,32,3,1,1,1 nn_layer_nl C4,C4_0,leakyrelu nn_layer_conv2d C5_0,C4,32,3,1,1,1 nn_layer_nl C5,C5_0,leakyrelu nn_layer_conv2d C6_0,C5,32,3,1,1,1 nn_layer_nl C6,C6_0,leakyrelu nn_layer_conv2d C7_0,C6,32,3,1,1,1 nn_layer_nl C7,C7_0,leakyrelu nn_layer_conv2d C8_0,C7,32,3,1,1,1 nn_layer_nl C8,C8_0,leakyrelu nn_layer_conv2d C9_0,C8,32,3,1,1,1 nn_layer_nl C9,C9_0,leakyrelu nn_layer_conv2d C10_0,C9,32,3,1,1,1 nn_layer_nl C10,C10_0,leakyrelu nn_layer_conv2d C11,C10,3 nn_layer_add OUT0,C11,BLUR nn_layer_crop OUT,OUT0,2,2,0,29,29,0 nn_loss_mse L,OUT,Y nn_trainer T,L,1e-4,adam,constant

NB: the file gmic_denoise_cnn.gmz almost certainly lives in your gmic cache directory; it is implicitly downloaded once you start working with the various nn_* commands ( But, sometimes, not ). That compressed file is a container for the various neural networks that @David_Tschumperle has published so far. Here, we pick one arbitrarily, type 1, aka heavy, from the set: (0) smooth, (1) heavy, (2) heavy (faster), (3) poisson+gaussian, (4) poisson+gaussian2, unserialize it, giving us 12 data sets (packaged as images) and a gmic script, also packaged as an image. We text-output that last image into a temporary file for later study.

I have not (so far) spelunked any of these scripts or allied data sets. In the fullness of time (which, in Tutorial Land, can approach decades), I should make a Beginner’s Cookbook. Not now; read Neural Networks in G’MIC: An introduction to the API of nn_lib instead. In any case, that’s your first argument to denoise_cnn: it picks one of the five neural network scripts that have been composed so far at the Global G’MIC World Headquarters, along with its allied data sets, and the same are turned loose onto your noisy photographs.

The second argument, patch_size, is more tractable. It runs img2patches <patch_size>,6,3 on your image. That cuts the image into patch_size × patch_size squares with mirrored overlap regions (6 pixels wide) on the borders so that the workload can be spread among the various cores you have available. When we run off of edges, mirror policy is in play.

So, ignorant that I is of neural network types, I just take them to be various magical black boxes and write myself a little finger exercise to spelunk , let’s call it noisesampler.gmic:

dncnnsample: skip ${1=0}
   -check isint($1)
   patchsz=$1
   denoisetypes=smooth,heavy,heavy\ (faster),poisson+gaussian,poisson+gaussian2 
   numtypes=narg($denoisetypes)
   -name. testimg
   -arg2var _ns,$denoisetypes
   -repeat $numtypes
      +denoise[testimg] $_ns{$>},$patchsz
      -normalize. 0,255
      -text_outline. "Type:\ "${_ns{$>+1}},8,8,15,1
      -text_outline. "Patch\ Size:\ "$patchsz,8,23,15,1
   -done
   text_outline[0] "Original",8,8,15,1

And a run of that might give you something like this:

$ gmic noisesampler.gmic input alice.jpg r2dx. 25%,5 n. 0,255 noise. 10 dncnnsample. 16

And with a big patch size of 128:

$ gmic noisesampler.gmic input alice.jpg r2dx. 25%,5 n. 0,255 noise. 10 dncnnsample. 128

Larger patches run faster, but seem to be lower in quality. But (!) — your mileage may vary. It is always worth one’s while to explore parameter spaces with finger exercises. Especially before big batch runs.

This should be enough to burn off the rest of your day. Have fun!

I have to say it took me till lunch time to finish all the reading. :smiley:
Thank you so much!

Argument 1 is relatively easy to understand but where should I start to tune the argument 2? It sounds like both the resolution of the image and the number of CPU cores should be considered. How was it determined while using the G’MIC-Qt plugin? It cannot be the iteration slider, right?

Meanwhile, please allow me to step back a bit to my original reported symptom. With this issue presenting on both Flatpak Linux and Windows latest version of GIMP/BIMP/G’MIC-Qt set, I think it would be worth to let developers aware. Is there some additional information I could gather for further diagnostic? I could report to BIMP or GIMP if it turned out not G’MIC-Qt related.

It is set to 64 by default in the Denoise filter.

1 Like

Many thanks @David_Tschumperle !

Please let me know if I need to report the symtom described in 1st post to BIMP or GIMP developers, if this turned out to be not an issue of G’MIC-Qt plugin.

In the meantime, I still very happily enjoy the work of denoised result.

1 Like

Large patch sizes (128), tend to run faster but tend to blur edges. Small patch sizes tend to run slower, do a better job on preserving edges, may leave noise in areas with large changes in luminescence over small distances, like hair highlights. Run argument variances, as I did above, as the behavior of the neural networks changes. There is no universal sweet spot.

I don’t use BIMP. input_glob * foreach { <insert what you want to do here> } is low-overhead, involve few parts - just gmic - which means fewer things to go off the rails. So, I have little practical experience with BIMP. The only thing I can suggest here is to do the classical exercise of fault isolation. Does it happen with plugins other than gmic-qt? Are there gmic command combinations that always work? Are there gmic command combinations that always fail? For a developer, having detailed test cases that reliably produce the problem - and similar test cases that succeed - is golden, because a reliable trigger to a problem is more than half the way toward solving the problem. This is a lot of work for you, but solid, well-researched bug reports that reliably reproduce an issue for a developer is in itself an extremely valuable contribution to an open source project. Worth as much as code contributions - maybe even more so.

1 Like

Dangerous just to dismiss anything just because it does not work for you.

I showed a linux installation working. Apart from flatpak, BIMP is not difficult to compile for linux.

For Windows users. This using a Win 10 (VM) Gimp 2.10.34 / gmic_gimp_qt 2.3.4 / BIMP windows installer.

Very slow in Windows, BIMP for Win is 32 bit and I suppose that does not help.

The first thing that comes to mind is the gmic_denoise_cnn.gmz file. You need that. It is worth deleting your gmic profile, start gmic in Gimp and update to get a clean installation.

For my 33M JPG, …snip… Unfortunately, what I got is another smaller JPG without denoise…

Smaller ? That is smaller file size ? BIMP will save the result with a default quality 85 unless the user specifies a greater value.

1 Like

Thanks a lot for another demo showing it’s working in Win10 setup.
This turned my looking more into my setup.

In my previous test, all the single image denosing without involving BIMP work hence I assume the “gmic_denoise_cnn.gmz” file should be all good. Both Win11 and Flatpak setup of G’MIC are new.
Yes, I will delete current one and re-try again. I assume that’s also what the button “Update Neural Network” for.

The original JPG is 33MB in size and the smaller not-denoised one generated from BIMP flow is about 8MB. Resolution remained unchanged.

WOW. That is a big decrease in file size even assuming that the 33M jpeg is using 100 quality setting. Unlikely, but I wonder if there is an embedded thumbnail playing some part. My jpegs are typically about 7.5 MB and 4800x3600 - ish I can easily double that file size with a 100 quality setting.

Just on a speed basis command line gmic is probably the best bet.

Yes. from the sources (@line : 53255)

#@gui : Update Neural Network = button()

which sets parameter $3, then downstream:

  if $3 delete ${-path_cache}gmic_denoise_cnn.gmz fi
  repeat $2 { denoise_cnn $1,64 progress {round(($>+1)/$2*100)} }

which forces denoise_cnn to reload, and where the repeat count, $2 corresponds to the : Iterations = int(1,1,5) setting.

fx_denoise is the barest of wrappers around the underlying workhorse: denoise_cnn. As @David_Tschumperle noted, you don’t have access to patch size when you go the route of fx_denoise You may choose a network; you may choose the number of times to run the network over intermediaries (Iterations). That’s it. Judging from your argument list following fx_denoise you are just iterating once, and using the Soft neural network. I don’t see a lot of room for things to go wrong there.

So — for the sake of investigative bug reporting — have you ever tried using denoise_cnn directly in BIMP, and not through the wrapper fx_denoise? That is, type (perhaps) repeat 3 { denoise_cnn 4,32}, choosing here neural network Poisson+Gaussian and a patch size of 32 pixels² (or any other arguments that suit your fancy)? Does BIMP do better? Worse? Maybe, more importantly, are the results different (maybe dramatically so) from that if you ran at a shell $ gmic -i <some image> repeat 3 {denoise_cnn 4,32}? In such an evaluation, the visual results are as significant as .jpg file size. If the results of pure command line (just gmic) are qualitatively different from BIMP+GIMP+gmic, then I’d likely wonder what is happening in the BIMP+GIMP layer. This is all volunteer work, of course. Thank you for checking!

2 Likes

Sorry, I confused myself in my 2nd post, and probably to you as well.
Allow me to re-run my trials again and correct some numbers.

  • The original JPEG came from a 33M censor camera(Sony A7IV, X.FINE JPEG) at 7008*4672 resolution. Its file size is 25.6MB.
  • Single file workflow without BIMP, Denoise module as Soft with 1 iteration, GIMP can output a 100% quality JPG at 21.2MB size, 90% quality at 4.0MB and 85% quality at 2.9MB.
  • Workflow involved BIMP and same Denoise setting, not sure what the default quality setting is but the resulted not-denoised JPG is 4.1MB. Hence I guess it’s 90%?
  • i cannot find where I got the 8MB impression of the not-denoised JPG size. Perhaps another source file which I used for experimenting.

I will later delete the current "gmic_denoise_cnn.gmz " and update a new one for more trials, including using CLI interface.

Thanks,

Just as a note, BIMP accepts Gimp registered functions and not all of those either. There is a blacklist of ‘reserved’ words. An example, anything that registers using ‘save’ Not possible to directly run gmic but maybe be possible via a shell script. I do this for GEGL functions using a couple of python plugins.

I will later delete the current "gmic_denoise_cnn.gmz " and update a new one for more trials, including using CLI interface.

wget https://gmic.eu/gmic_denoise_cnn.gmz

Well. Heck :wink: . I can see the necessity of sanity-preserving constraint in a free-for-all text input, but it is necessities such as that — and the K.I.S.S. Principle — that send me off to the command line. Fewer parts to break. But I digress (Yes, you are digressing (Sorry! ( Now you’re digressing in a digression!!! (…)))). Confining myself to denoise_cnn, whether you use BIMP or not, you do need to experiment before processing any batch, as these neural networks run slowly, especially with low core counts. Also, a sweet spot among parameters for one set of images isn’t useful for other sets, so the question of best parameters is never settled.

NB: When denoise_cnn can’t find its neural network file, it downloads it automagically (usually), so simply deleting it triggers a refresh. Day-to-day refresh may be overkill, but not harmful. Week-to-week may be a more realistic refresh rate. Of course, when in doubt, refresh. Neural networks are still a volatile area in G’MIC, so your mileage will vary even with a particular set of parameters (but, perhaps not by much). Good luck!

My questions were completely ignored - so I’ll ask again:

  1. Why fx_denoise doesn’t work with ,Custom Code, (under G’MIC menu → Various). It doesn’t work in G’MIC, so why would it work with another application (e.g. BIMP)?
  2. Why is the fx_denoise preview invalid? (not a big problem for me, but such a good plugin shouldn’t have such incompatibilities).
    Maybe it’s just my problem?
    Regardless, I still think G’MIC is the best set of filters in Gimp.
    Constant thanks to the authors of G’MIC!

Well Heck, Ho Hum… :wink: Maybe it should be renamed “I cannot get Batch denoise_cnn using BIMP working”

I have demonstrated it working with both linux and Windows 10. Initial thoughts were/are that gmic_denoise_cnn.gmz file and maybe a sandbox issue with a flatpak. Next is that large jpeg file.

However, since BIMP only takes a single instance of ‘Use Other Gimp Procedure’ I often use this, normally with several procedures, just linear programming. This one, a single procedure for gmic. A bit of a nonsense since it can just as easily be entered into the BIMP gmic entry. A python plugin.

#!/usr/bin/env python
# -*- coding: utf-8 -*-

from gimpfu import*

def plugin_for_bimp(timg, tdrawable):

# put your gimp procedures here

    pdb.plug_in_gmic_qt (timg, tdrawable, 1, 0,   "fx_denoise 2,1,0,0,50,50"),

register(
        "python_fu_for_bimp",
        "for bimp",
        "select",
        "*",
        "*",
        "*",
        "<Image>/Tools/for-bimp...",
        "*",
        [],
        [],
        plugin_for_bimp)

main()

One advantage, it registers in the Tools menu, and can be checked, see the video.

Using BIMP it goes like this.

…and that is me done.