I am not sure it is that easy…I took an image and applied exposure…and your logic held but applying one more module…the results are not the same…My understanding is that normal blending has no real math the output layer is blended on the input based on opacity …zero the whole input image is essentially revealed in layer speak and at 100 the input layer is blocked by opaque pixels of the output layer or of the module. I really haven’t given it too much thought but in any case applying a second module of local contrast and using a snapshot…50 normal is not at all the same as 100% average so I am not sure that you can make that direct comparison…I think average is often used in software with a stack of images to reduce random noise…that would not be the same as blending the output at a certain level of opacity I don’t think…Can’t seem to upload a pic right now will edit the post later to show my image…!
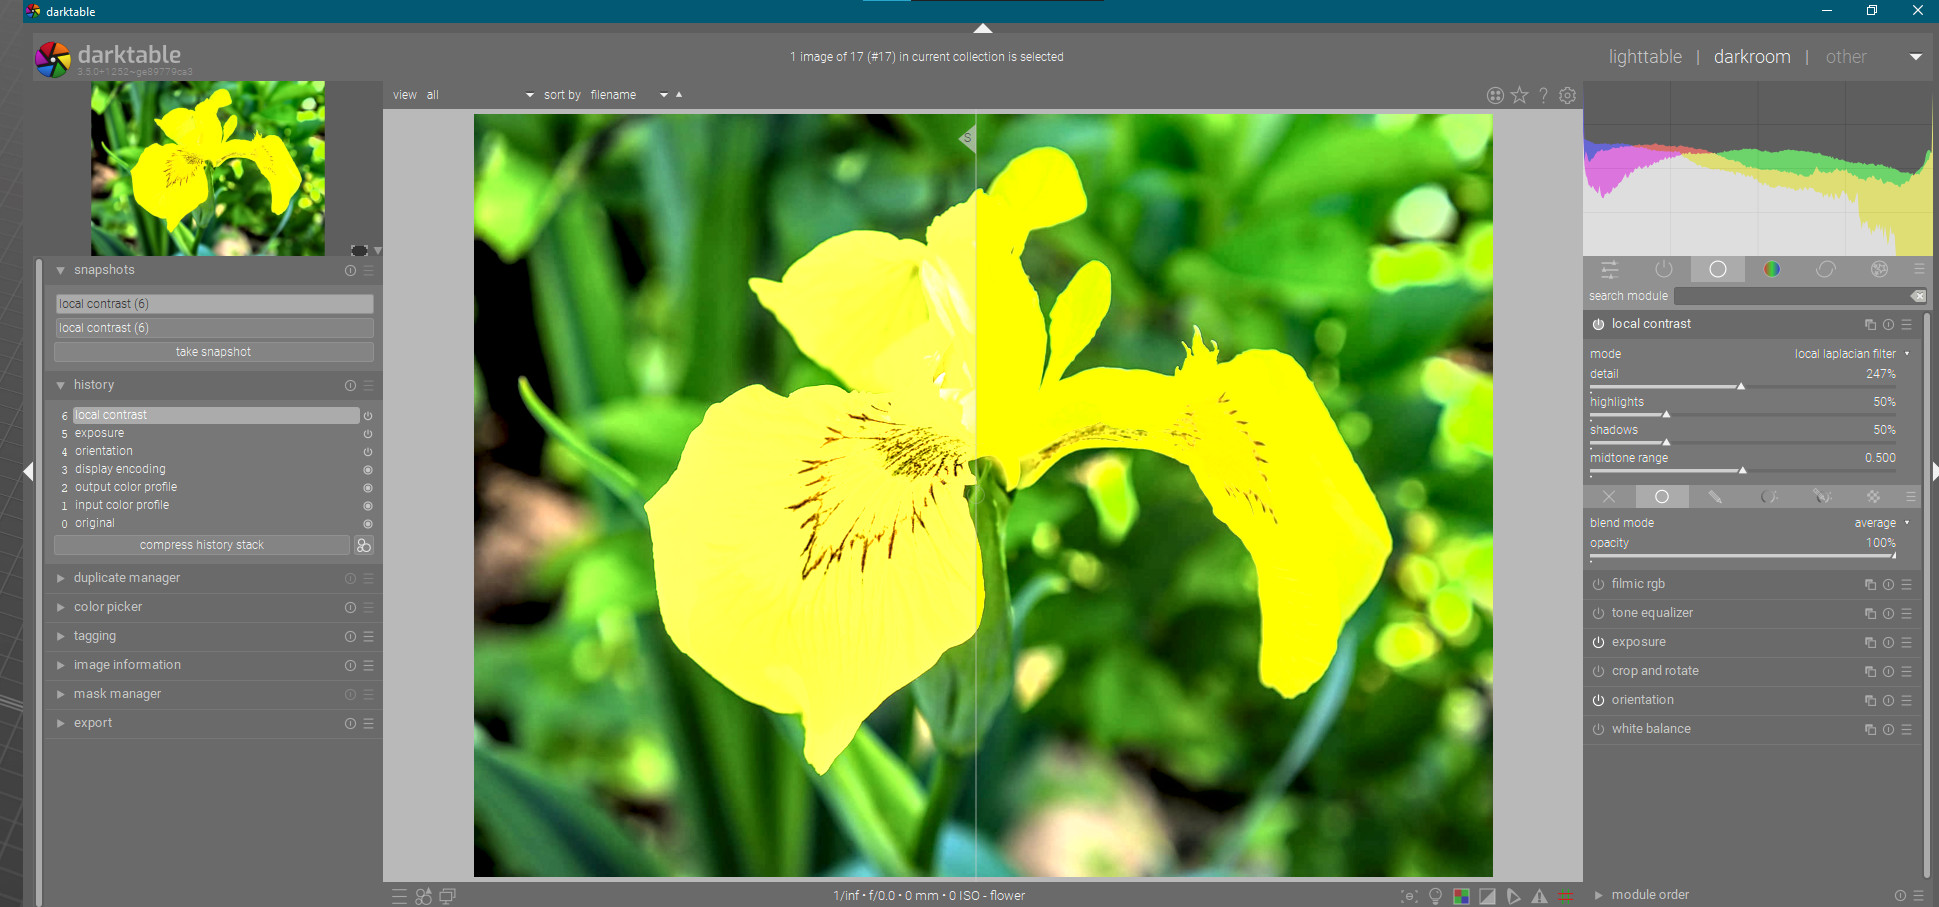
EDIT…LC module on the left 50% Normal and on the right 100 average…
image|690x322

A bit of a topic-bump, but I wanted to show this.
On1 NoNoise 2022 (open de ORF, default settings (which seemed fine, noise reduction is almost maxed) save as DNG, process in Darktable with lens-correction):

DxO Photolab 5, all the optical corrections and their DeepPrime thingie. Copy n pasted the Darktable settings, made sure lens-correction was disabled:

The difference in colorcast is interesting (more noticeable when viewing the entire picture, I guess).
Another crop, on1:

DxO:
I thought On1 was still kinda blotchy. I actually said this on their feedback forum, but I wished their slider would ‘go up more’. Their detail retention is quite good but for heavy images it just doesn’t do ‘enough reduction’ it feels like.
Now, when looking at 100% I have a hard time dialing in Darktable to be somewhat similar.
It looks very ‘blodgy’ or it looks over smoothed to me. The thing is, looking at the picture ‘as a whole’ they all seem fine.
DT:

ON1:

DxO:

But to be honest, just doing chroma denoising and leaving the luma in their and then ‘viewing the image as a whole’ it seems fine as well :).
What I did for a while with film-negative-scans, is that I ‘over smooth denoise’ the image, so that it is quite overdone. But then I ‘compare’ the original image with the heavy-denoised image, just like when doing frequency separation. So I basically have an over smoothed image, and I have a layer that is just the noise / details that I removed.
I then edit that over smoothed image to do color + contrast and other things, and as a final step I overlay the ‘noise/details’ layer on top of it. Most often in ‘luminance blending mode’ to leave the chroma noise behind… but also playing with the opacity sometimes.
But often this works very nice, and in the final image I leave the noise in. This way you can even do sharpening + resizing, as along as you keep the layers separate and only merge them as a very last step.
… if something like that could come to DT it would be nice :). ‘Separate the noise’ early in the pipeline, do your stuff, then apply it back on top at the end of the pipeline. Makes the ‘auto buttons’ also more reliable, I’m guessing.
I have ON1 as well. most times in my limited expting I have to reduce their detail slider often to 0 as it introduces a lot of artifacts…it might also come from sharpening…and my pc is older so this Denise takes like 30 seconds to run…Im not massively impressed with it. In DT I often use surface blur which is the old bilateral Denise with a low radius even like 1 and it often does a nice subtle job …also tweaking astrodenoise can give really nice results on the sky…So I try Denoise profiled…defaults at first or more often just use it’s color noise preset and then if I need to address Luma I try surface blur or astro with tweaks and in combination with the detail masking
Maybe I need to try it more often , to see what i can get out of it . I don’t do it that much , and it makes my darktable run slow as …
Thanks for the tips , might play around with it a bit more to get the hang of it. Maybe going for the tra smooth look and then using the blending options to reduce the effect is also a good idea (make sure the denoising doesn’t cause artifacts, then control the amount of denoising with blend opacity ) .
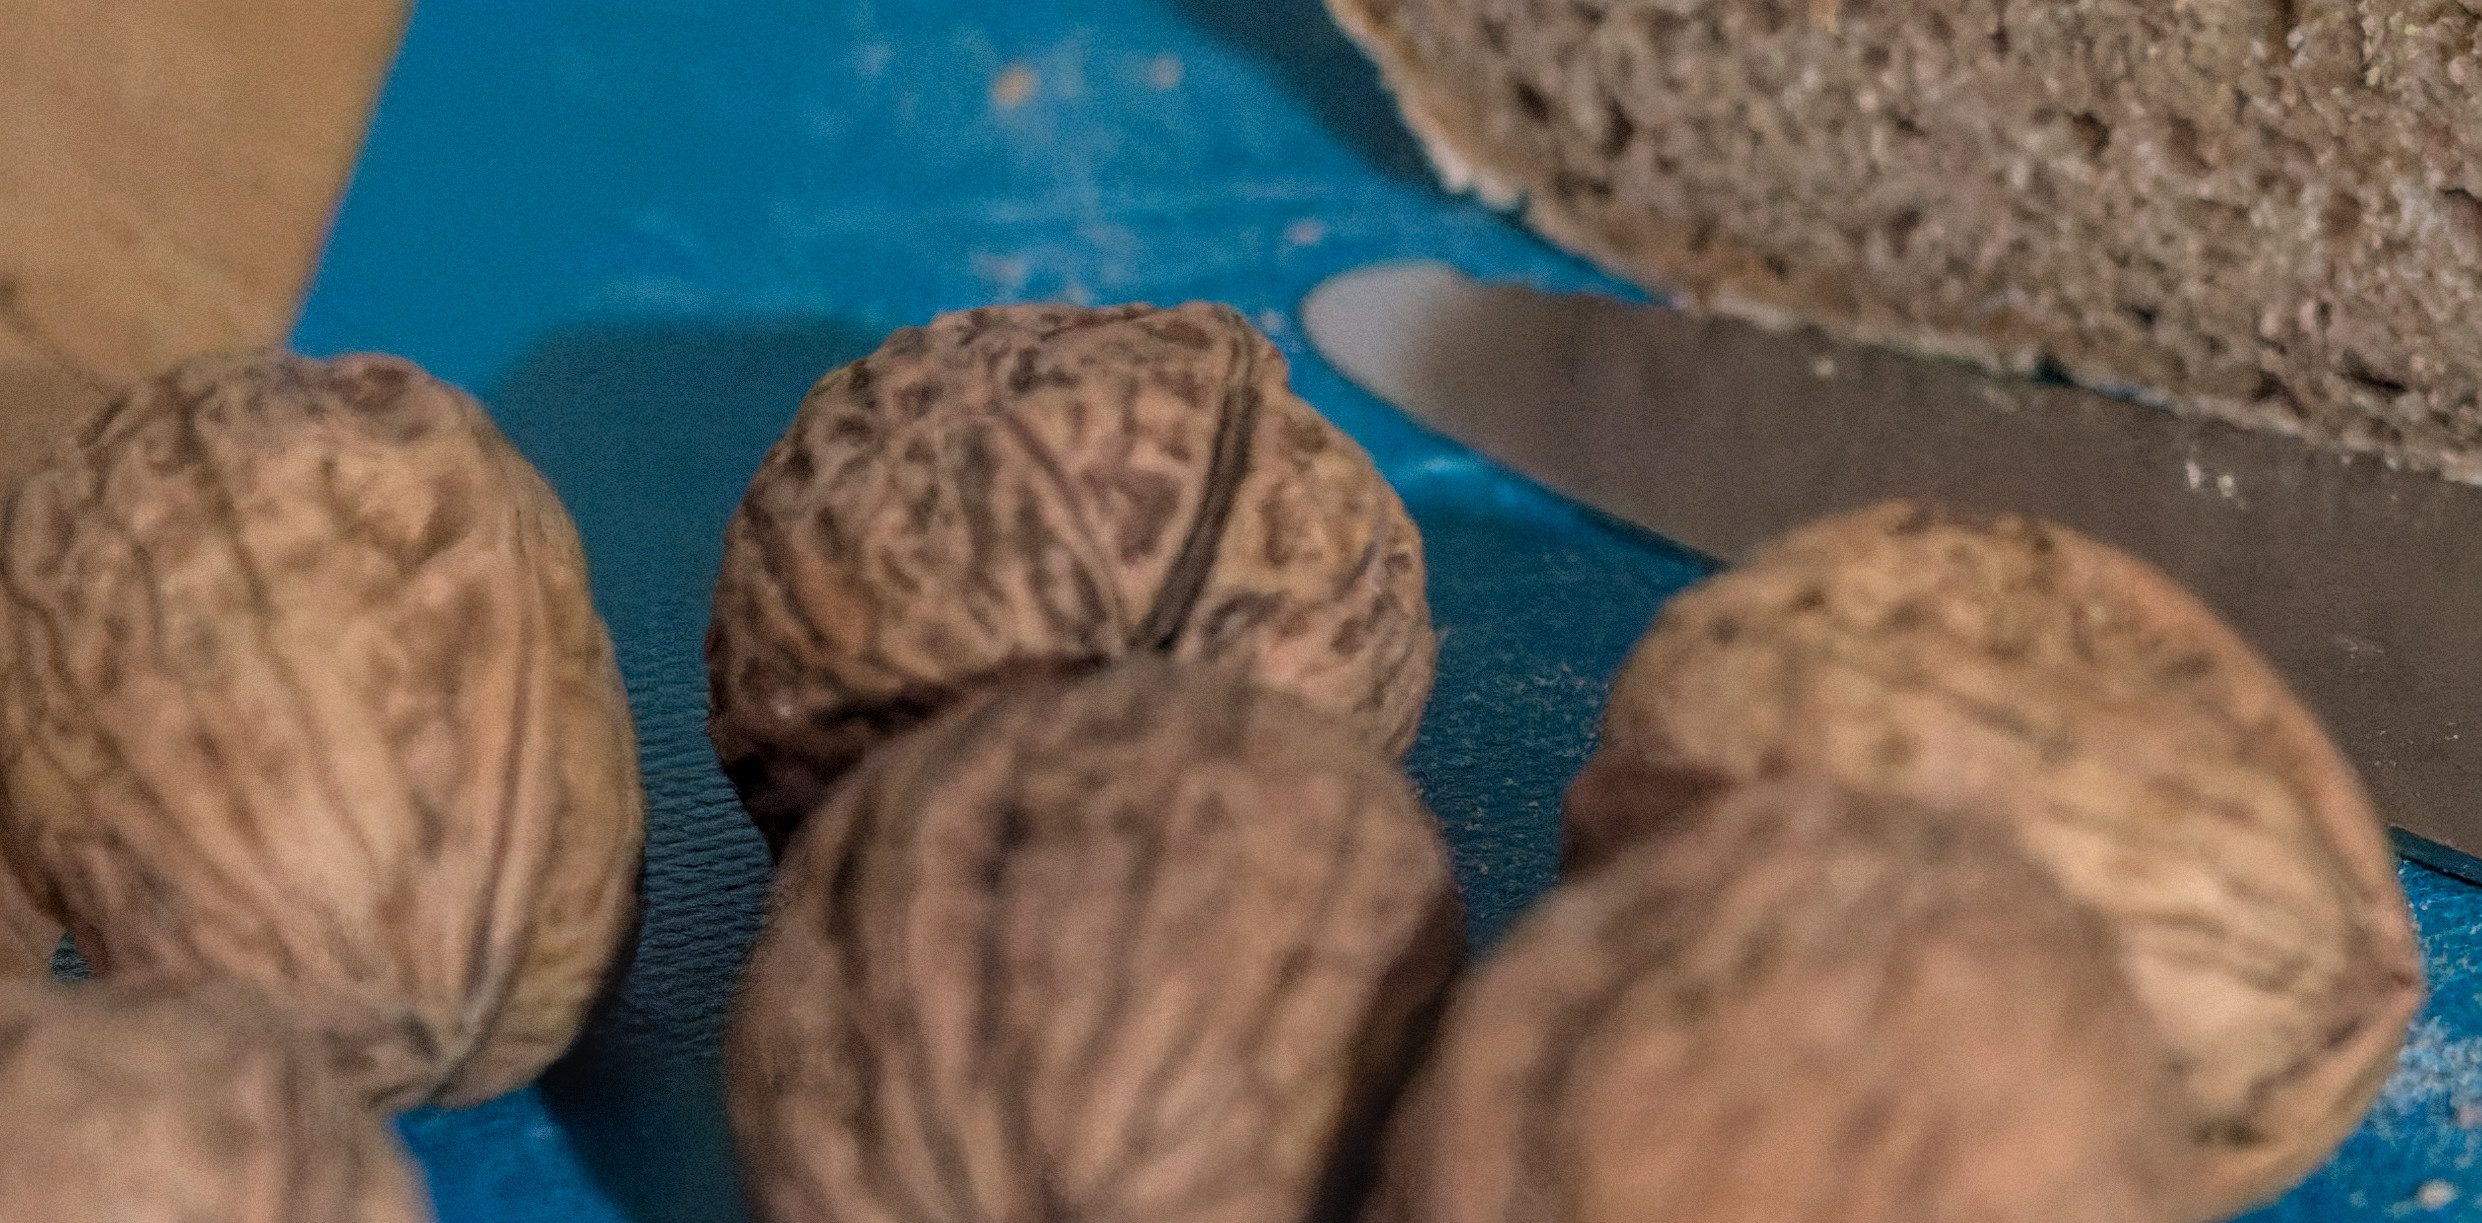
They being said,this is an extreme case. Not only the smaller sensor and higher iso , but there is a lot or smooth background in there, so it really stands out.
I’d you look at the parts of the bread with fine detail, the noise is way less an issue there . So on pictures that are just a bit less challenging , denoise-profiled might just be all you need to get good results .
I did an edit above a few months ago I remember I wanted to focus as much on the bread and not worry about the knife…I would have to go back and load that edit to see what I did…i was pretty happy with it…I could likely improve it today for sure
So you could do something similar…just do your denoise blend in difference mode to confirm what you are impacting and then turn it off…do your edit and then turn it back on again…or you could even use raw denoise initially and you would not have to be too concerned with tweaking the setting for softness with your approach as you over denoise…then in the end turn off the raw denoise and apply your choice of noise reduction…
yeah that’s mostly how I work now, if the files aren’t preprocessed by DxO or something.
Crank up raw-denoising to get a (way to) smooth of an image, but it helps in setting things like exposure and filmic without getting too distracted on little peaks of data, and it makes the filmic auto-button work better.
Then when it’s set to a good start point I turn off raw-denoising, use a chroma-only denoise setting and leave it at that.
A while ago I was thinking about how to improve the darktable auto min / max color pickers, so they wouldn’t always pick an outlier pixel, mainly because I was having trouble with the negadoctor pickers (More robust color picker in Darktable). Probably the simplest solution would be to have the picker pick the min/max from a blurred version of the preview image, maybe with something like a median filter applied.
I didn’t get any good result with dt. I used Exporting/importing photos in full 32-bit representation (to train a neural network for image denoising) but it is not trained on Olympus raw file, so there where some artifacts. I exported another file from dt and merged them to get some more structure and less visible artifacts.

A long time ago it was recommended to turn on raw denoise esp for the black level autopicker in filmic…then just turn it off…
Since this thread takes a close look at denoise, I’ll bring up an issue I am seeing, but if you think I should make a new thread, I’ll do that.
The issue is that when I export this edit, there is noticeably more noise in the jpeg than in the image shown in dt.
I am using darktable-3.7.0+795~g0cae2c24d-win64.exe.

“That’s the piece I wanted!”
IMG_7275.CR2 (20.8 MB)
IMG_7275_04.CR2.xmp (38.5 KB)
The posted jpeg is what you get with denoise on. If you turn off denoise and export, there is not much difference in noise. I have tested turning all other modules, except exposure, and they don’t change the increase in noise.


Morning!
This sounds peculiar || interesting.
What export-to-jpg-settings do you use?
Have fun!
Claes in Lund, Sweden

I’m trying to say that I see more noise between the image I see in dt versus the exported jpeg when I am using denoise than when I am not. There is a lot more noise in the image in dt with denoise turned off then when it is on, but that is not the issue. It is between the image and the exported result.
dt with denoise turned off

jpeg with denoise turned off

dt with denoise turned on

jpeg with denoise turned on

Now, I might not be able to see the difference between the dt image with denoise turned off and the jpeg because there is so much noise to begin with. Therefore, the problem might not be with denoise and just with export.
Only “odd” thing I have detected so far:
why do the four last images you posted
differ so much in file size?
I don’t know. I’m using Windows Print Screen on all four.
After looking more at the actual images, I think it is not a denoise issue, just a jpeg issue. I think I need to take this off this thread, so as not to hijack it.