Trying to keep up with Christian ![]()
2 Likes
Excellent!
Notice how we softened the bokeh in the background while making the bird sharper at the same time:

Now we have functionality very similar to the contrast equalizer, but with the advantage of being able to adjust the scale range and additional control of the edges.
Thank you for your efforts @Christian-B !
The photo is from the thread:
7 Likes
Not for this edit but just wildly playing for a minute or two if you set the scale large and then try looking at the mask and seeing what you get by changing the micro and fine it seems hard to predict or wasn’t what I expected as a micro change and large portions of the image could get brighter. This might not be an informed thing to do but points out that with all these sliders you can perhaps get a lot of combinations that might make the image worse… Maybe I just need to try more images and do a more logical progression… In your hands almost anything will work…some of us need saved from ourselves ![]()
I wouldn’t judge it by the mask, but rather by trying out the different scales. And depending on what you want to change in the photo—whether you just want to sharpen a few fine details or increase coarse local contrasts, such as enhancing the texture of the clouds—try out the appropriate scales.
To do this, I recommend taking a snapshot before doing anything. This is the best way to compare what each scale actually does.
In this example, we have very harsh, coarse local contrasts that make this scene look unsettled. This can be clearly seen in the shadows on the tree trunks:

When testing, it becomes apparent that broad and extended scala reduce these brightness differences in this range without losing finer details:
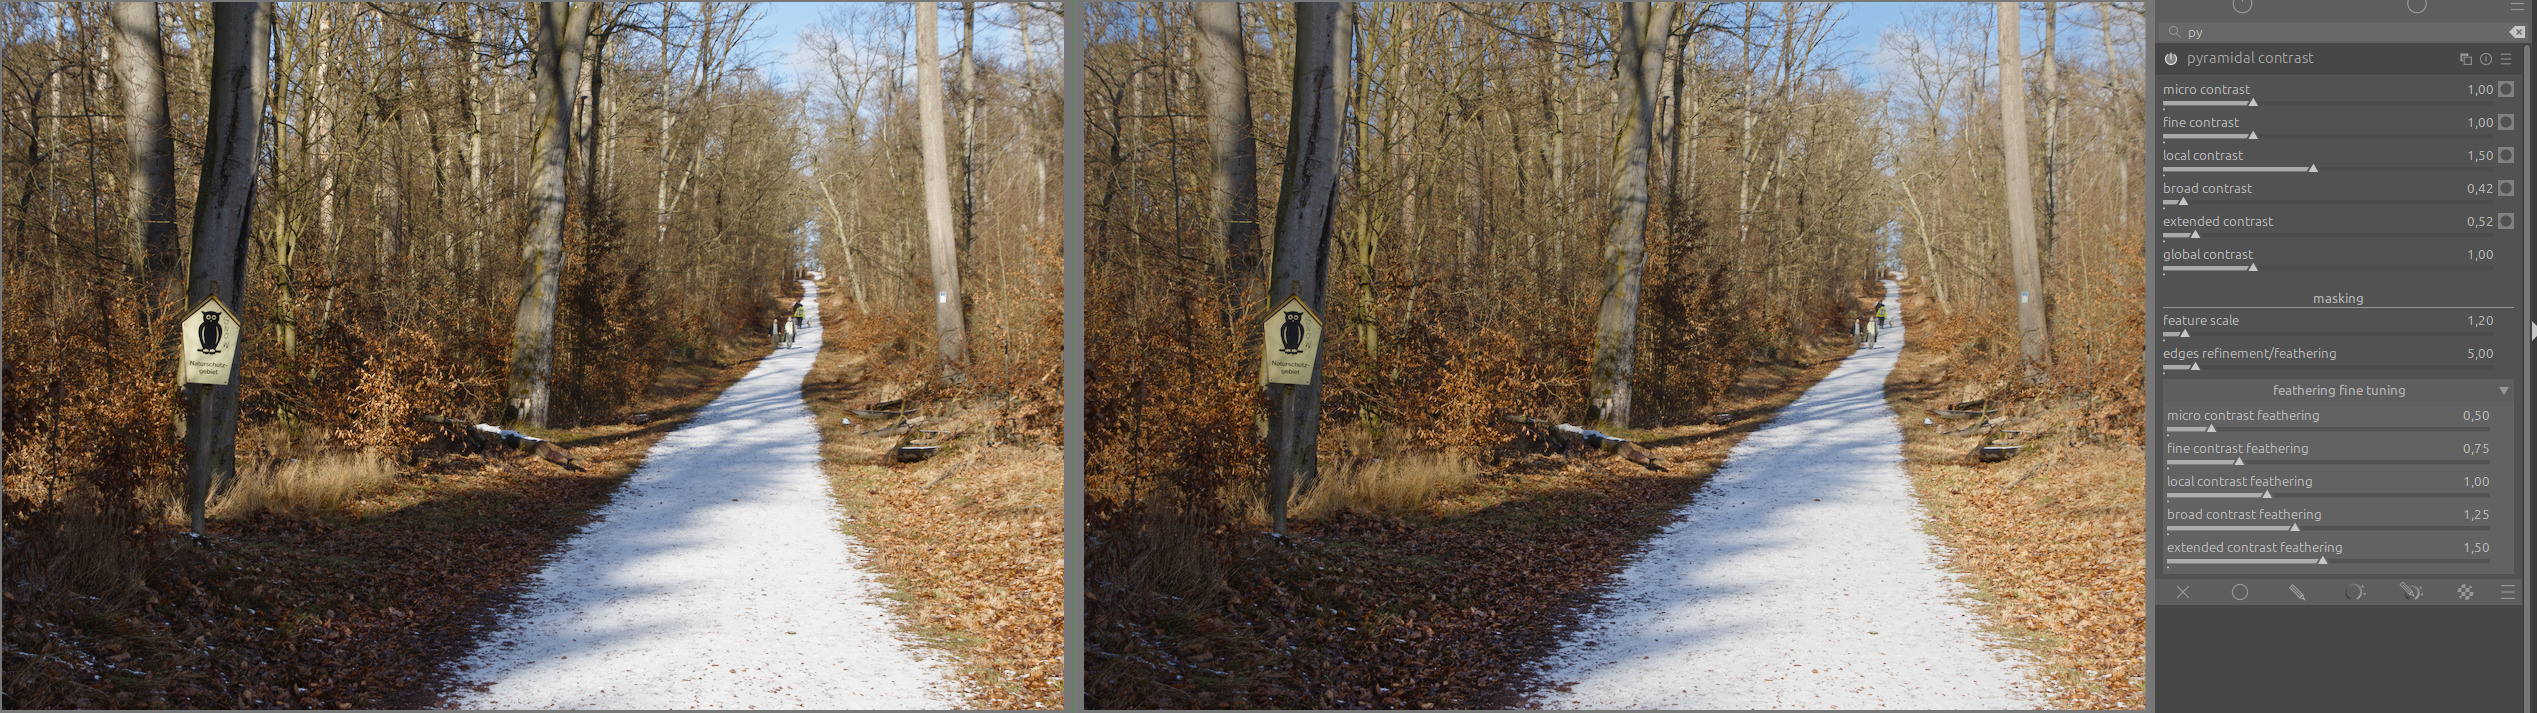
Now you can increase fine and micro contrast slightly:

Now I have pleasant sharpness in the scene without any disturbance in the area with trees.
5 Likes
I am just lurking here in the background but I hope this makes DT5.5 at some time as it sounds very interesting.
2 Likes
I also hope that it will soon be included in the master. The amount of detail that can be squeezed out early in the pixel pipe without producing artifacts is astonishing.
15 Likes
That’s an excellent example.
3 Likes
This was one of the reasons why I prefered @Wilecoyote’s solution. I would have liked to see his option 3 (Experiments with a scene-referred local contrast module - proof of concept - #114 by Wilecoyote) compared to this fixed equalizer layout. This woulkd have given us the possibility to raise or lower the contrast exactly where it is needed.
Hello,
I tried to work on this lead but I didn’t succeed. As explained above, I had conflict issues. And I definitely lack experience. ![]()
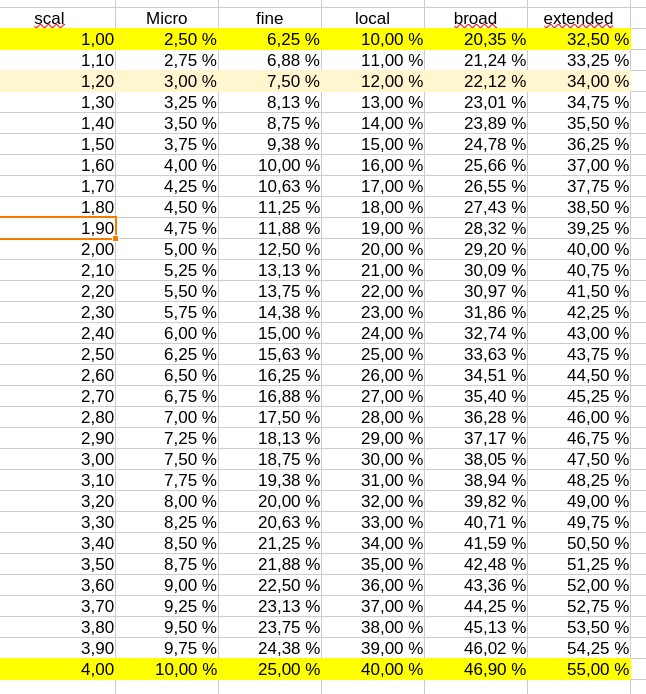
I completely understand your comment. I ran a few tests and I have to agree with you. I entered some basic mathematical formulas to set the different frequencies. If we change the “feature scale” value, we move all the sliders to the right or left with an evolving proportionality.
Yesterday’s and last night’s experiments ![]() lead me to believe that a similar solution to that used for edge refinement could be applied.
lead me to believe that a similar solution to that used for edge refinement could be applied.
Here is the current situation.
Thank you for all the tests and explanations you have provided.
I completely agree with you, that’s the power of the algorithm created by @wilecoyote, let’s not forget that.
We can thank @wilecoyote for this wonderful gift :-), I only did the customization.
The appimage and Windows version compiled by @priort also contains the original version. I invite you to try it too, as it allows you to use the full power of the algorithm.
I’ll try to think about how these two versions can coexist or be merged while respecting the power of the algorithm.
Have nice day,
Christian
3 Likes
Maybe @Wilecoyote will come up with a solution.
If not and the decision is already made to go the equalizer way. Maybe it would be an option to add a further slider to the already many sliders, which acts like the node placement slider in the “color equalizer” module.
That would at least bring a bit more flexibility.
1 Like
Out of respect for @wilecoyote’s work, I would like to clarify one thing: nothing has been decided yet. It is up to the darktable team and the author of this POC to decide on the outcome of the project and my proposals.
Please give me some time. I will review all the suggestions and proposals in this post and get back to you with an analysis and proposals.
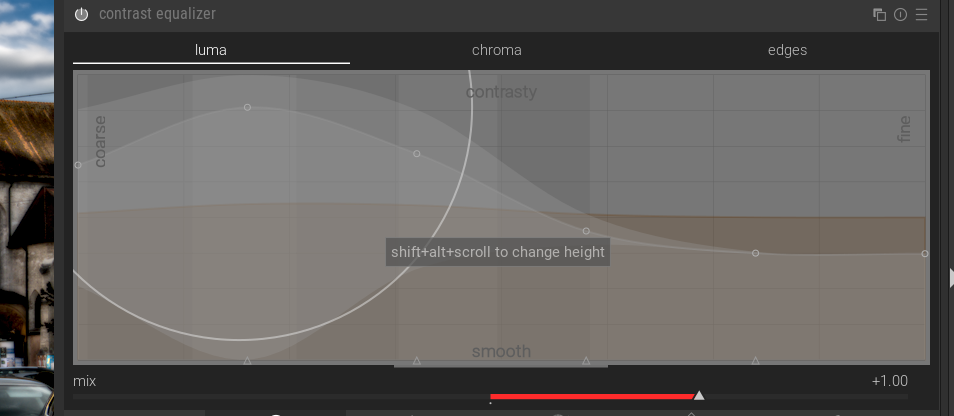
That’s exactly what the “feature scale” slider does right now. But I think it could be improved, like with edge refinement.
Greetings from de Lubéron,
Christian
7 Likes
Ah Ok I got that wrong (Again ![]() ). Anyway something where I think a proposal of me using a interactive curve instead of sliders would have been of profit, because then it would be more obvious what each slider does (and you would have less of them). The movement of the nodes would have been visible. So one can see in which direction and how far they move.
). Anyway something where I think a proposal of me using a interactive curve instead of sliders would have been of profit, because then it would be more obvious what each slider does (and you would have less of them). The movement of the nodes would have been visible. So one can see in which direction and how far they move.
I fear I’m sounding overcritical. Sorry for that!!! I really appreciate the work you do, but I somehow got the feeling we are already running into a direction without really having thought about the advantages and disadvantages of the different solutions.
I think @s7habo comes from a different perspective. He is a professional with a lot of background information. Whereas I’m just an average user, who is trying to understand what all the modules do on a quite basic level. And therefore is really interested in modules which are not completely overloaded and where I don’t only see some effect in the picture but have some help by a GUI which is as intuitive as possible.
3 Likes
As I understand it, for detail levels, that would only work if you had infinitely many detail levels / scales. In the ART screenshot shown before, you edit a curve, but behind it are just a handful of levels; the curve is ‘sampled’ at a few fixed points, if I recall correctly.
I’m aware of that. That is not the point for having a curve over the sliders of an equalizer - In the end both are equalizers. On many curves in dt there are still nodes (just like in color equalizer or contrast equalizer).
For me the advantage is mainly seeing such nodes and their movements. Not only their amplitude but as well their movement sideward (direction and extend)
On top I can move just one part and have smart transition without haveing to touch every slider.
Just an example:
Usually I don’t want something like that on the details level:
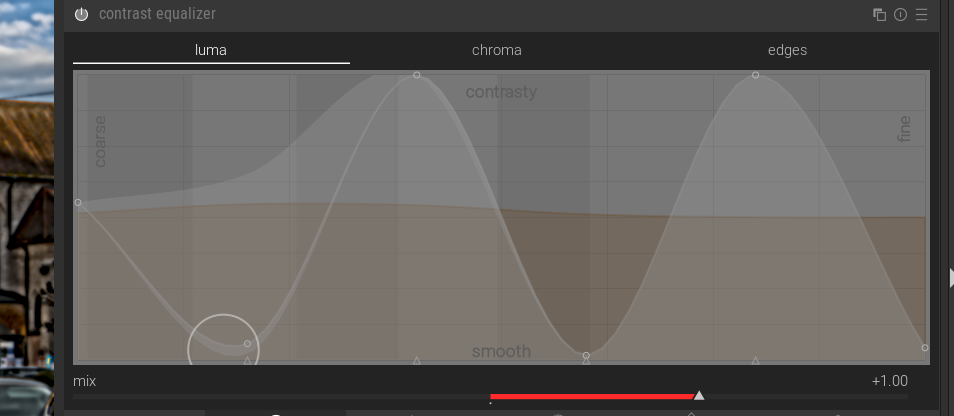
But more something like that:
On Conrast equalizer I have to touch the curve only on two points and get smooth transitions. With sliders I have to touch every single slider, to get that.
6 Likes
I’m sorry, I misunderstood you.
1 Like
Thanks for the examples. Ya I wrote mask as that is where I was looking at it initially but I should have said also what I see in the image…But I have note yet had time to try anything beyond what I had fiddled with last night…thanks again. I will use you examples to dig deeper
1 Like
If @Wilecoyote’s module makes it into master, then surely it must be called “Acme Local Contrast” ![]()
10 Likes
Indeed. ![]()
Sorry for cluttering up the thread with examples, but they say more than words. Some of you will surely remember this one:
We had countless discussions in that thread about how to increase local contrast in snow. It wasn’t impossible, but now - take a look at the history log to see what was necessary to process this photo:
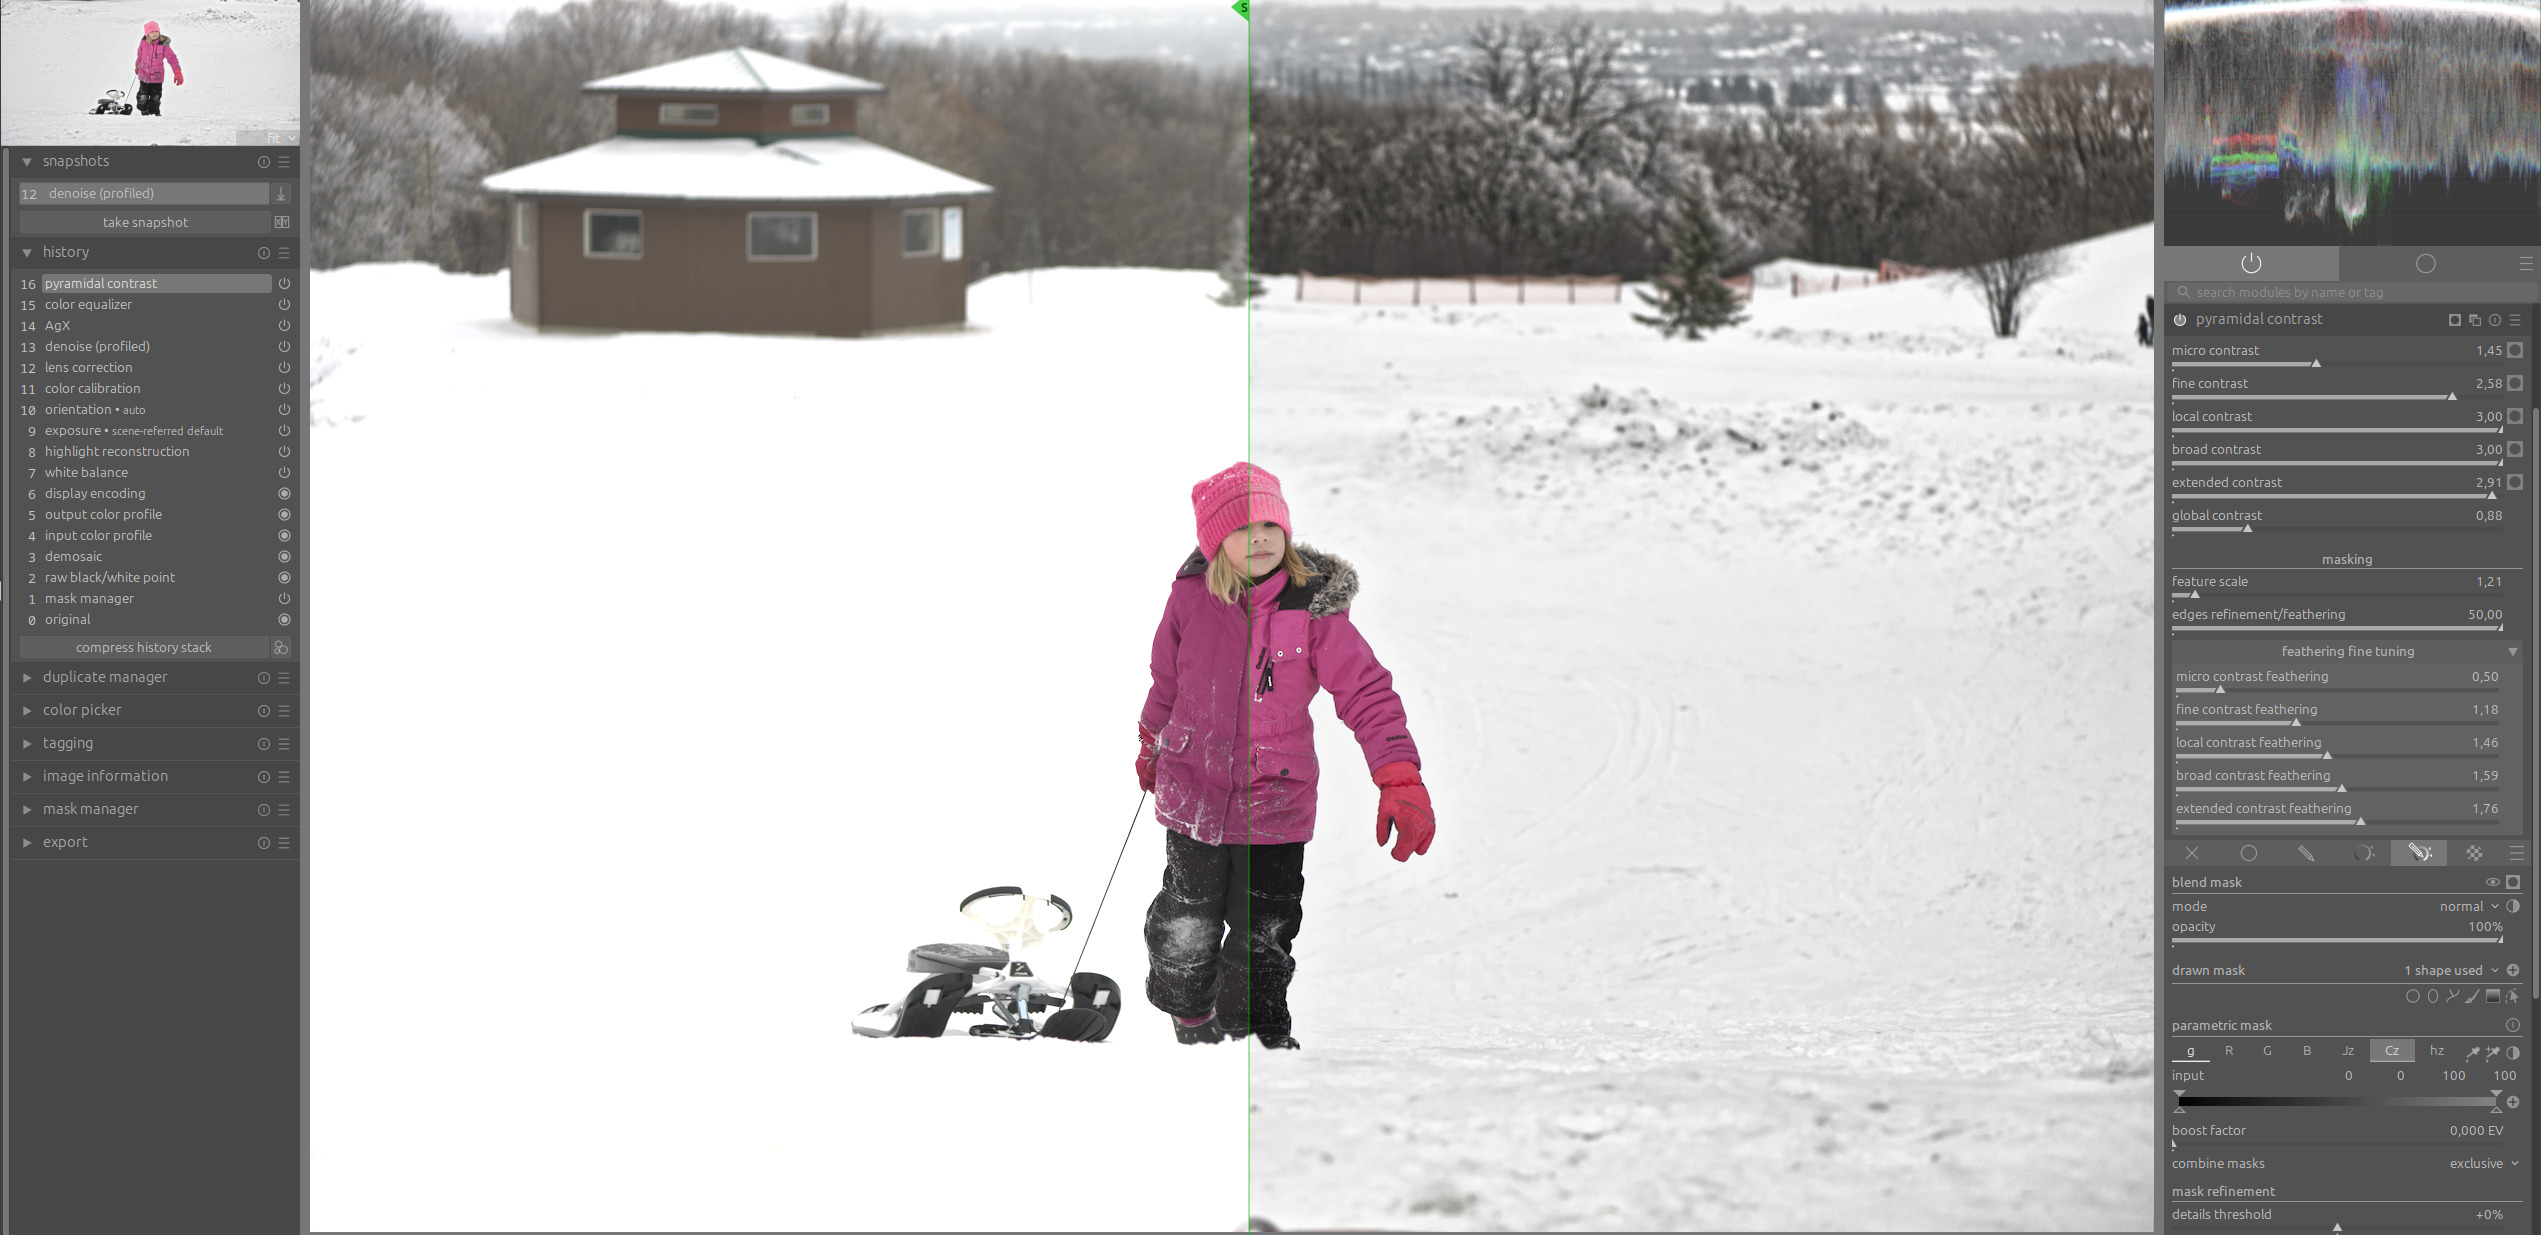
If one of these two versions of local contrast modules makes it into the master, then for me, the circle is complete. The problems with missing local contrast in highlights are off the table.
15 Likes
Never clutter, I think the opposite that many users clammer for these sorts of visual explanations so I would share as many as you have… IMO of course… n=1 as I always say… ![]()
5 Likes
Thanks for the examples @s7habo. I too have been doing my own testing. I’m using the Windows build that @priort kindly made. Like you, I have been testing both concept modules on tricky images (usually from Play Raw) to see what they are capable of. And as you may remember, I have previously been interested in ekeing out as much contrast in highlights as possible for some images, like the snowy mountains one I gave you for one of your video tutorials.
I try not to make conclusions too early but it’s hard when the results out of the gate are so impressive. I can see one of these quickly becoming one of my favourite modules because it’s so useful for dialing in the contrast and softness where you want it.
For me and my landscape work, my holy grail has always been the ability to add softness for “ugly” busy details, sharpen fine details, and add diffused contrast globally to add 3D/texture (like dodging and burning). This has always been possible with Darktable using multiple modules and instances, but it looks like we might get a module that can do all of this together.
Now the hard part: getting the UI that pleases the most amount of users as possible!
4 Likes