
TL; DR : this is a full rewrite in clean unbounded RGB of the channel mixer in darktable. The old one had some computational mistakes in it, plus clipped RGB at 100%. This also introduces much requested normalization options, that will keep the sum of parameters to 1, trying to preserve – rougly – luminance (actually, perceptual luminance is much more than a simple sum of R + G + B, since it depends on hue, but… TL; DR).
Ok. But it’s named color calibration because it’s not merely a channel mixer.
When you think about it, a channel mixer does what maths nerds call a matrice product. That is :
new R = some param × old R + some param × old G + some param × old B
new G = some param × old R + some param × old G + some param × old B
new B = some param × old R + some param × old G + some param × old B
Guess what ? If you put all the params in an ICC file, you get… a colour profile. So this is exactly what your input color profile is, except you don’t get to set the params, they are written in the file.
Guess what more ? If the bold params are adjusted with the color of the illuminant used to lit your scene, this becomes a white balance.
So, your channel mixer is actually a full-featured color space correction + white balance adjustment in disguise. That’s why I added another tab, the CAT (color adaptation transform). Then it becomes a hub for all-things-color-space.
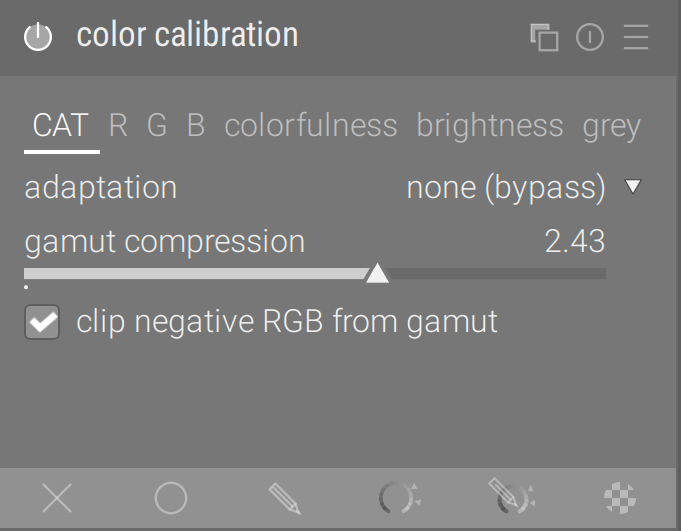
Before going any further, what if you want to disregard the CAT and simply use the channel mix ? Well, set “adaptation” to “none”.
BTW, the colorfulness vs. brightness tabs use the same algo as filmic v4, brightness defines a chroma-preserving exposure boost based on the original pixel values, and colorfulness massages the ratios. For example, if you want to darken the pixels which have a high blue component and brighten the ones having a high red component, here you go :


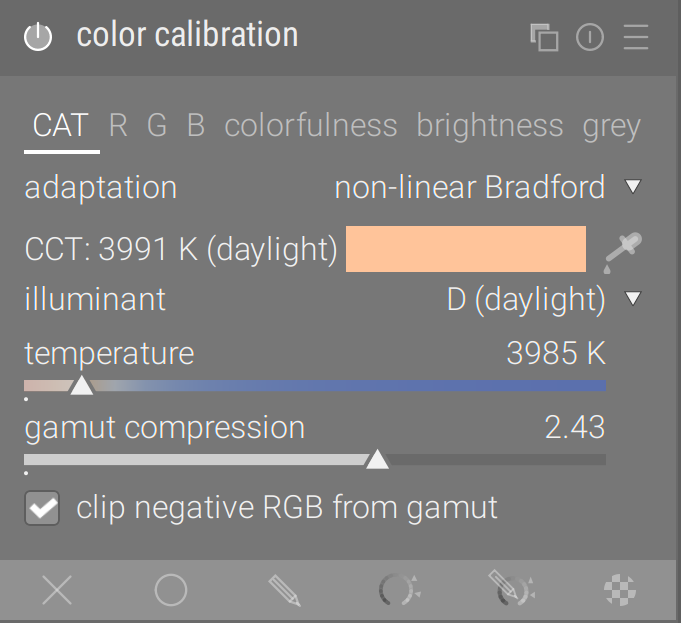
Back to the CAT now. To use it, you need first to set the regular white balance module to camera reference (D65):

Then, the default parameters of the color calibration will:
- read the raw EXIF to fetch the scene white balance set by the camera,
- adjust this setting with the reference white balance used in white balance module,
- adjust this setting again with the input color profile in use (only the standard matrix).

So the default settings will be fully functional to start with, and adapted to each picture.
Why duplicate the WB setting ?
Well, the high-quality CAT need demosaiced RGB pixels. But most demosaicing algos rely on a chroma/luma separation that itself needs a WB applied before, otherwise chroma means nothing and demosaicing blows up.
So we need a raw WB before demosaicing, that can only by low quality because we have only one primary color per pixel, and high quality CAT can only be on demosaiced signal. See the problem ? So, sorry for bad workflow, but pixel-correctness first.
What is the difference between low and high quality WB ?
Actually, white balance is only part of the chromatic adaptation transform. Chromatic adaptation aims at predicting how all surfaces, in the scene, would look like if they had been lit by another illuminant. What we actually want to predict is how those surfaces would have looked like if they had been lit by the same illuminant as your monitor. While white balance aims only at ensuring whites are really whites, that is R = G = B, and doesn’t really care about the rest of the color range.
So CAT is WB performed in a specially designed RGB space : the CAT space. You will find several of the best in the “adaptation” setting : CAT16 from the CIECAM 2016 color model, Bradford linear from the ICC v4 and non-linear, and XYZ (which is there for testing and debugging, it’s not very good). The whole module will work in the CAT space chosen there. In the R, G, and B tab, the background colors of the sliders are actually the primary colors of the CAT spaces, so you can have an idea what they look like once projected to sRGB.
Why is there no tint ?
The tint is a big fat lie that every software tells you. It’s the most stupid piece of GUI ever and a wrong use of physical models.
All we need to perform chromatic adaptation is the color of the illuminant, expressed as a good old RGB value, but in the CAT space. We use each component of the illuminant color to rescale the corresponding component of each pixel. You may find these coefficients in the old WB module too :

Temperature + tint are only a GUI to precompute these 3 coefficients. Nothing more.
But… the temperature, which is actually called correlated color temperature (CCT), can be used to refer to an idealized light spectrum : the black body radiator heated at the CCT. That is, only illuminant which color is close enough to the parabola below, can be described by their CCT because the models linking spectrum to CCT hold:

Only daylight is close enough to that sweet spot called the Planckian locus. For everything else, it sucks. Actually, the CIE discourages the use of CCT for illuminants which have a delta E > 5 from Planckian locus in CIE Luv space, but do you think coding monkeys care ?
No, so they invented the tint, which lets you define an illuminant far away from the locus. Problem is : the tint axis depends on the actual temperature. See on that graph, at 10000 K, the tint direction goes from green to magenta, but at 3000 K, it goes from amber to magenta.
How is that predictable, in term of result, for our user ? How does it solve our problem ? Why does everybody continue to do it ?
Experts often baffle me like that. They should know, they should think, and yet their title is just the result of having been overpaid for 20 years. All hail Adobe.
So, the color calibration module will run a quick check on the illuminant you have. If it detects an delta E < 0.05 from the planckian locus, it will give you the temperature GUI, with no tint. Otherwise, it defaults to “custom” illuminant, where you will have hue and chroma sliders operating in CIE Luv (designed just for that), and guaranteed to be independent anytime:

Even using the custom illuminant, you will get a reminder of the closest CCT close to the color patch that actually represents the illuminant color. Here, the (daylight) tells us that we could use a D illuminant if we wanted, because we are close enough. Otherwise, it would say (invalid). If that is what you want, switching the illuminant from “custom” to “D” will keep your current settings and translate them in temperature, so you will not have to redo the setting.
Illuminants

I have put there the whole list of standard CIE illuminants. Their values are precomputed, so if your camera sensor is properly profiled, you just have to use them.
The (AI) options are not real artificial intelligence, but it was shorter than spelling “optimization by machine-learning” in the list, and AI is all the rage now so pretty much anything a bit advanced qualifies for that name these days. They perform an auto-detection of the best illuminant in image.
The auto-detection from image surfaces gets the average color of image patches that have a high covariance between chroma channels in Yuv space and a high intra-channel variance. This allows to discard flat colored surfaces that may be legitimately non-grey, and also discards chroma noise as well as chromatic aberrations.
The auto-detection from image edges gets the Minkowski p-norm (p = 8) of the laplacian and tries to minimize it, which relies on the assumption that edges between objects should have the same gradient over all channels (grey edges). It is of course more sensitive to noise than the previous
Both methods fail at different times, there is not one clearly better than the other, however they are better than the manual color picker (also available) when you have no grey reference in the image, for example because you have only artificial painted objects in the frame.
Gamut handling
The CAT are not perfect, though, and as it is customary in engineering, the more accurate methods are usually the more brittle, while the more robust are usually the less accurate but the more consistent.
CAT will push colors out of gamut. Here is an example of a Nikon D810 color primaries getting white-balanced from some red-ish illuminant to D50 by different CATs:

The more simple (and inaccurate) XYZ scaling is the least gamut-damaging. The gamut compression will help getting those bad boys in line, especially when dealing with the infamous blue LED lights. The negative RGB clipping will do the last part. It is, however a simple non-linear compression that will affect the whole color range, even its valid part, though with less weight on the valid parts. It is also not entirely hue-linear, meaning compressing the gamut will slightly shift hues, but that’s the best we can do for now, keeping in mind that we are at the beginning of the pipe and can’t loose RGB linear encoding yet.
See the before/after:
filmic v4, color calibration with CAT16 but no gamut compression:

Push gamut compression to the maximum:

Bring back colorfulness in reds and greens with color calibration, and mid-tones colorfulness with filmic:

Last but not least
This is a maskable white balance, meaning you can selectively correct some parts of the image, and make different adjustments for different light sources.
On the following example, a first pass of chromatic adaptation is performed globally with a hue parametric mask excluding the blue-magenta range. That first pass uses minimal gamut compression. The second instance of chromatic adaptation reuses the mask of the first one though raster masks, inverts it, and deals specifically with the blue lights using harder settings:

