Introduction: RapidRAW, a GPU-accelerated open-source RAW editor

Hello everyone,

Some of you might have seen a post about my open source project, RapidRAW, a while back. That wasn’t directly from me, and I wanted to wait until the project was in a more polished state before introducing it properly myself.

I know this community values powerful, highly configurable tools like darktable and RawTherapee, which offer deep control over the processing pipeline. RapidRAW takes a different approach, prioritizing a user friendly experience with a clean UI and a gentle learning curve. The goal isn’t to expose every possible parameter, but to provide a fast and intuitive workflow.

Core Architecture

The application is built with a Rust backend and a React/TypeScript frontend, packaged using Tauri to keep it lightweight. The core principle is performance: the entire image processing pipeline is a custom WGSL shader that runs on the GPU. I’ve spent a lot of time recently optimizing this pipeline for better responsiveness.

A common concern with web based frontends is color management. In RapidRAW, all critical image processing is handled in the Rust backend directly on the GPU, ensuring calculations are done in a high precision color space before being displayed.

Recent Developments

The project has evolved quite a bit. Here are some of the more significant recent changes:

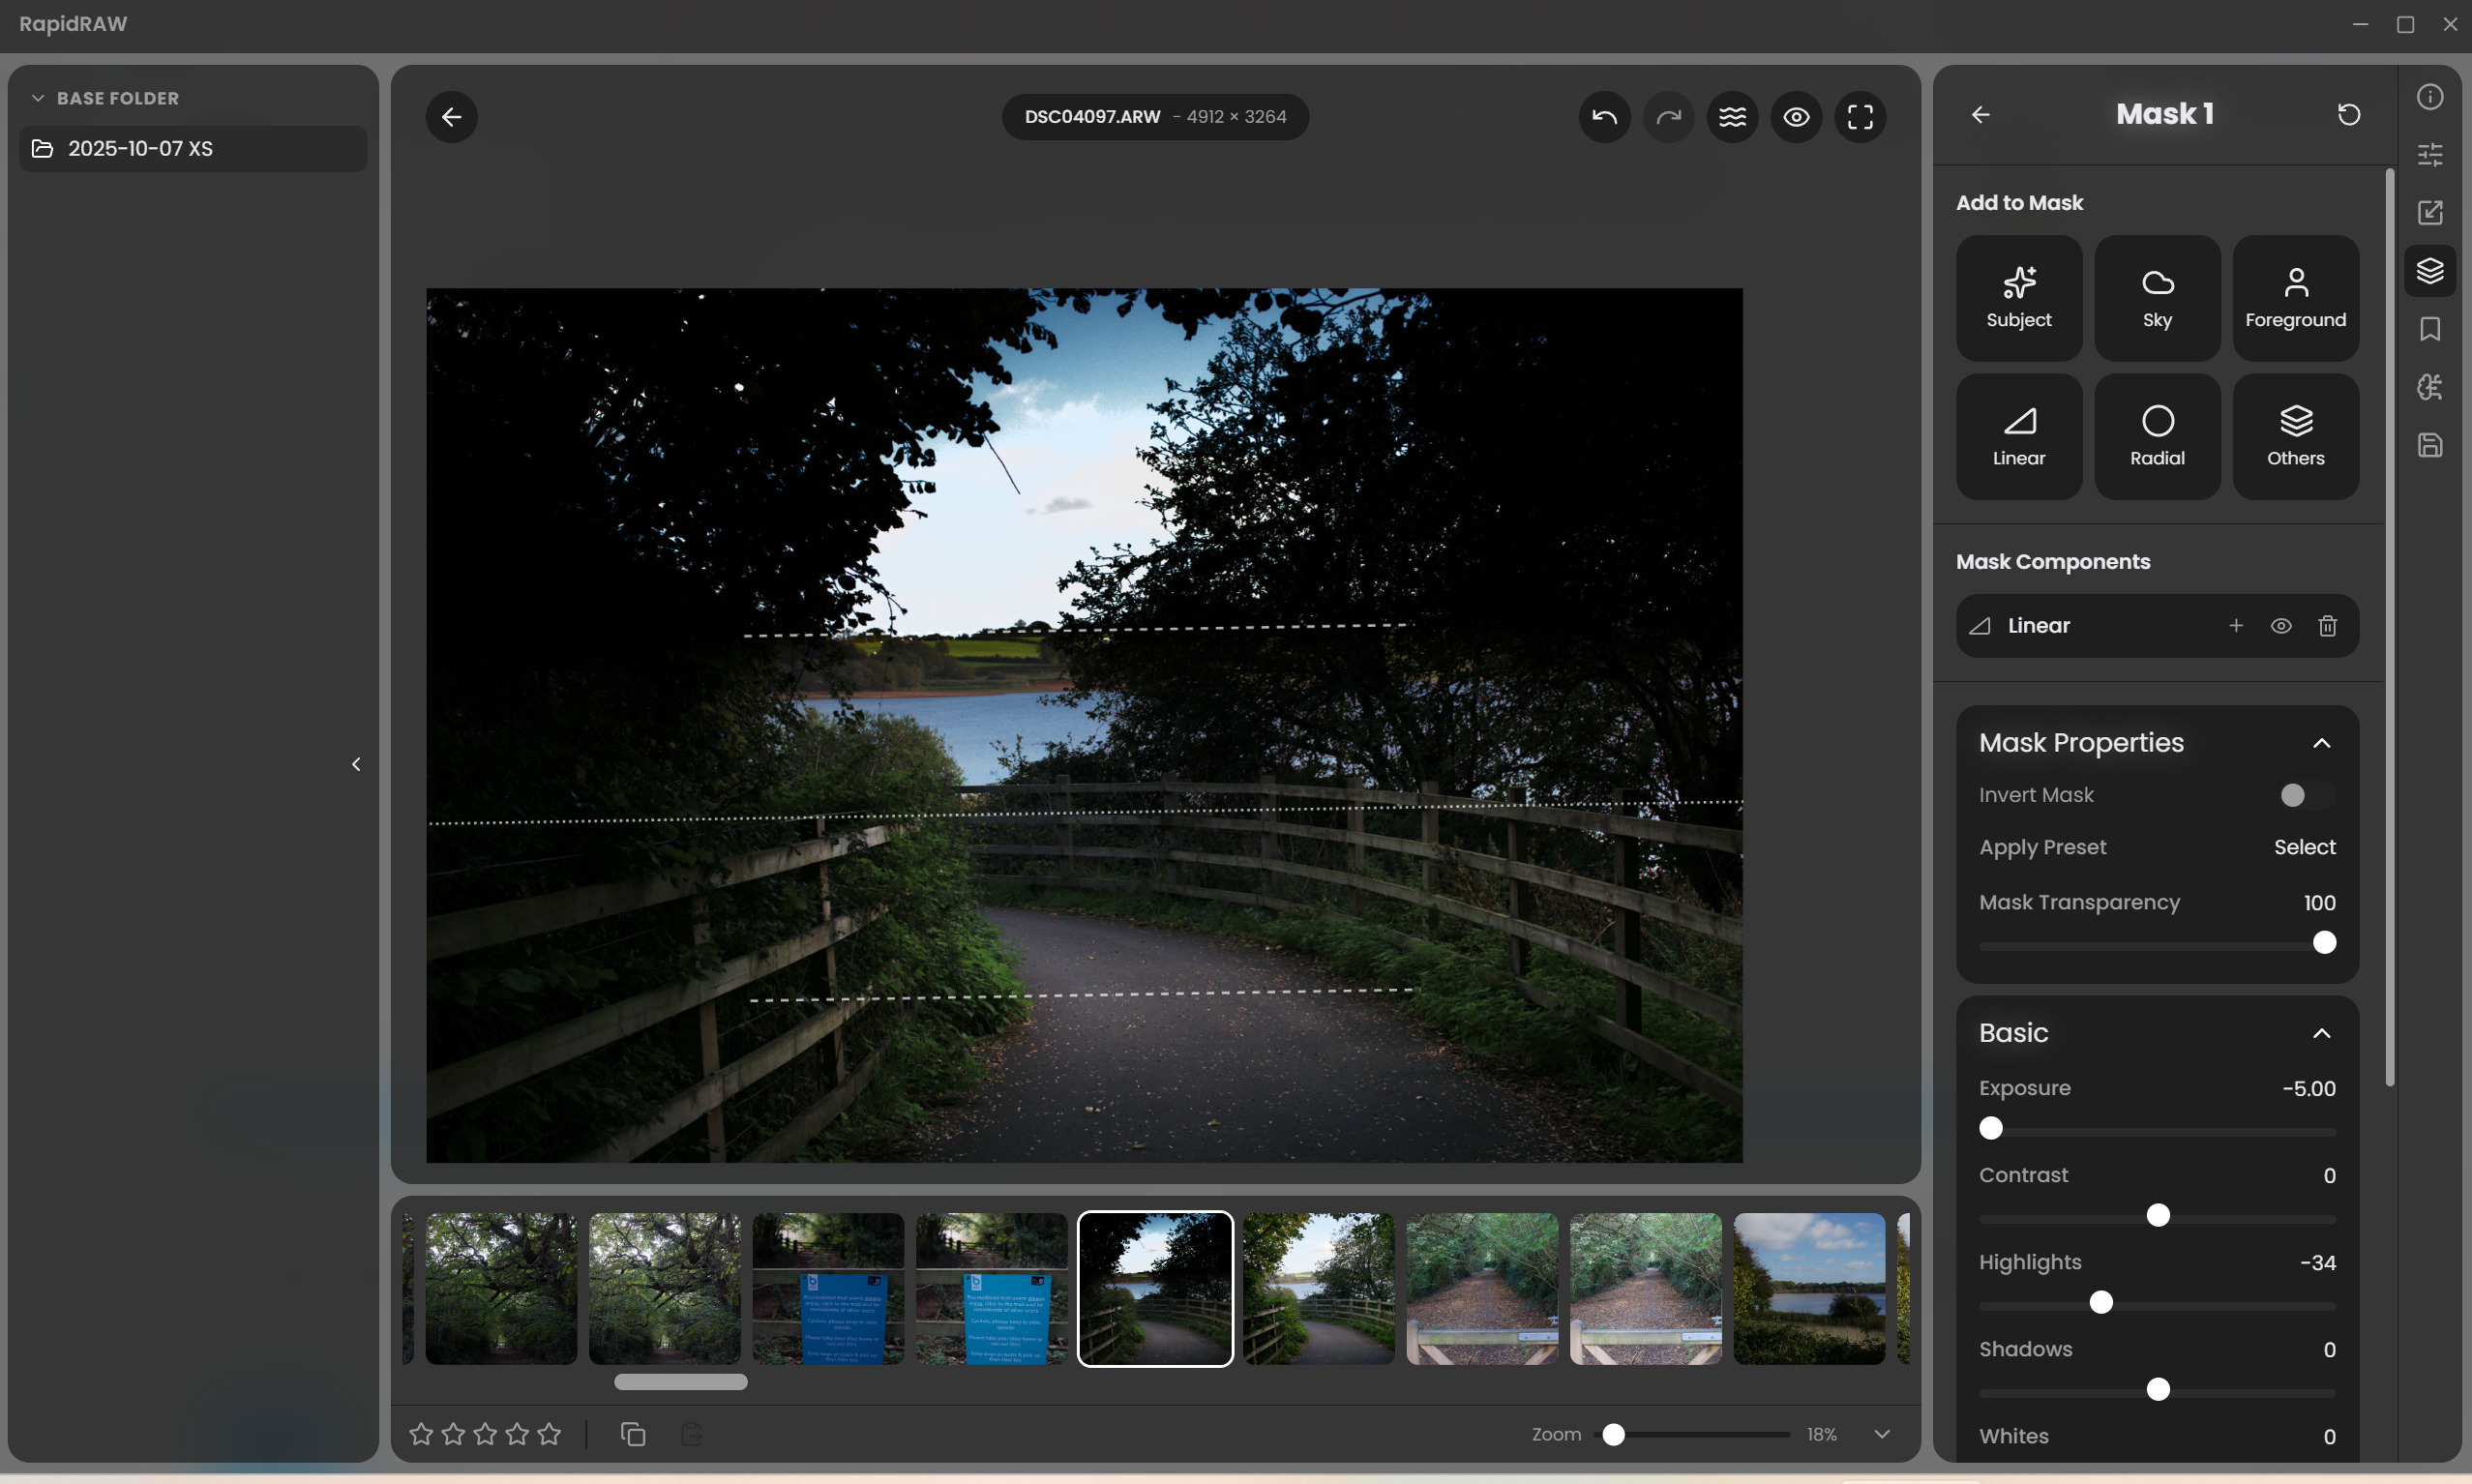
  • Advanced Masking: The masking system now includes AI powered subject, sky, and foreground detection (using local models), which can be combined with traditional linear, radial, and brush masks.
  • Local AI Integration: For users with capable hardware, RapidRAW can connect to a local ComfyUI server. This allows you to use your own custom Stable Diffusion models and workflows for generative edits.
  • New Workflow Tools: I’ve added a panorama stitcher, a collage creator, automatic image culling (blur/duplicate detection), and support for LUTs.
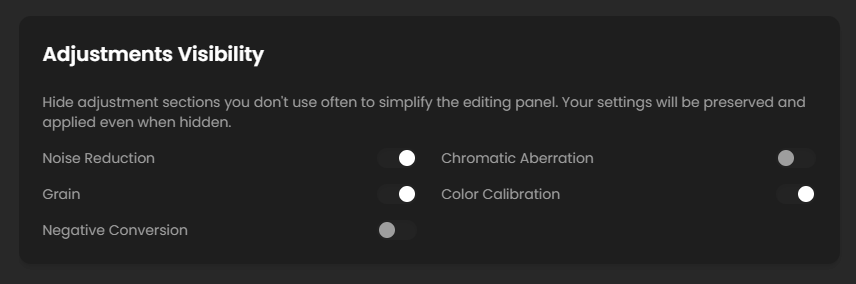
  • Creative Adjustments: A range of new creative adjustments and image processing tools have been implemented to provide more finetuned control over the final look.

Current Challenges & Roadmap

I’m actively working on improving the image processing core. One area I’m currently a bit stuck on is finding high-quality X-Trans demosaicing algorithms. The project uses the rawler crate for its base decoding, and I’m actively researching better algorithms to contribute or integrate to improve detail and reduce artifacts for Fuji shooters.

I also anticipate that lens correction will be a common request. Integrating Lensfun is on my roadmap for the near future.

A Question for the Forum

Before I post further, I wanted to check in with the community.

  1. What’s the general feeling about project update threads like this one? I’m happy to share technical progress if it’s welcome.
  2. If there’s enough interest, would it be appropriate to request a “RapidRAW” software tag to keep future discussions organized?

The project is fully open source on GitHub. All feedback, bug reports, and technical suggestions are highly appreciated.

Link to GitHub: GitHub - CyberTimon/RapidRAW: A beautiful, non-destructive, and GPU-accelerated RAW image editor built with performance in mind.

Thanks for your time.

  • Timon
29 Likes

Hey Timon, welcome! This is a nice looking project, and all types of FOSS are welcome here. I’m sure your emphasis on workflow and ease of use will attract a lot of users!

You are certainly welcome to post all sorts of updates here.

If you want your own category here, we can also make that happen, so you can have a place other than github to have community.

8 Likes

Thank you for your kind words & for your response, @paperdigits.

For people wondering how the user interface looks like:

3 Likes

I’ve tried RapidRAW a few weeks ago, and it’s a beautiful piece if software! Kudos to you for building something as complex like this on your own, it’s tremendous work.

A thread on your latest developments would be extremely welcome here, in particular if you want to discuss the gory details of your algorithms. But just regular progress updates are absolutely welcome as well.

11 Likes

Thanks for sharing… The software has a nice clean UI. I tried the subject masking and I seemed to have a mask by circling the subject and then it was selected … but the local edit that I assumed would impact the masked area only appeared to be applied while I was hovering over one of the sliders I modified… If I moved off of it the red mask came back and if I used the little eye icon the red overlay disappeared and there was no edit to the area. I also tried 0 and 100 transparency in case I wasn’t interpreting that properly but I couldn’t seem to land on the right sequence to apply any changes to the masked area…

Great work it looks very promising

1 Like

@priort

Thanks a lot for your feedback! Just a quick note - it’s best to report issues on the GitHub issue tracker, so we can keep the general discussion here focused and easier to follow.

Regarding the masks, let me clarify how they work:

  • When you create a mask, you’ll see a red overlay indicating the masked area (when not hovering over any adjustments).
  • When hovering over adjustments, the red overlay temporarily disappears so you can see the mask changes more clearly.
  • If you exit, deselect, or close the mask tool, the red overlay disappears, but your mask edits remain visible.
  • The 0–100 transparency slider controls the mask’s overall strength, and the red overlay helps visualize how much of the image is being affected.

I hope this explanation helps - the behavior is similar to Lightroom’s masking tool.

5 Likes

I figured it was me or was not sure it yet warranted any bug report…Thanks for explaining…I’ll go back and check…I thought that I had basically done this but when I exited it didn’t seem to have done anything…Thanks again…

Hello @CyberTimon,

Problems with the Ubuntu 24 packages.
I downloaded the .deb file and when I run RapidRAW, it gives this:

Then I saw there’s an AppImage as well. Downloaded that one and started the app from the terminal. Main window is the same as shown above, the terminal complains about missing modules. Any idea? I’m on Xubuntu 24.04.1.

EDIT. My bad, I downloaded the 22.04 AppImage instead of the 24.04. But the same thing with the 24.04, just a black image, and only minimal output in terminal.

The MacOS version for Intel works fine though. Looks good your app, kudos!

@paulmatthijsse

Thanks for trying it out.

As I’ve already noted here, I’m trying to keep all bug reports consolidated on GitHub. Can we please move this over to the official issue tracker to keep this discussion thread focused?

The display issue you’re running into is a well-known problem with Linux on X11/Wayland. It’s an easy fix with an environment variable, but since it’s an issue with the underlying framework, it’s not something I can simply solve in my own code. I’m tracking all the workarounds / fixes for it in this main ticket, please take a look: Tracking Issue: Linux/Wayland related problems · Issue #306 · CyberTimon/RapidRAW

2 Likes

Wow. Thank you Timon, for sharing this here!

I am seriously impressed over how quickly you have put this together and how smooth the experience is, but I have a few thoughts as well.

To give you a little context, I’m a long time darktable user but not a developer in any way. I follow developments with keen interest but the maths usually go right over my head :stuck_out_tongue_winking_eye:

I’ve installed the windows build on my Win11 laptop last night and have been playing with it.

I hope it’s ok if I share my feedback here? I know you want to keep issue tracking on Github. but these are mostly feedback/suggestions. Also, I want to make it clear that I am not trying to detract in the slightest from what I see as an incredible achievement, I just hope that perhaps my thoughts might help in some small way to make it even better.

I love the minimal controls that yet have almost everything needed for day-to-day processing.

Need to spend more time with it, but on a first try the AI subject masking is excellent.

A.
I am interested in what I know in darktable as the pipeline order - I get the feeling most operations take place after a display transform (or base curve) is applied to the linear RAW image?

An issue for me seems based on this, but may be due to my not fully understanding the best workflow.

The file is unclipped, with data in both highlights and shadows.
I raised the exposure, then applied a linear mask to drop the exposure of the sky. Notice that although the brightness has lowered, no detail has been recovered in the brightest area, due to it being clipped in the curve or transform.

If I instead drop the exposure globally, then invert the mask and use it increase exposure on the foreground, no issue arises, but (to me) it seems unexpected behavior for a RAW editor.

Bear in mind that I may have been spoilt by darktable’s (unconventional?) linear pipeline ending in the display transform :no_mouth: which makes ‘order of operations’ irrelevant.

I notice the same behavior in the vignette controls - the brightness drops, but unlike actual lens vignetting, it pulls clipped whites to grey instead of a linear brightness drop.

B. Related - why does the exposure control affect saturation? I expect there’s a good reason for this but it seems very unintuitive. (to this particular human)

C. I am finding that the Clarity, Texture and Sharpening controls have an extremely subtle effect - is this intentional or a bug on my machine? (edit: they are working - feel free to disregard)

D. I applied a whole image mask and was pleased to see the Lr-style color calibration controls, as it is essentially a channel mixer, but they appear to have no effect on the image - am I misunderstanding anything?

If you would like me to elaborate further on any of this, I’m more than happy to!
The software is already excellent which is no mean feat to do single handedly in the time you have - it’s the fact that it is so good that has prompted my feedback.

Honestly, I could see myself using this for most of my editing, but I would really like better highlight handling/response. If this had a linear pipeline ending in a darktable Sigmoid or Blender AgX style display transform it would be unbelievable :smiley:

P.S. the free but sadly not open source Android app Saulala has a nice minimal version of AgX with (to me) lovely handling of dynamic range - if you are interested you might like to have a play with it for inspiration.

3 Likes

Thank you, @123sg / Steven, for your detailed feedback. This is exactly what I was looking for.

To address your points:

For a very long time, I used a completely linear workflow, which provides linear exposure adjustments that don’t clamp any results. While I was doing this, users complained (example & example2) that the exposure slider was pretty bad compared to Lightroom’s because it was a simple linear multiplication with no tone mapping involved. So, I rewrote parts of the system and implemented a Lightroom-like exposure slider, which clamps the results a bit. This was a compromise my users were aware of, and they had no problems with it; instead, they were extremely happy that the exposure slider now behaves more “realistically” rather than being mathematically accurate.

After reading more about tone mapping and understanding it better, I’m slowly starting to rethink my pipeline and whether a fully linear exposure slider with tone mapping at the end would make more sense. The saturation difference in the exposure slider is there to prevent unnatural, plastic-like colors.

Regarding the local contrast tools: Yes, they are quite subtle, but when comparing the results at full resolution (e.g., by zooming in), you should definitely notice a difference when using them.

And lastly, Color Calibration:
This is a working feature, but it is disabled by default to prevent cluttering the UI. I probably forgot to also hide it in the masks panel when the main feature is disabled. That’s why you only saw it there. Try enabling Color Calibration in the settings. Then you can and should use it in the normal adjustments panel (not in the masks). Since version 1.4.1, you can hide niche adjustments to prevent UI clutter. See here for more info.

I hope this addresses your points. I’m thinking more and more about tone mapping and AgX, and I will probably start experimenting with it in the coming days.

Thanks!

2 Likes

I’d love to give this project a solid five-star review. It’s simple, fast, effective, and fits perfectly with workflows many of us learned from courses built around proprietary apps.

For example, I took Simon d’Entremont’s Wildlife Photo Processing Essentials course — which I can absolutely recommend. He uses Lightroom Classic in his lessons and notes, in the very first module, that the same ideas should carry over to other software. In practice, though, a lot of what he demonstrates depends on being able to automatically create precise object masks — for the subject, background, or specific elements — with just a few clicks. Until now, that level of object-aware masking was pretty much exclusive to Adobe tools.

That’s why RapidRAW feels so refreshing: it brings those modern, object-selection-based workflows into the open-source world. It really feels like it was built to fill that exact gap.

Thanks so much for building this — it’s a fantastic piece of software!

2 Likes

Thanks for your response!

Gotcha! Thanks for the links. I see how that came about now - it’s interesting. So do I understand correctly that at present there is no tonemapping par se - the exposure adjustment is doing the hard work of containing the colour response of clipped channels?

I feel like the problem I mentioned with the gradient not recovering highlight detail is a similar issue to the original one you linked to above regarding highlights. It looks like the exposure adjustment is clamping the output, i.e. clipping to white, leaving the gradient/vignette ‘module’ no data to work with.

As you know, darktable has a ‘math accurate’ exposure module, who’s output is completely unbounded. Any channel can reach any value, meaning that although without further work it is invisible, all the highlight detail is preserved, meaning that downstream modules can then recover it.

Tone equalizer is the current dt equivalent of Lr’s Highlight and Shadow slider.

But even without bringing Tone EQ into play, the tonemapper, be it filmic, sigmoid or the (new to dt) AgX is still receiving all the highlight detail.
As I see it, the crucial point in darktable is that the pipeline is unbounded - no clamping takes place, right up until the tonemapper, removing most reliance on order of operations and greatly reducing interaction between sliders (or modules in dt).
Not sure if this is useful!

I strongly support that - it was a bit of a revelation for me when Sigmoid was introduced as it kind of makes the image unbreakable, no matter how far one pushes exposure or other adjustments. Sigmoid in most cases only needs a single slider (contrast) which responds in a very intuitive fashion and in my view could easily pass for the Lr contrast adjustment.
It’d be awesome if the masked adjustments could come before the tonemapper, so they receive unbounded data if possible.

Yes, I see that now. That would be redundant with a decent tonemapper… hint hint.

Yes, I realised that after trying on more images - sorry I was a bit quick on the trigger there.

I do very much appreciate that a darktable user like me probably has slightly different expectations, as you mentioned in the OP. It’d be cool if RR could meet both though… :wink:
I wonder - please ignore if need be - if you could have a toggle for now, to choose between an Lr-style pipeline or an math-correct-with-AgX pipeline?

Sorry, that might be way over the top!

Looking forward to it!

1 Like

I spent a few hours today and finally got AgX properly implemented in RapidRAW. It’s fully reversible in masks now.

The part I’m currently stuck on is how to handle RAW vs. non-RAW images. For example, I (again) replaced the recently implemented “curve-like” exposure adjustment with a more mathematically correct pow function, which works beautifully with the AgX tonemapper.

However, when I open a JPEG, it looks completely different and unnatural because it gets tonemapped on top. You might say, “Why not just skip the tonemapper for JPEGs?” - but if I do that, I’m back to the old, unnatural exposure slider that I just added back for the AgX system.

So I’m wondering: how should I handle this? Has anyone found a good approach or solution for this kind of situation?

4 Likes

In darktable, the contents of the JPG are linearised (converted to linear Rec2020) by the input color profile module, and exposure is applied afterwards.
There are different pipeline orders for raw and non-raw input.

4 Likes

You’ve implemented AgX and there’s masking? Let’s just say you’ve piqued my interest. :smiley:

I believe that both curve-like (a-la Lightroom) and mathematically correct (a-la RawTherapee) exposure sliders can be needed, with a twist: they do not need to be named “exposure”.

The mathematically correct one is actually about setting the white point luminance. And the compressed one… did you notice that Lightroom does not have a Midtones slider in the Basics panel? Well, RapidRAW does not have it either. That’s because the Exposure slider in Lightroom actually is about shifting the midtones and compressing/expanding the rest accordingly.

So my take is: if you provide a mathematically correct Exposure slider only, then please also provide Midtones.

2 Likes

Thanks for all the inputs; here’s my idea:

In the settings, the user can enable or disable (show/hide) the tonemapper options.
When enabled, they can choose between Basic and AgX.

  • If Basic is selected (aka no tonemapper / default), it will fall back to the current midpoint-based exposure control curve.
  • If AgX is selected, it will also tonemap non-RAW images to provide more accurate exposure control and full reversibility in masks.

How does that sound?

2 Likes

This is the current section where you can hide / show adjustments (and where I also plan to put the tonemapper visibility toggle:

1 Like