Making good progress with DT Sharpen

After I worked through a workflow in which I started with developing raw images, in dt, , with filmic, and went on to sharpen in Lightzone, while the results were pleasing, the overhead of this workflow was not something I could sustain over lots of images. (having tried it in practice, over a number of images)

There was a downside, in this case, of using multiple tools, which is having to convert to a 16bit tiff uncompressed, as the exchange format between dt and lightzone, because lightzone will not open a 32 bit float tiff uncompressed, which would have been the better format to preserve all the processing from dt.

I therefore spent some time with the DT sharpen module, to see how I could use it to achieve similar results, and over a few images, I have got the hang of it, and am satisfied with the results, without any need to oversharpen.

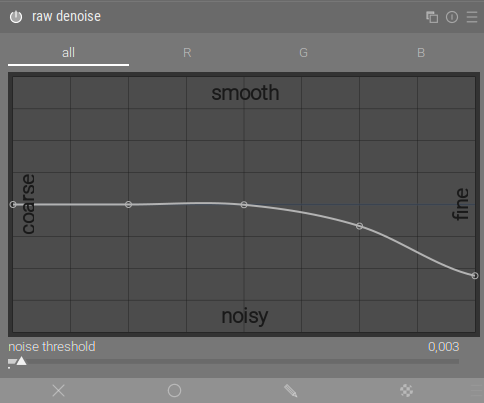
I think the DT sharpen module meets all my needs. I must add though, it also required me to relearn how I use raw-denoise, which is my preferred noise management module, cos its a yin and yang, between denoising and sharpening.

Sharpening can reverse some of the gains of denoising. But I’m ok with dt sharpening.

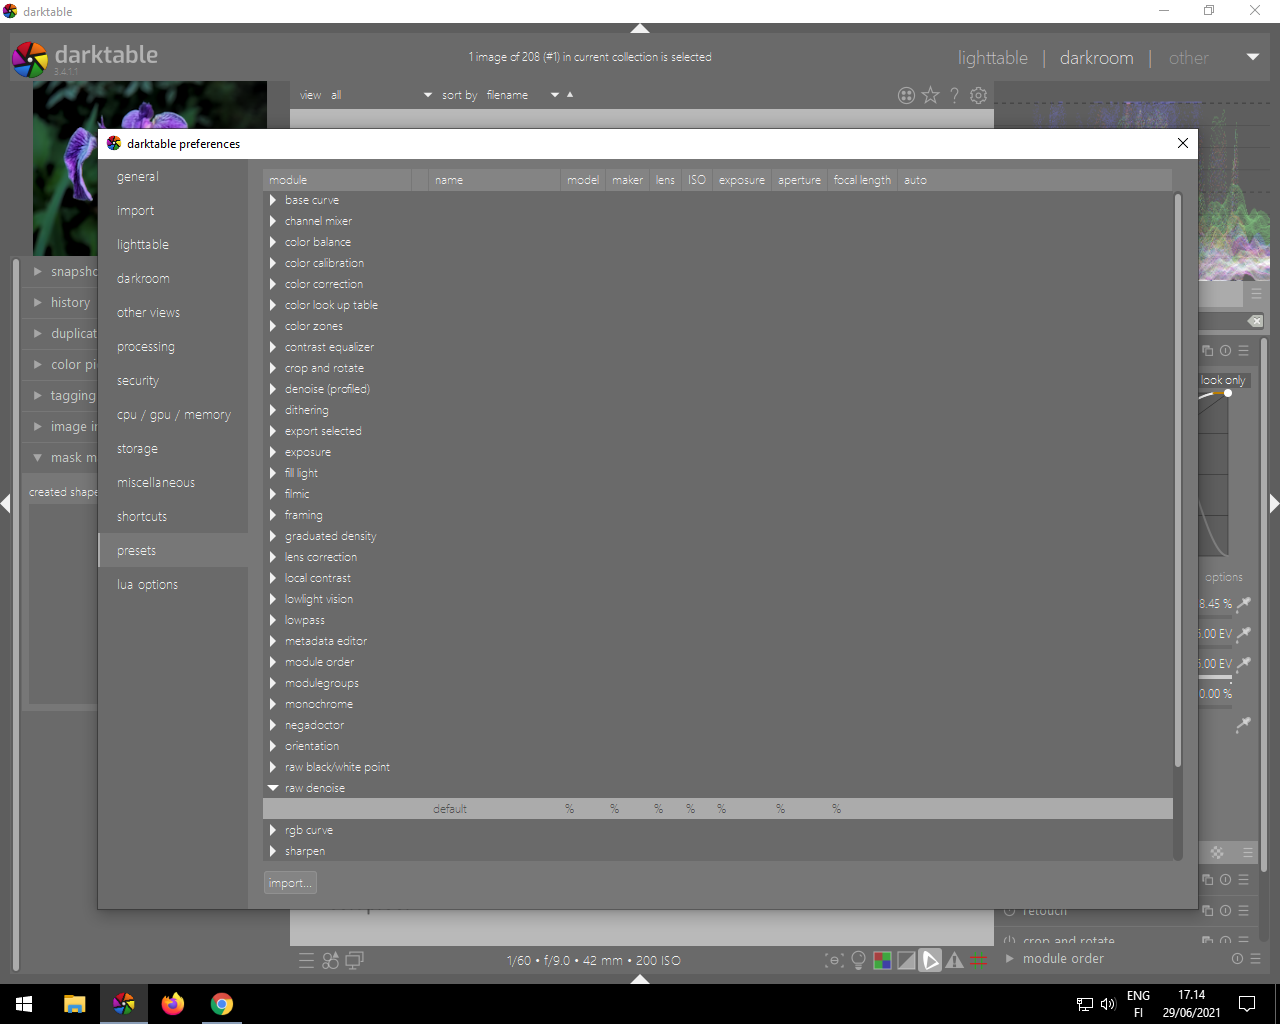
My workflow is therefore back to being 100% in dt.

This seems to be a trend, that initial hurdle, when one is figuring out how something works, and investing the time to learn it properly.

I do hope however that future versions of dt, do not turn the whole apple cart, and replace the current modules like sharpen and raw denoise, with alternatives with many more controls, soon after one has finally learnt how to use these tools well.

1 Like

i think you might be pleasantly suprised replacing that with a touch of local contrast and using the contrast equaliser solely for sharpening (not sharpening module or high pass module) (i use raw denoise and profiled denoise too)

2 Likes

Raw denoise always sounds enticing because of where it is in the pipe but it easily kills detail if not tweaked properly…I was never prepared to do that photo to photo so I pass on it generally. Maybe I should revisit that

1 Like

i just use the same for every pic -but i’m just a hobbyist :slight_smile: having said that, this works ok for me at least
Screenshot_20210628_225127

1 Like

image

This is what I use now for most images.

Where there’s a need, I might bump the threshold to 0.004, but definitely no more than 0.005.

On some images, truth be told, I may decide not to denoise at all, if its the kind of image that has lots of detail, with very few sparse regions where noise may be visible, when viewed enlarged.

Sure as you rightly said, too much denoising robs the image of detail.

I think some of the challenges with modules may be from their default values. Threshold on raw denoise is defaulted to 0.010, which was too much for my sensor. I think its a legacy from a time when camera sensors, were noisier and needed more help.

Albeit, noise will be related to ISO, those who shoot at “low” ISO’s and use a “recent” camera, the default threshold may be a bit too high. My current main camera was launched in 2012.

I do not use any other denoising module, after raw denoise.

Interesting. I will try this out.

It’s possible to export module presets, and attach them to posts for sharing (last time I did this, I had to add a .txt suffix, as the forum did not support the .dtpreset extension).

The real power of this approach is to use the r g and b channels…there is a great video if you have not watched it. It was done by rawfiner The author of the profiled denoise module. He reviews all the methods of denoise in DT. Using surface blur which was then bilateral denoise he achieves some great results and again with raw denoise by identifying where the noise is using the gray tab on the channel mixer and looking at only r g and b one by one…soon you get to see where the noise is… The whole video is great and gives you a real insight to the darktable way of working with images… If you have not seen them watch them all but this is a great one https://www.youtube.com/watch?v=RMbbLyKqdLY

2 Likes

Thanks will definitely take a good look at this resource. Appreciated.

doesn’t seem an easy way to do this - any tips? for example the code for the paramater in my custom styles
e.g. rawdenoise<op_params>gz04eJxbNtvFmgEMGuyAhD0DgwMQN9hTKAbG/ZX/7Rq3XrG7fy3RDiZGDgYAj+IVvQ==</op_params>1 …

In preferences you can export/import your preferences as @kofa mentions above otherwise I am not sure of exactly what you are getting at??

don’t see export anywhere only import

I don’t know I have been on a dev version so long I don’t know when this was initially introduced.
image

perhaps @kofa remembers…what version are you using??

i’m on 34.1.1. and it’s not in that one

Well you will be good in a week or so….

2 Likes

I’ve added “export” there in [presets] allow mass preset export by johnny-bit · Pull Request #7405 · darktable-org/darktable · GitHub so it comes in 3.6 ver.

However if you double click on the preset a window popup will appear and clicking [save] button on it will allow you to export the preset. and the [save] button in preset edit was there since forever :wink:

3 Likes

wow 2 levels of bad UI right there - hidden functionality with no tooltip or a greyed out export button (next to the import one) that becomes active when context allows (i.e. a custom preset that can be exported) AND then the second level if you accidentally double click is that it then allows you to save when it should say export ; or at least ‘save as’) No mention of “export” in the dt manual either.

As a general principle in open source, suggestions are much more likely garner a positive response than complaints.

1 Like

the suggestions are in the complaint - tool tip when hovering over a preset or the export button next to the import one - or an export button that is next to the preset that can be exported or copy that explains to double click/enter for options.
Even an options button/link that then shows the dialogue box and from there could be the option to export the preset.

By detailing what was missing and why it didn’t work it’s implicit what to fix and how to fix it.

EDIT - actually it’s more constructive criticism than a knee jerk complaint, so i don’t agree with the label that feels too derogative in use here

Yes you’re right, criticism was the right word. The main point was that tone is important. So something like “this is great but it could be improved if you…” would be much better received.