Is there a way to achieve pre-tonemapping levels of local contrast in highlights present in the RAW file after applying a tone mapper?
Here’s what I mean.
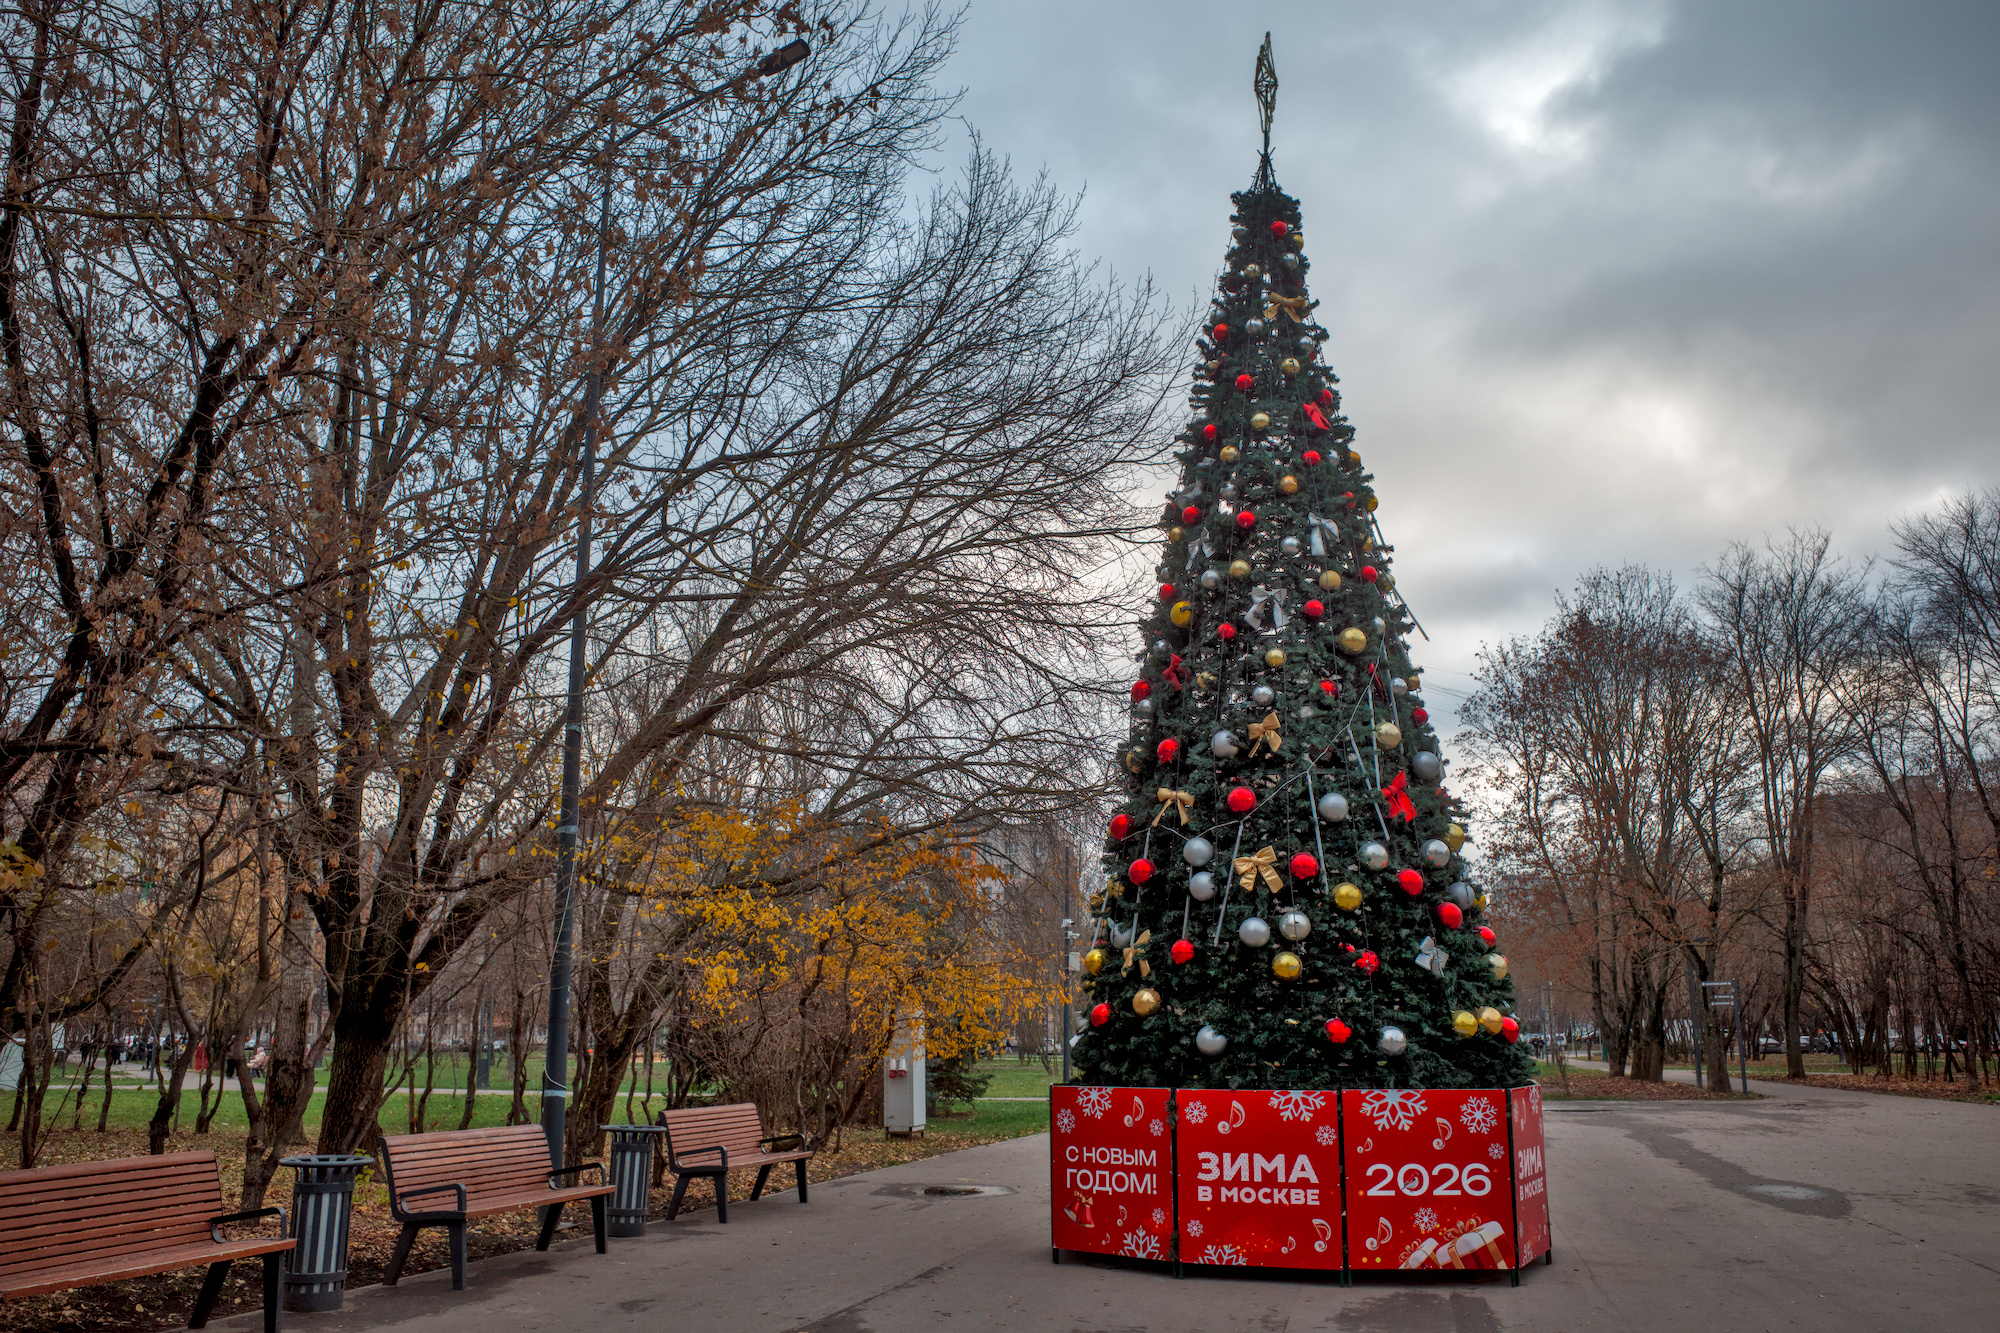
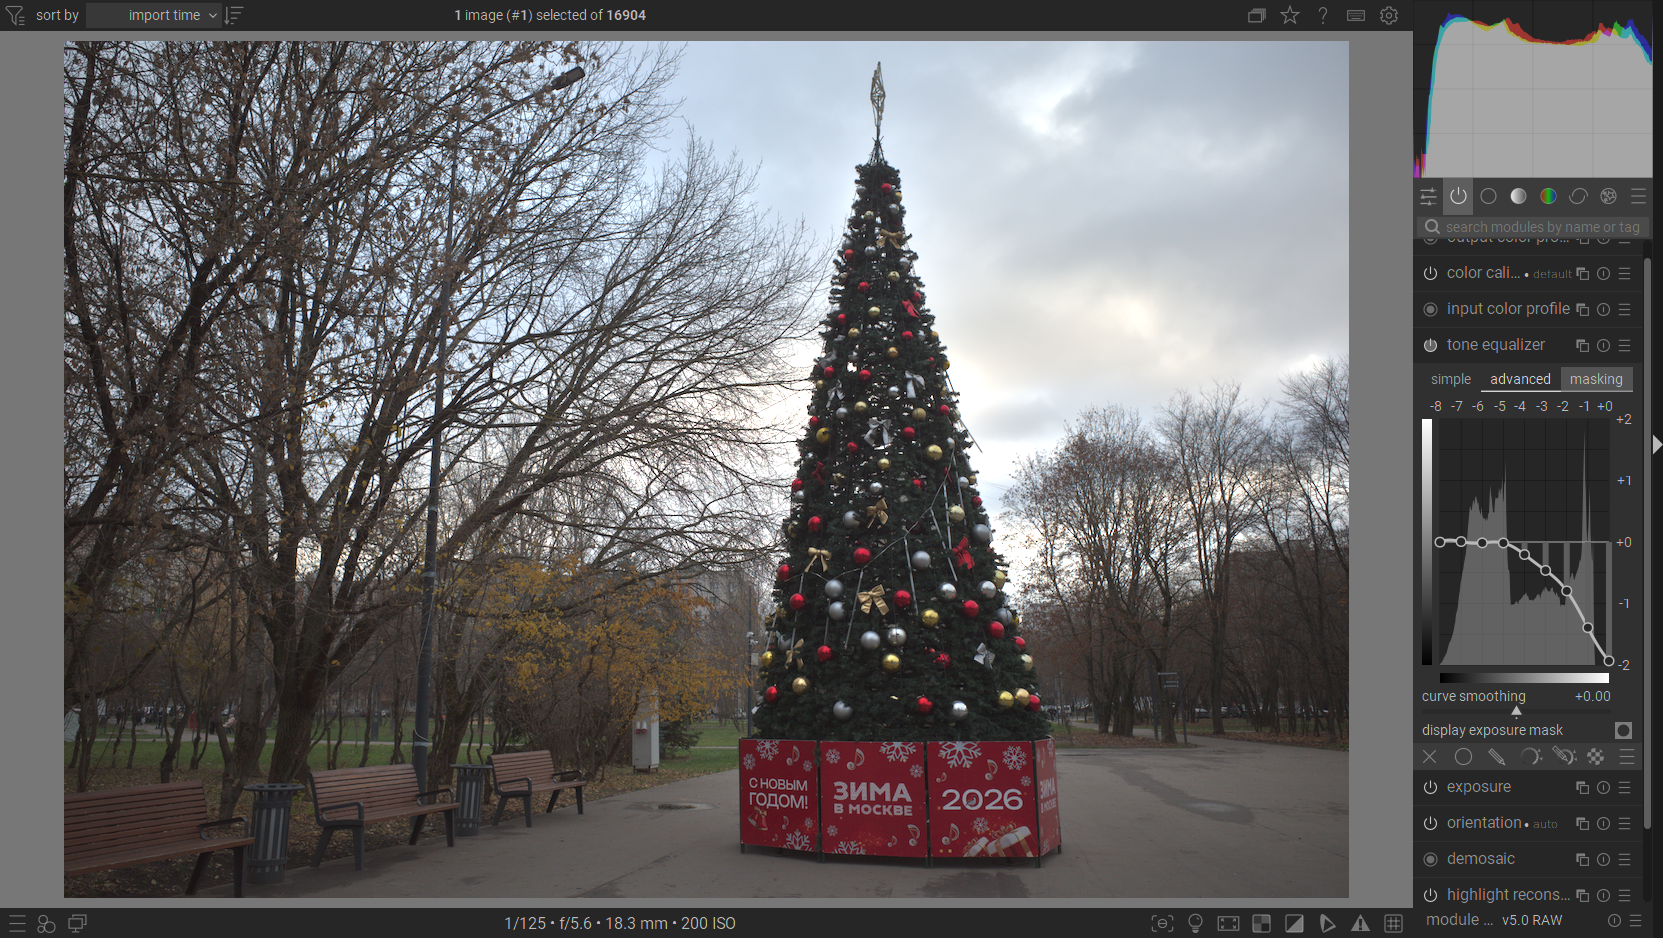
Look at the amount of detail and colour in the sky with the tone mappers disabled. All the modules are set to default.
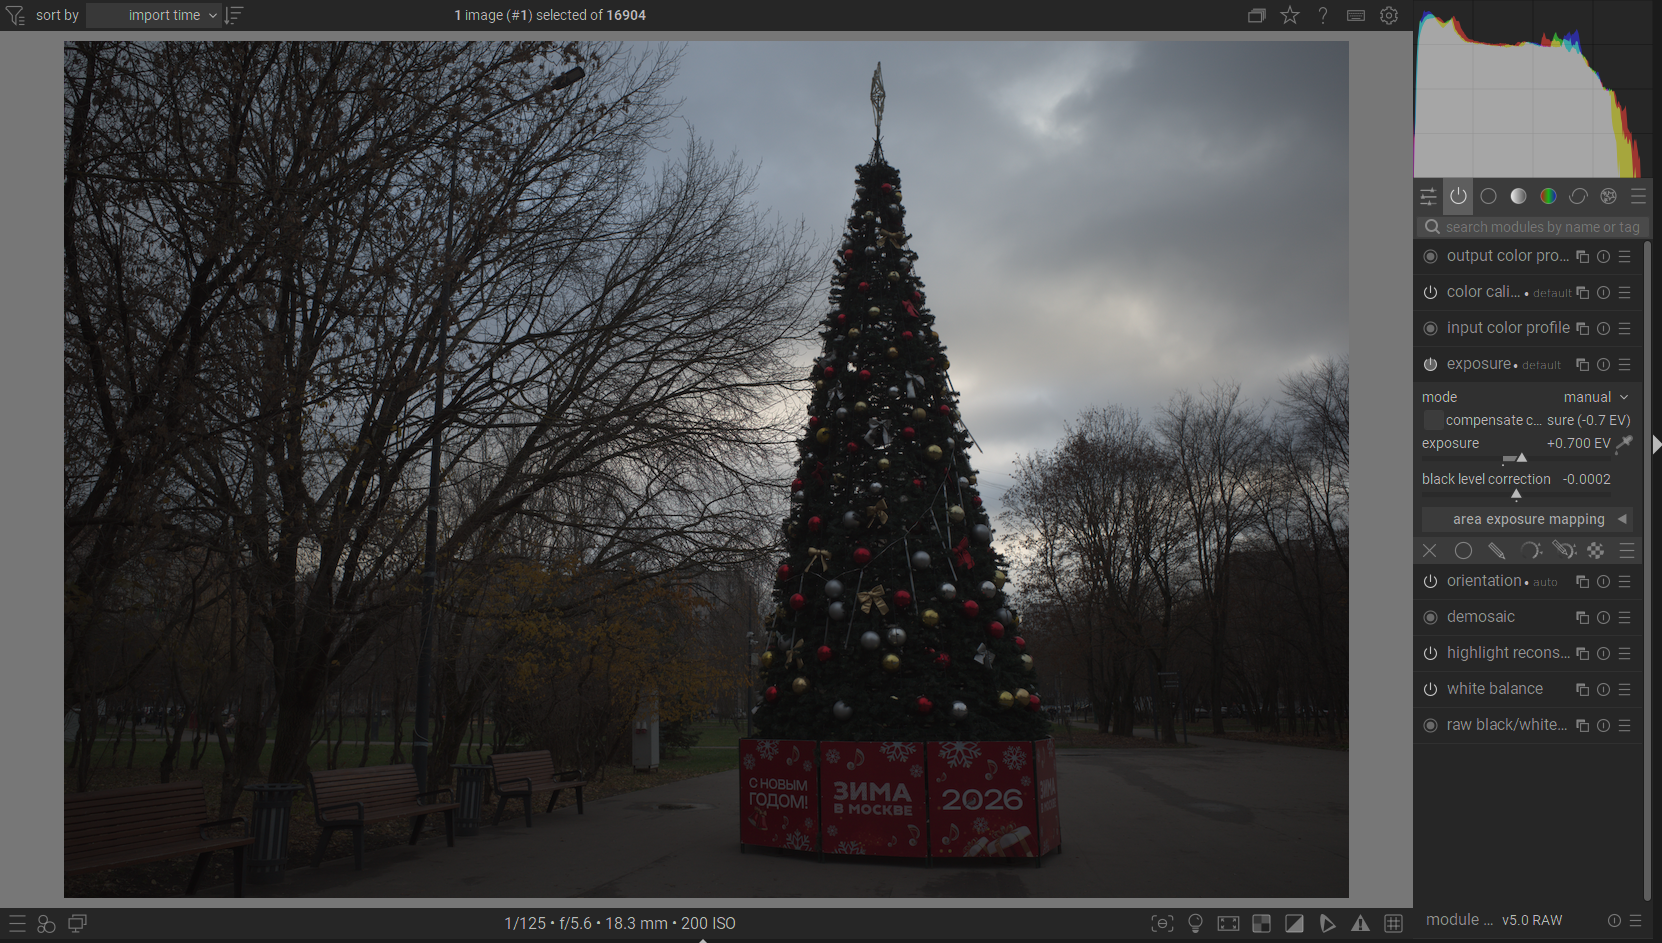
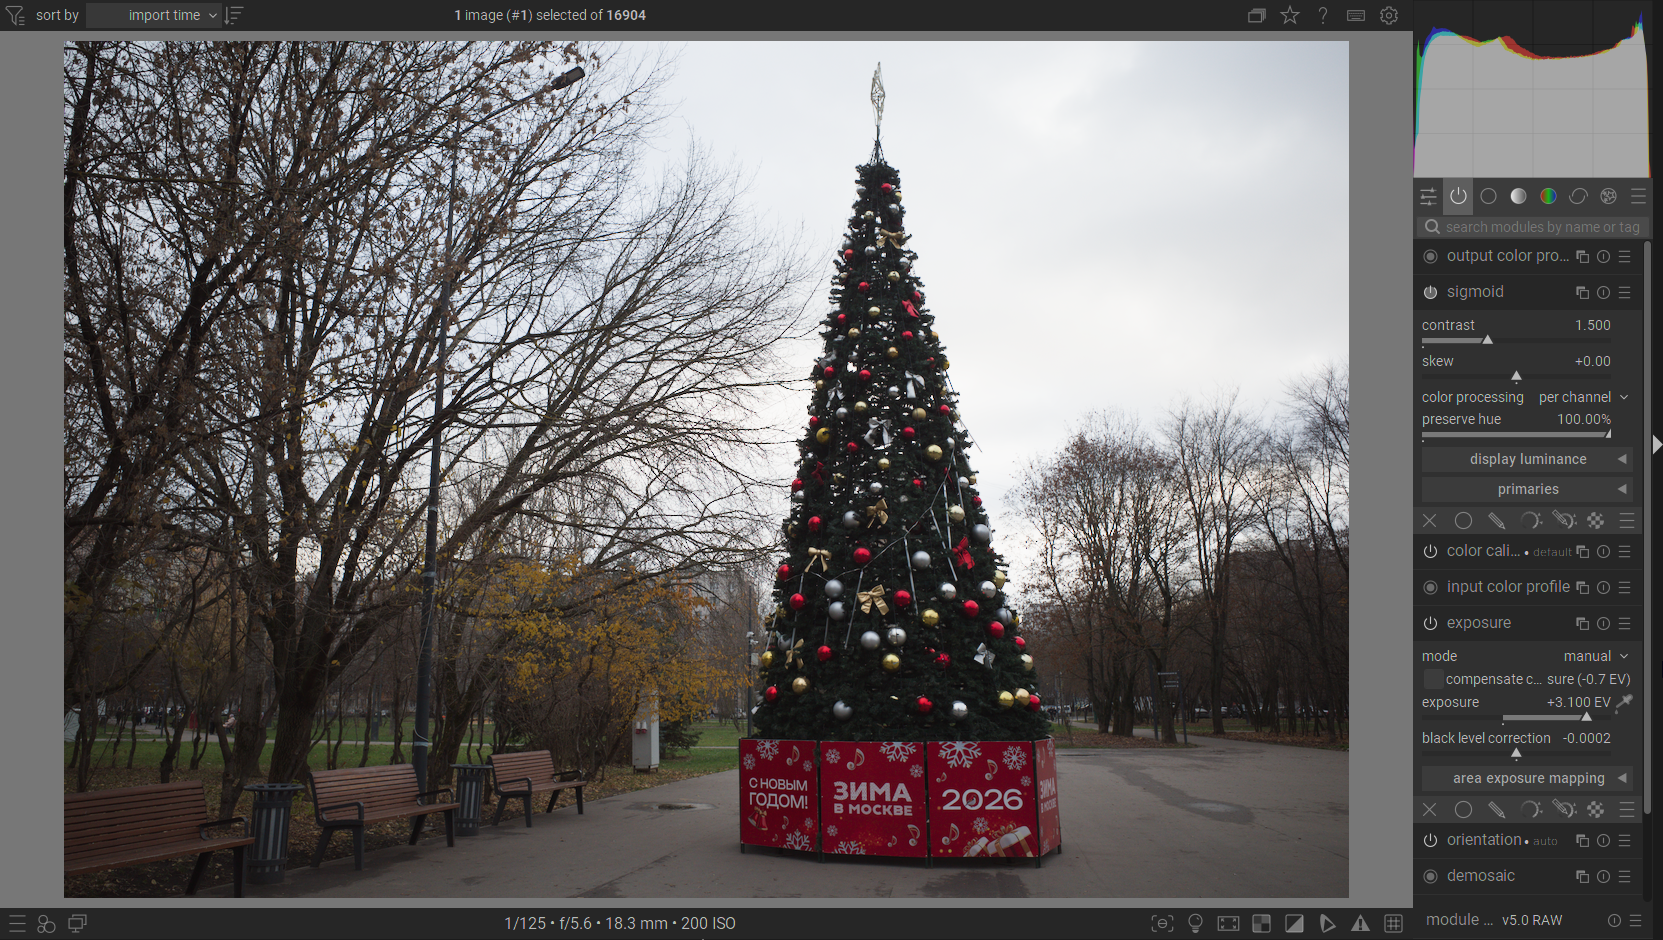
This is the proper exposure of the midtones, which naturally blows out the sky, since there’s no tone mappers enabled.
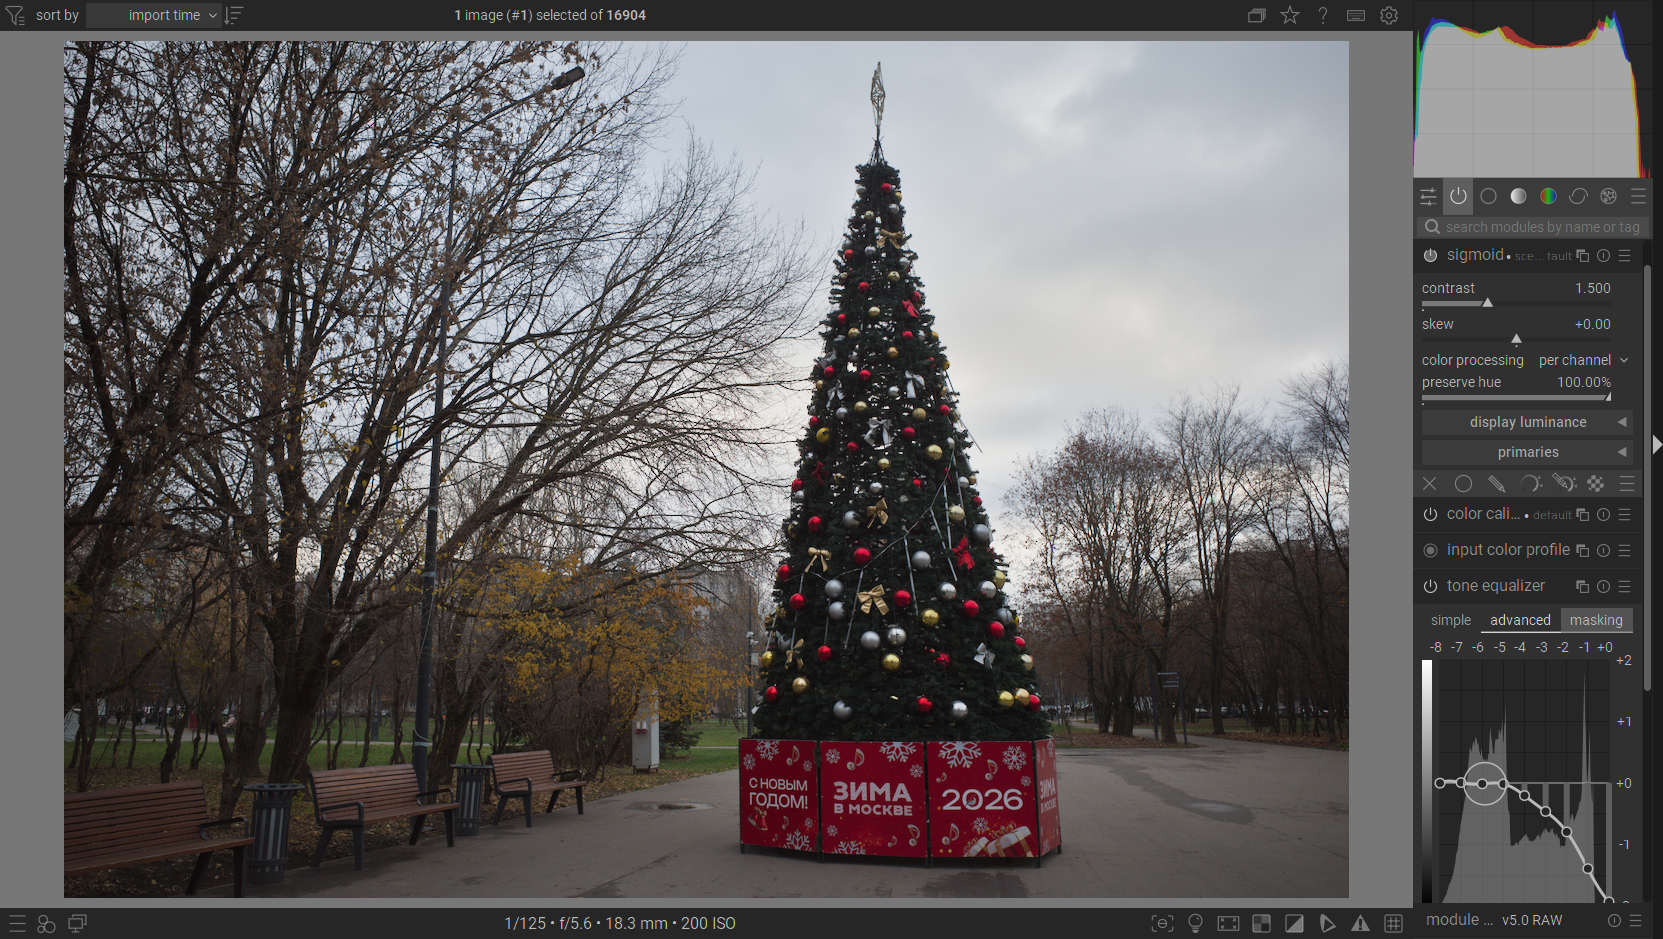
When I enable “sigmoid” with its default settings, it maps the range to where it needs to be, but as you can see, the sky has lost all of its detail and colour.
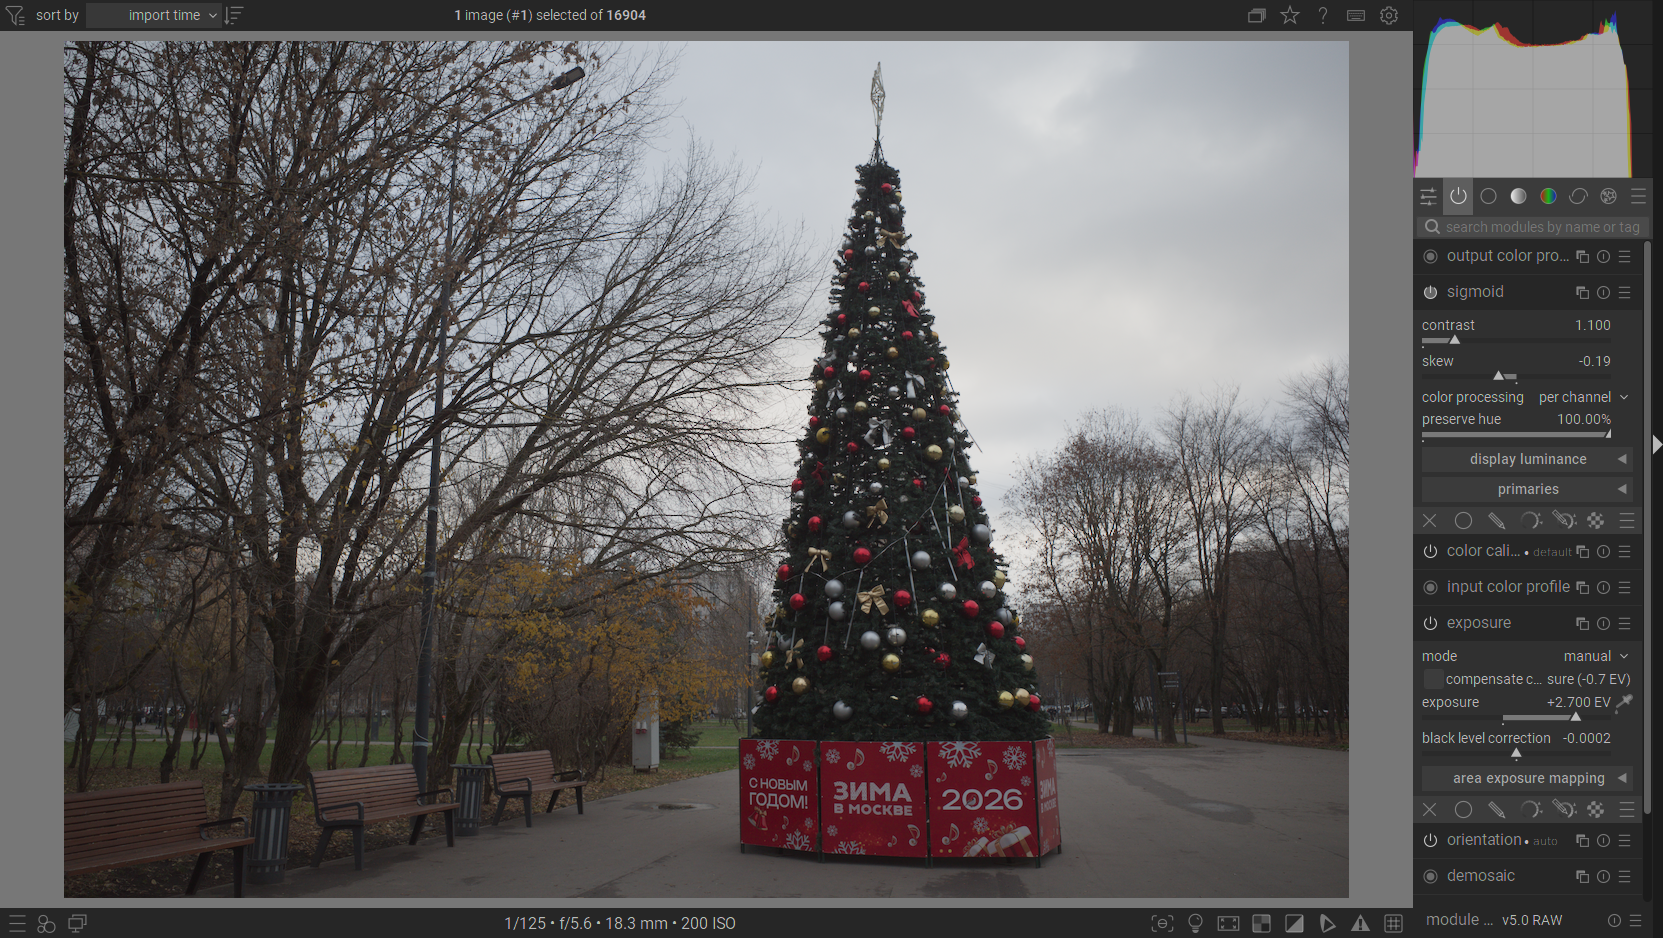
If I push the contrast down and reduce the exposure slightly, I can see a little bit of detail appearing in the sky, but nowhere near the no-tonemapped version. And I being to compromise on my exposure a bit.
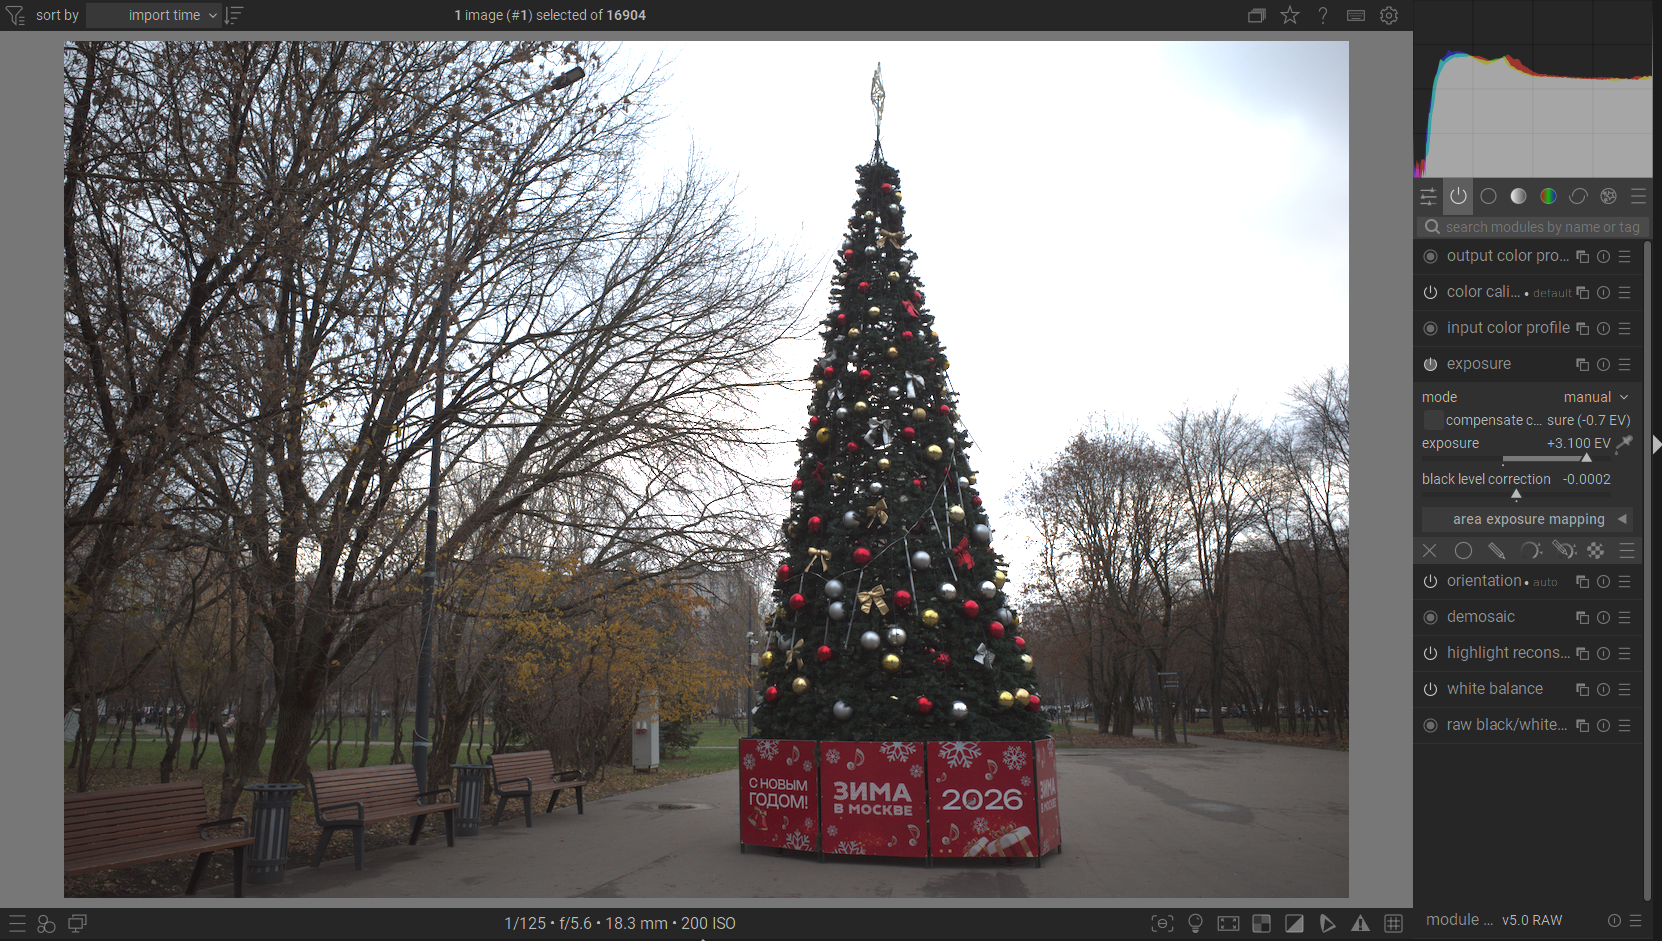
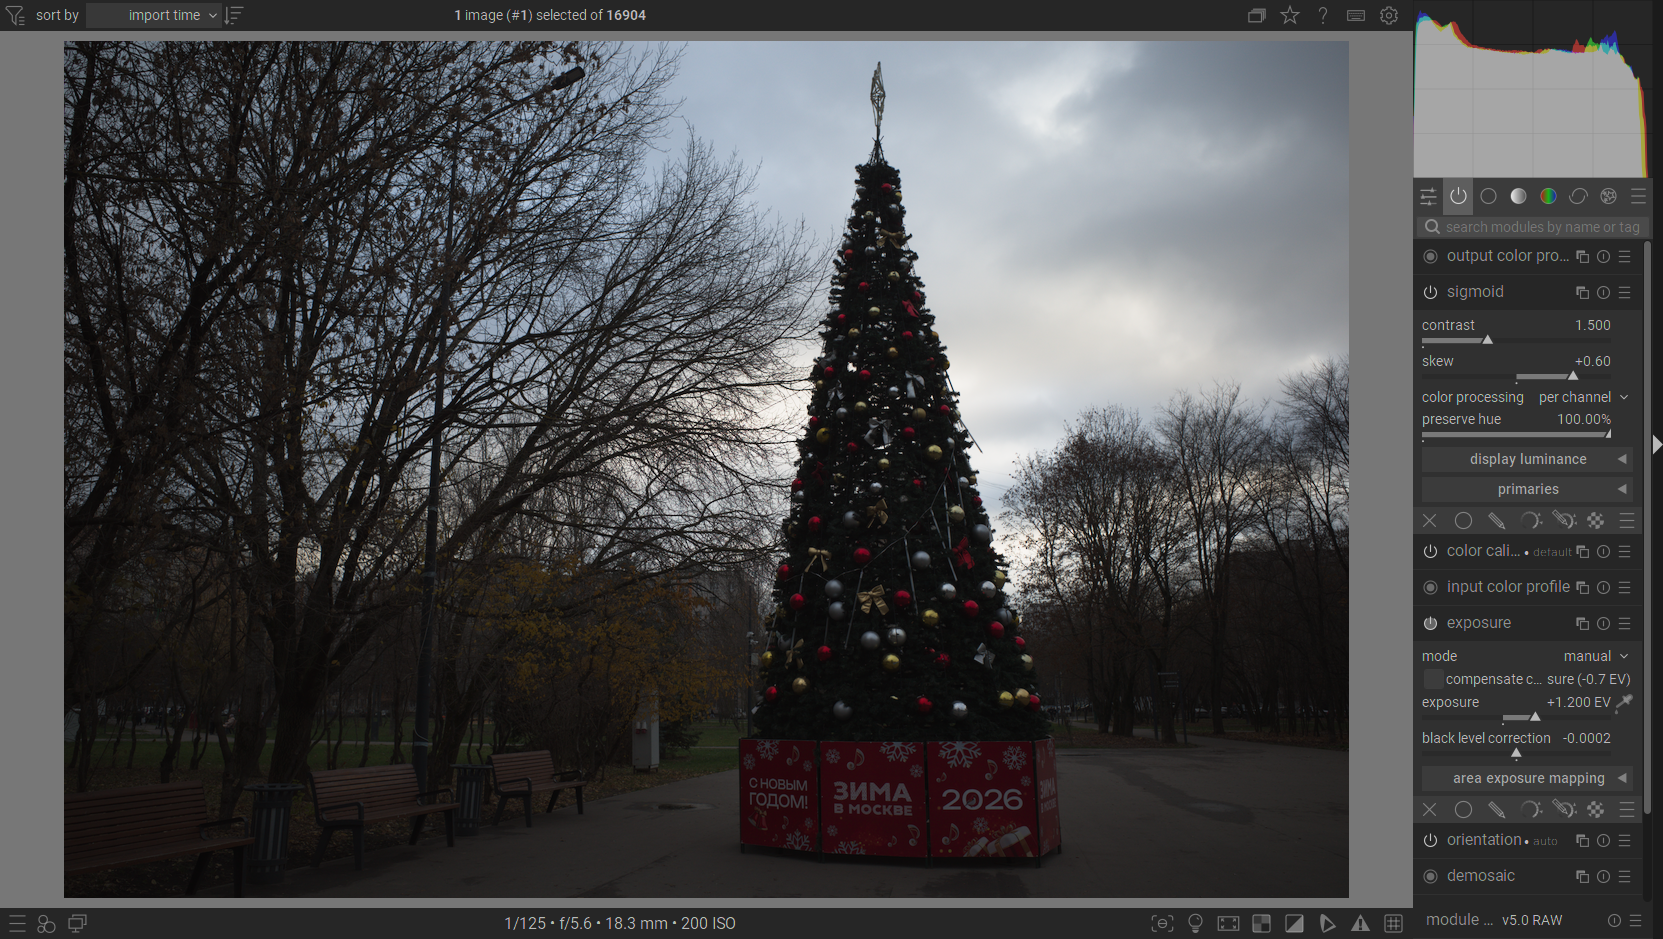
This is the setting that somewhat naturally represents the sky that I want to achieve, but it involves heavy underexposure.
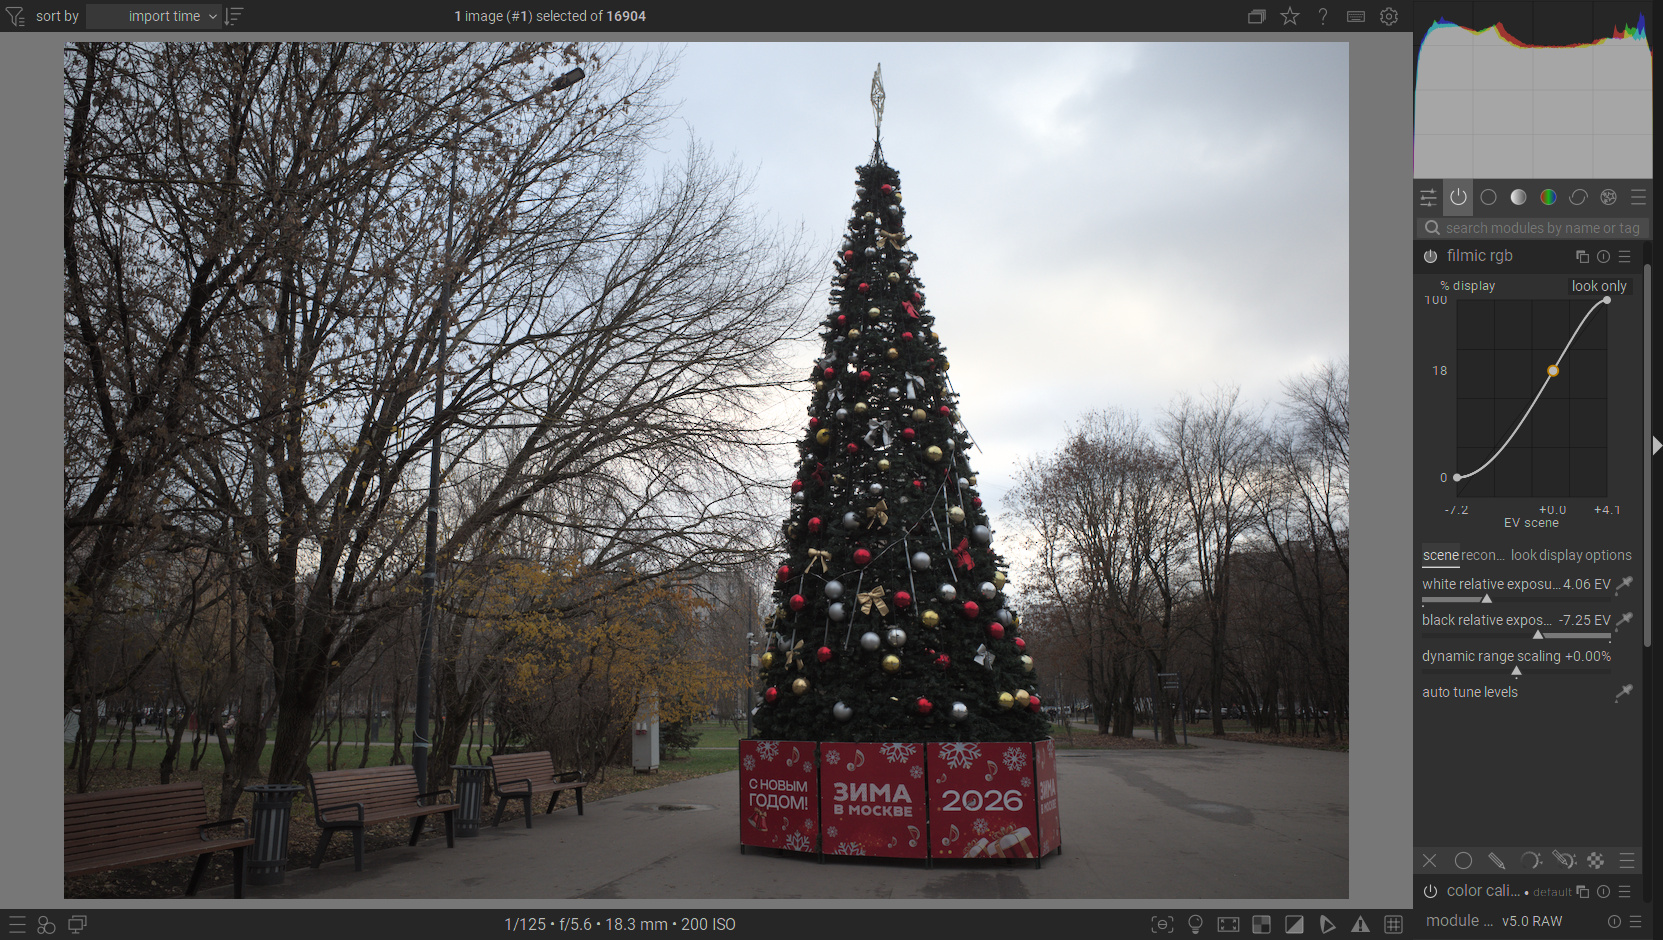
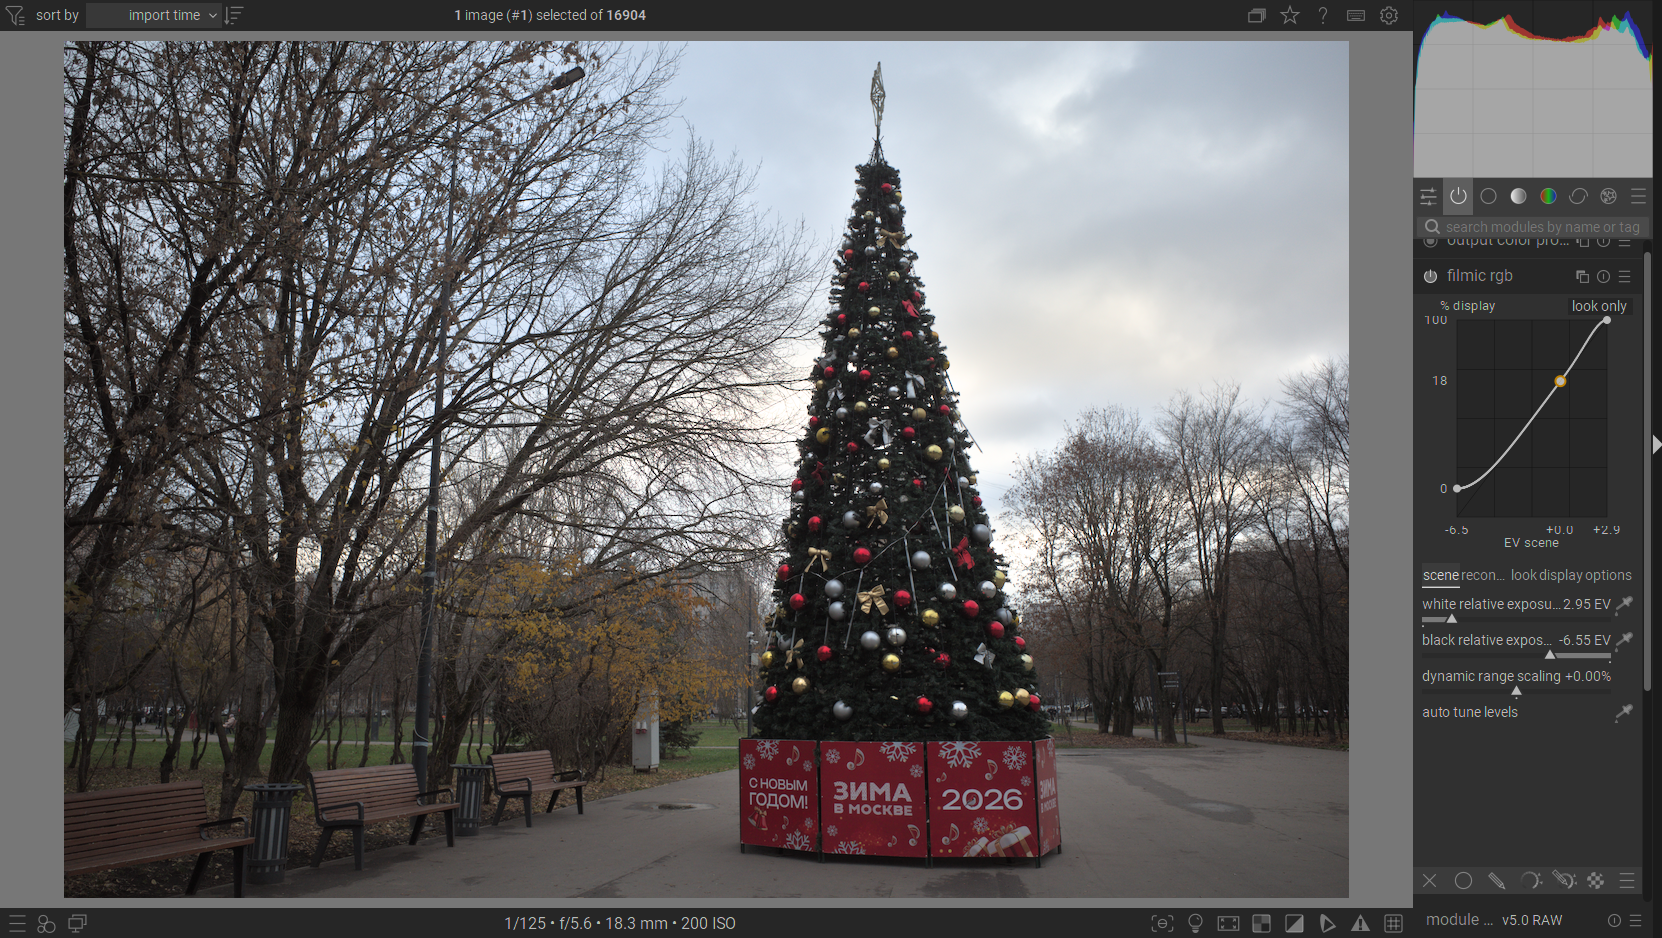
Now “filmic rgb” does a better job at the cost of a slight underexposure - it’s set to 2.8 in here. Yet still, the detail is nowhere near the non-tonemapped image.
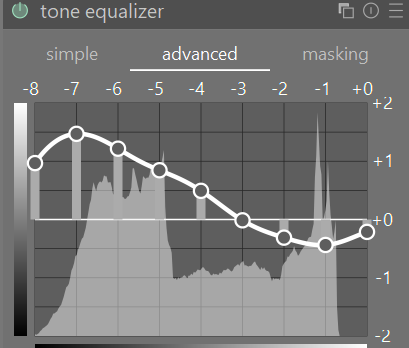
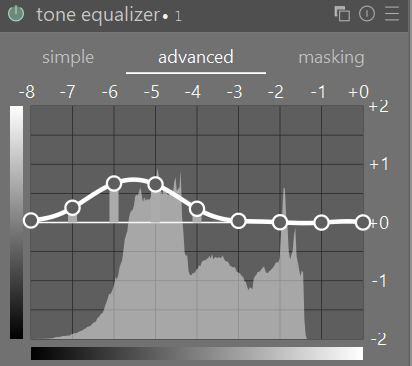
Here I’m back to the original exposure (3.1), now using “tone equalizer” without a tone mapper. The result looks very promising, but due to the nature of the applied effect (it’s done with clever masking and so on), I need to introduce this shoulder all the way from upper-midtones to achieve a natural looking effect. This compromises on midtone contrast.
Now if I turn on the default “sigmoid” in addition to this, it butches the sky once again. Colour is gone, texture is partially gone.
The skew pushed to the right, which, as per description in this tooltip, is supposed to favour contrast in the highlights, doesn’t do much beside lifting the highlights a little bit.

A fine tuned “filmic rgb” does a good job here, but still not quite there.
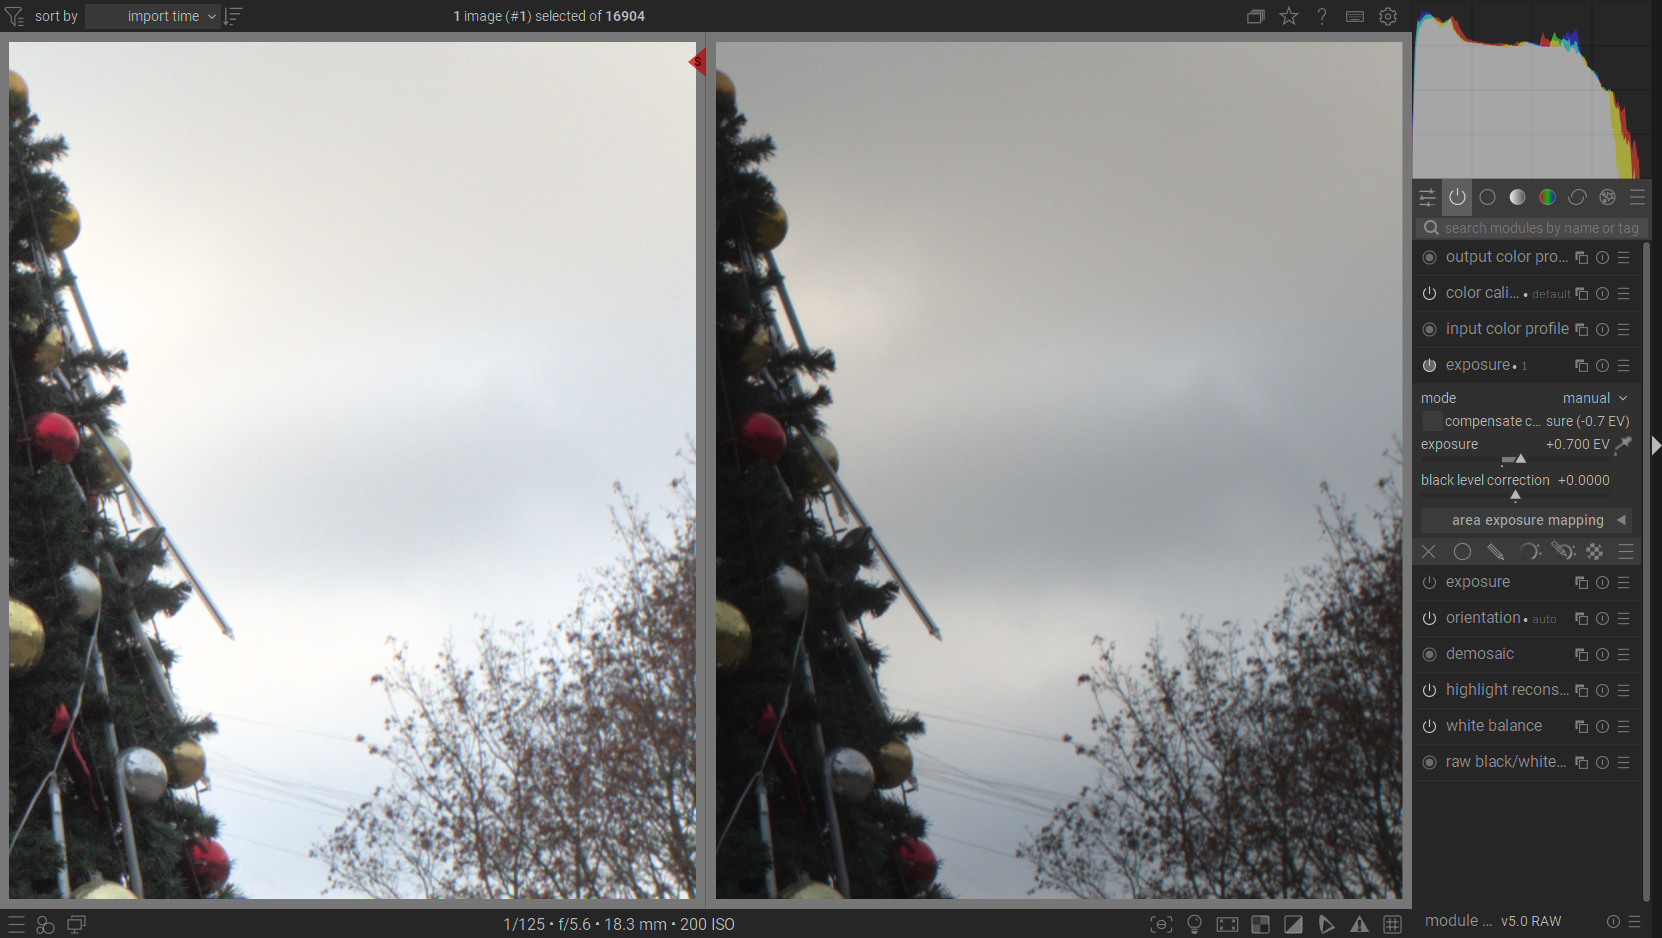
If we inspect this bit closer, you can clearly see how in the “raw” file (on the right) there’s a clear gradient going like this: a darker warm cloud, a slightly brigther warm cloud, a patch of bright blue sky, followed by a darker blue cloud, then a brighter warm cloud, and finally a darker warm cloud. Meanwhile, it looks much more simplified in the tonemapped image.
And finally, the same configuration with “filmic rgb” (left) versus a better exposed (1.0) configuration with the “base curve” preset “ricoh-like” (right). The result looks quite similar if we discard the fact that the rest of the image is heavily underexposed.

So how can I achieve a proper local contrast and colour in the highlights while also having a tonemapped histogram and a proper dynamic range in the image?