I’ve been photographing for a couple of years and always been using Darktable to process my RAWs so they look reasonable.
Lately I have come to realize how little I understand of what I do.
I use the exposure module to avoid clipping whites or crushing blacks
I use white balance module to calibrate how warm/cold my image looks
I just now understood the concept of the image pipeline
I’ve only just now started using Filmic RGB and Color RGB modules (and I have no idea what I’m doing)
I’ve watched numerous videos and started reading the manual for Darktable 4 (since there is none for major version 5 what I could see).
Everything I come by seems to expect some prior knowledge and I am struggling to understand how to control my edits and move with purpose in the program.
Some of my edits turn out great using the modules I am used to, but sometimes the modules i “understand” just aren’t enough.
I want to learn more and get better at post processing, but I feel stuck.
How would you recommend I get unstuck and continue learning and improving?
That’s pretty much how I started, too. After six months, you have started learning your way around darktable. After a year, you’re probably getting pretty good with it. After two years, you are pretty much understanding the most important parts. And, you still keep learning new techniques.
Oh, what would I recommend? Bruce Williams’s videos on Youtube
It took writing my own software to really understand, don’t recommend that. But, what I did was to write software that didn’t do anything for you, you have to build the tool chain yourself. Here’s what I know from that:
From a raw file, at least the following has to be done to produce a decent render, in no particular order:
demosaic: Whatever it takes to convert the camera data from Bayer/Xtrans/Foveon/whatever to the RGB data most imaging systems use.
black subtract: some cameras do that to the data before they deliver it to you, but most don’t. It’s that image sensors can’t record black=0 due to properties of the electronics, so the data needs to be subtracted down to 0 for images to look right.
white balance: This is actually due to two things: 1) the color temperature of the light at the scene, and 2) the varying sensitivity of the red, green, and blue filters of the filter mosaic on the camera sensor. This is not a temperature value, as most software would lead you to think, but three multipliers to skew the R, G, and B data to where white should be
color conversion: The camera records a greater range of colors than what can be rendered by display or print media, so somewhere in the process the data needs to be “gamut compressed” to what the media can handle. Some (most?) software does an intermediate conversion, to a large-gamut working profile, and that’s supposed to make colors easier to work with; I don’t do that, just a conversion from camera to sRGB when I save the JPEG. YMMV.
tone curve: The tone values of the camera are usually not what we perceived, so some sort of tone curve is needed to “lift” the data accordingly. The original state of that in the camera data is often referred to as “scene-linear” or “scene-referred”, and the lifting makes the data “display-referred”. Of note is there are usually two different tone curves applied to the image: 1) Filmic/sigmoid/whatever tone curve you want to mess with (filmic, sigmoid, etc), and 2) the tone curve associated with the color conversion, e.g., approximately 2.2 gamma with the color conversion to sRGB. Exposure adjustment is usually associated with this operation.
You typically don’t do much if anything with #1-4, except white balance if you don’t like what multipliers the camera figured out. Most of the user discretion is exercised in #5, and most of that is inflicted by a ‘tone curve’. This is an essential mechanism to understand; mathematically, it’s referred to as a ‘transfer function’, what that is is a ‘goez-inta/comes-outa’ mechanism where when a particular value is inputted, a corresponding value comes out. Most can be described by a curve, where the lookup can be done on a graph of the curve by finding the input value on the horizontal (X) axis, then tracing vertically up to the curve, then horizontally to the vertical (Y) axis to find the corresponding output. Really, understanding this mechanism will do more to helping you understand darktable’s internals than anything else you can learn.
All of raw processing is just variations on these basic operations. Hope this helps.
Can you describe, using pointed language, what is lacking in your current edits? Can you see what you want to achieve and just can’t achieve it, or are you thinking that moving more sliders will suddenly produce excellent work?
If you don’t understand what you are doing with filmic then use sigmoid instead. It will give pleasing results straight out of the box for most images with any user input.
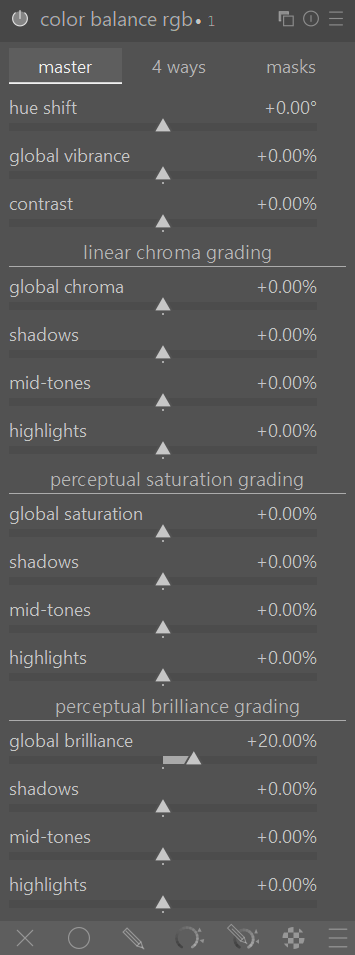
As for Color Balance RGB module read the user guide for its description and initially just use the sliders found master tab. They are pretty intuitive after reading the user guide. Forget the 4 ways and masks tab until you are more experienced.
I might suggest scan some of the playraw files and or submit one of your own…share how you edit now and you can receive feedback, suggestions and examples from others of how they might tackle it…there are many many images shared here…look for an interpretation of the edit you like and then you can breakdown the sidecar file that shows all the steps…
This can be very helpful and break down the barriers a lot faster than trying to struggle with video’s…
If any of your photography is landscape…outdoor stuff then this channel is fairly recent and well done…even if not you should be able to get a lot out of it…and Bruce WIlliams is updating his long standing series of videos as they are a bit long in the tooth so maybe follow along with Bruce…
Once I switched to the scene-referred modules, I wrote up the basic steps I use on each image (and what each is doing here):
Keep in mind that there are multiple ways to do the same thing, so if one seems difficult or confusing try another (e.g. maybe you find color equalizer easier to use than color balance rgb for color adjustments)
I am going to echo @paperdigits here a little and suggest that when you are feeling like the edit just isn’t what you want, it really helps if to sit back and (as precisely as possible) think about what some area is supposed to look like.
Does some patch need to be darker or lighter? Does it need more/less color? Do the tiny lines (details) need to stand out more or be less noticable?
Once you have that in mind you can select the tool you want to change it. For all the modules and complexity, we are mostly just making things lighter/darker or more/less colorful. The tools just help us to target our changes.
Also, sometimes it is beneficial (to me) just to play around with settings without a specific goal in mind. Removing the goal removes the frustration when you do not achieve it and, instead, lets you focus on what the hell that slider does. Watching Boris’ (@s7habo ) videos from a couple years ago can help here too. You can watch someone edit and just see what modules and sliders he uses, and the next time you think “Oh, I want to do X in this spot…how do I do that again?” you have a reference.
There may be a misunderstanding here: you should aim to get midtones right. In the scene-referred part of the pipeline (before filmic rgb or sigmoid), values won’t be clipped. It is the job of those two modules to map the unbounded range to ‘display’ (0…1) range.
With sigmoid, you have a curve that never quite reaches 0 and 1 (but gets very close). With filmic rgb, you define the points that should be mapped to 0 and 1 using the relative black / white exposure sliders, which also provide tools to pick the darkest and darkest points of your image. If there is no pure black and/or white in your image, or you want to deliberately clip the range, you can set the sliders manually.
I think the already suggested Play Raw path is a good way to improve. There are some good editors around here. Maybe tell them to make more basic edits, with just using a few modules. So it’s easier to understand what module does what. And don’t be shy, ask if you don’t understand a step.
Anyway, for me the most important thing is to have an idea how the photo should look in the end. I usually take the postprocessing already into account when I shoot the photo.
If you can imagine how the photo should look, it is so much easier to get to a result you are pleased with. What is it good for, if you know what every single slider does in darktable, when you don’t know how the Picture should look.
For some people this is easy and they don’t have to think about it, for some it is hard. What helps is a thoughtful looking at everything around. I already described it in another thread. If you look at a photo don’t think in terms of great or bad. Think about what makes this photo a good or a bad photo. What is special, why do you like it or not. The same counts for everything around you. On a cloudy day have a look how saturation of colours change, when the sun comes out. How deep are shadows…
You only can make good edits, when you know what a good edit is.
I’ll give an opinionated workflow if this can help you to have a basis to work with. The module are in the order I generally follow when editing with how I use them:
Main workflow
module
usage
color calibration
Set the white balance with the picker on a neutral area (grey/white). Check that “area color mapping” is set to (50, 0°, 0)
exposure
Adjust until the midtones are midtones¹
tone equalizer
Correct shadows and highlights in case of high dynamic scene. Sometimes it is better to use one instance for shadows and one instance for highlights. Watch for the potential halos and correct with the parameters
sigmoid
Starting from the soft preset, I set it in sRGB mode (primaries section) and use it to increase general contrast in a soft manner. You can increase the white point by setting the “target white” above 100% to increase contrast in highlights²
color balance rgb
Adjust saturation and contrast. I generally increase saturation in the shadows and decrease it in the highlights. For a softer contrast, I use the “perceptual brilliance grading” section. For a more punchy contrast, I use the contrast slider, and in this case I usually set the “contrast gray fulcrum” setting (last tab of the module) to the area where I want the biggest contrast increase³
color equalizer
Tweak the individual colors to give a style to the picture or correct specific hues
color balance rgb
A second instance after (above) the first to do the color grading. I use the “4-way” tab to add different colors in shadows/highlights
diffuse and sharpen
I use the “lens deblur” preset and use a mask to restrict sharpening to the details and midtones
contrast equalizer
To sharpen and add local contrast. I only use the finest (last two) scales because I don’t like the effect of the largest scales. I mask this module to restrict it to zones with details and avoid adding noise (I re-use the diffuse and sharpen mask using the raster mask) tab. Watch the halos when using larger scales
¹ You can use the color picker section in Lch mode and check that your midtones region is around 50% in luminance.
² You can press “o” or activate the clipping indication button to check that you are not clipping (too much) in the whites.
³ If you are using the luminance slider in the power section of the 4 way tab of color balance rgb, be sure to set the “white fulcrum” in the “masks” tab of the module (use the associated auto picker).
Utilities (enabled by default in my preset)
module
usage
lens corrections
default settings
chromatic abberations
default settings
denoise (profiled)
default settings most of the time, chroma only in case of high noise.
dithering
set to “random” -80dB to avoid banding in gradients (social media compressions tend to do this)
This is a nice little summary video of using DT…from there progressing towards using things in a way to really start editing with purpose you will want to watch @s7habo 's videos… Using playraw examples as I suggested above and looking in on the Darktable landscapes channel which has some great videos and covers a lot of ground…
eg
would help also to master the software… It will take time and if you share pointed examples and share them here people should be able to help you with both understanding and implementation…everyone has favourite ways to do things (@gigaturbo shared a nice concise roadmap) and in the end getting a result that is pleasing is all that matters not what tools you use to get there… for sure you can and will learn to be more efficient and effective but it will take a bit of practice if you are up for it…
One thing that really helped me, but was (still is) a slow learning process, was to read up and try to get a basic understanding of colour science, in this case meaning how we see and perceive colour. I have come to realise that all we are doing when post processing a photograph is manipulating colour. Pushing and pulling the RGB values in such a way that we see changes in contrast, brightness, saturation, tone, shadows, highlights, colour cast, white balance etc etc etc. The various modules in darktable provide different ways to adjust the RGB values and the mathmatics involved is (to me at least) very sophisticated and complicated. We don’t need to understand the mathmatics, but we do need to understand how we perceive the results.
I would recommend 3 things you could try.
Read through the manual (I am not trying to be sarcastic here).
Check out the youtube channel of Boris Hajdukovic, so good! He does have a few videos showing a complete start to finish edit.
Check out the youtube channel of Aurellien Pierre, specifically his video on colour balance rgb. It’s a heavy watch, but having watched it 3 or 4 times now it really has helped me make sense of things.
Other youtube channels definately worth working through are Andy Astbury and Bruce Williamson.
A website really worth taking a look at is Cambridge In Colour. It’s a really good read to dip in and out of to learn the various concepts.
I found it all to be quite a hard slog if I am being completely honest but at some point the penny just finally started to drop. This forum has been, and continues to be particularly instrumental in my learning.
I appreciate the shout out! I was about to link to my video. It is meant to be a clear and simple workflow to help people get a good grasp of the program.
It’s explained further in the beginner tutorial below, but it’s impossible to clip the highlights with exposure, so don’t worry about them and expose for what should be mid-grey instead. You then bring the highlights back to where you want them with other modules.
The modern way to white balance is with Color Calibration CAT. While you can use it to set a “creative” wb, like you do now, it’s designed more for setting a technically correct/neutral wb, with creative adjustments done elsewhere. Tint in RGB primaries and power in Color Balance RGB are both good choices for creative wb adjustments.
This video is a good demonstration of this concept of technical wb with creative wb later:
I can imagine you’re a bit overwhelmed now with all tips, advice and url’s. I’m - as well as you - relatively new to darktable, started beginning this year coming from LR + PS. So I’ve/I’m more or less experienced/ing something you experience.
I have a request for you which is in line of the above:
Would you mind posting one or a couple of photo’s in the ‘play raw’ category? Photo’s you found hard to get matching your vision. Maybe even share what you want to achieve with each photo and what you’ve tried… I think this will be a very direct way to learn on the job. You’ll get back from us our - sometimes crazy - idea’s in the form of an .xmp file with all used modules and settings within it. When you import this .xmp you’ll see what’s been done to your photo to reach a certain result. I feel this is one of the best and nicest ways to progress! Hope you like doing so.
I learnt something today. This will change my approach to using DT. Previously I had ignored the general advice to use the exposure module to set mid-grey and instead used it to set the highlights and then recovered the shadows later. This seemed to work fine for me. However, upon reading this post I opened a HDR image and increased exposure to set the mid grey which brought out much more shadow detail as well. This left my highlights bleached away to nothing, but I was able to recover the highlights with the tone equalizer module. The result was a very flat image but using the contrast slider in Sigmoid I soon had a pleasing result from a very HDR image. I repeat, learnt something today. Amazing.
What modules do people prefer to use to recover the highlights after setting the mid grey in exposure?
Are you asking in the context of an actual HDR image (where you’ve merged several exposures) or for a single frame?
I don’t do much HDR at all anymore, and for a single frame, when I use exposure to set my midtones, the highlights don’t really seem to clip much if at all. If they do “clip” I use white relative exposure in filmic to bring them back to the level I want.