(This is a new topic started at: [DE] darktable.info – A new resource for the German-speaking community (Modern Workflow & AgX) - #143 by paperdigits)
Let me start to explain where I am coming from. I have been using Lightroom and Capture One for years before moving to darktable. But I was getting very annoyed by the vendor locking. And I am preparing a move to Linux, and well darktable was by far the best option I tried (because the interface is clean - surprise surprise)
This post is intended to explain my learning process with the tone equalizer. Nb. I have used the current version of the tone equalizer, the UI is better than the previous one, but for my story here there is not really a difference.
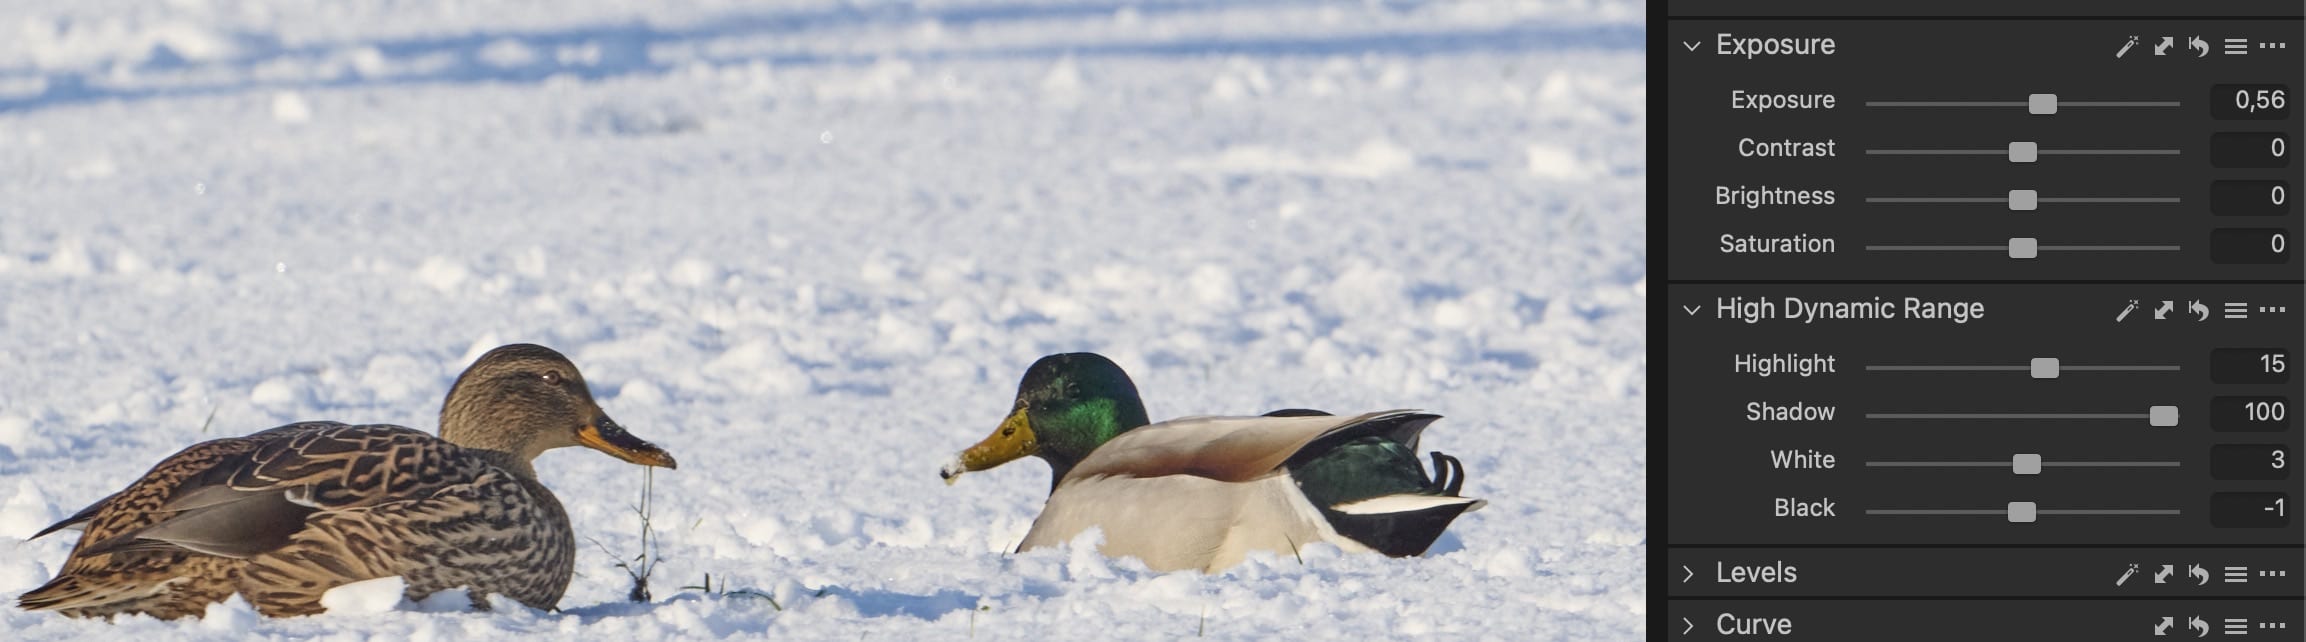
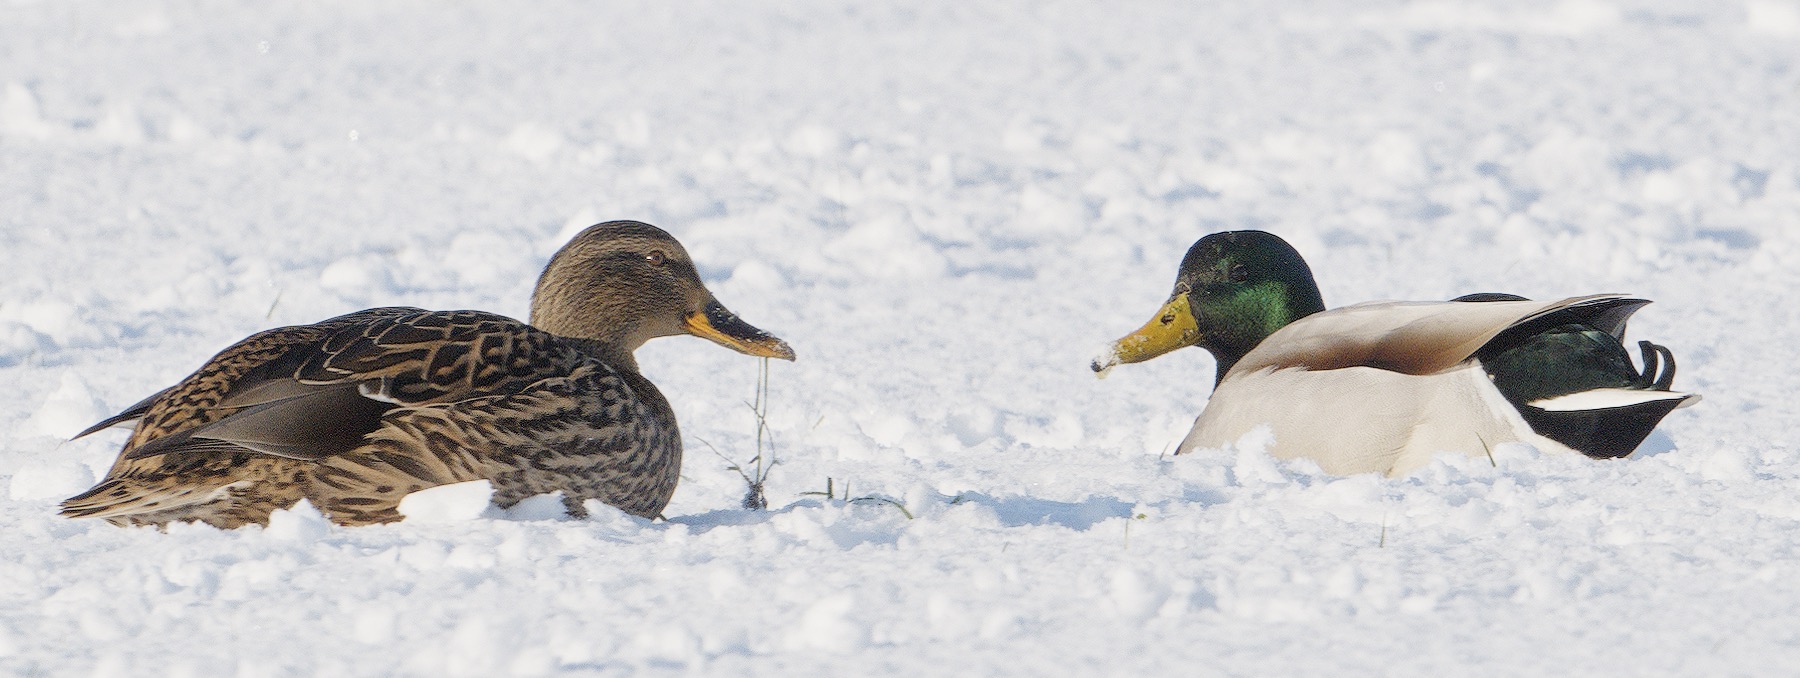
So as example to what I struggling with. This is the image as shot. Yes, it is under exposed, but that is rather as intended. So ensure the highlights are not blow out, which is extremely easy to do in snow. Please note, while this is stationary shot, birds move a lot, which doesn’t allow much time to and carefully expose.
So in Capture there is a module called ‘High Dynamic Range’ which is very easy to use. For the image I raised the exposure a bit, bumped up the shadows are gave some punch using the highlights. This is literally 30 seconds. (of course not much control)
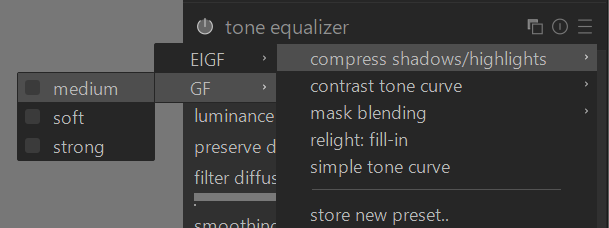
So this is wanted I to replicate in darktable. So as I said, I started to use the shadows and highlights module but that will often create halo’s or blur for me. So I moved over to the Tone Equalizer, as the documentation suggests. The first thing to wrap your head around is that whole maks thing. Note, coming from a tool like Capture One that whole mask thing (which I assume that they use as well) is cumbersome, why not just one or two sliders??
So the first thing I read in the manual:
When used together with filmic rgb, this module replaces the need for other tone-mapping modules such as the base curve, shadows and highlights, tone curve and zone system (deprecated) modules.
Okay… But I am using sigmoid. Does that means that I can’t use this? Well I figured that sigmoid and filmic rgb are both tone mappers so just let’s try.
The next section in the manual describes how tone equalizer works. It reads well, no comment here. The only things, if you want to know, how to use the module then it is odd add first. But it makes sense that it is there at the beginning.
Then I read this
Examine your image beforehand to identify which regions you wish to dodge and burn, and use the controls on the masking tab to ensure that those areas are reasonably separated in tone within the final mask. This will allow those regions to be adjusted independently
This gave me the impression that the regions are independently. In my mind that means that if I change the slider for one region, other regions are not affected. But given how the curve is changed, this is not the case?? Or what am I missing here.
So let’s open the image in darktable, and measure how dark the duck is. That is -2.5EV
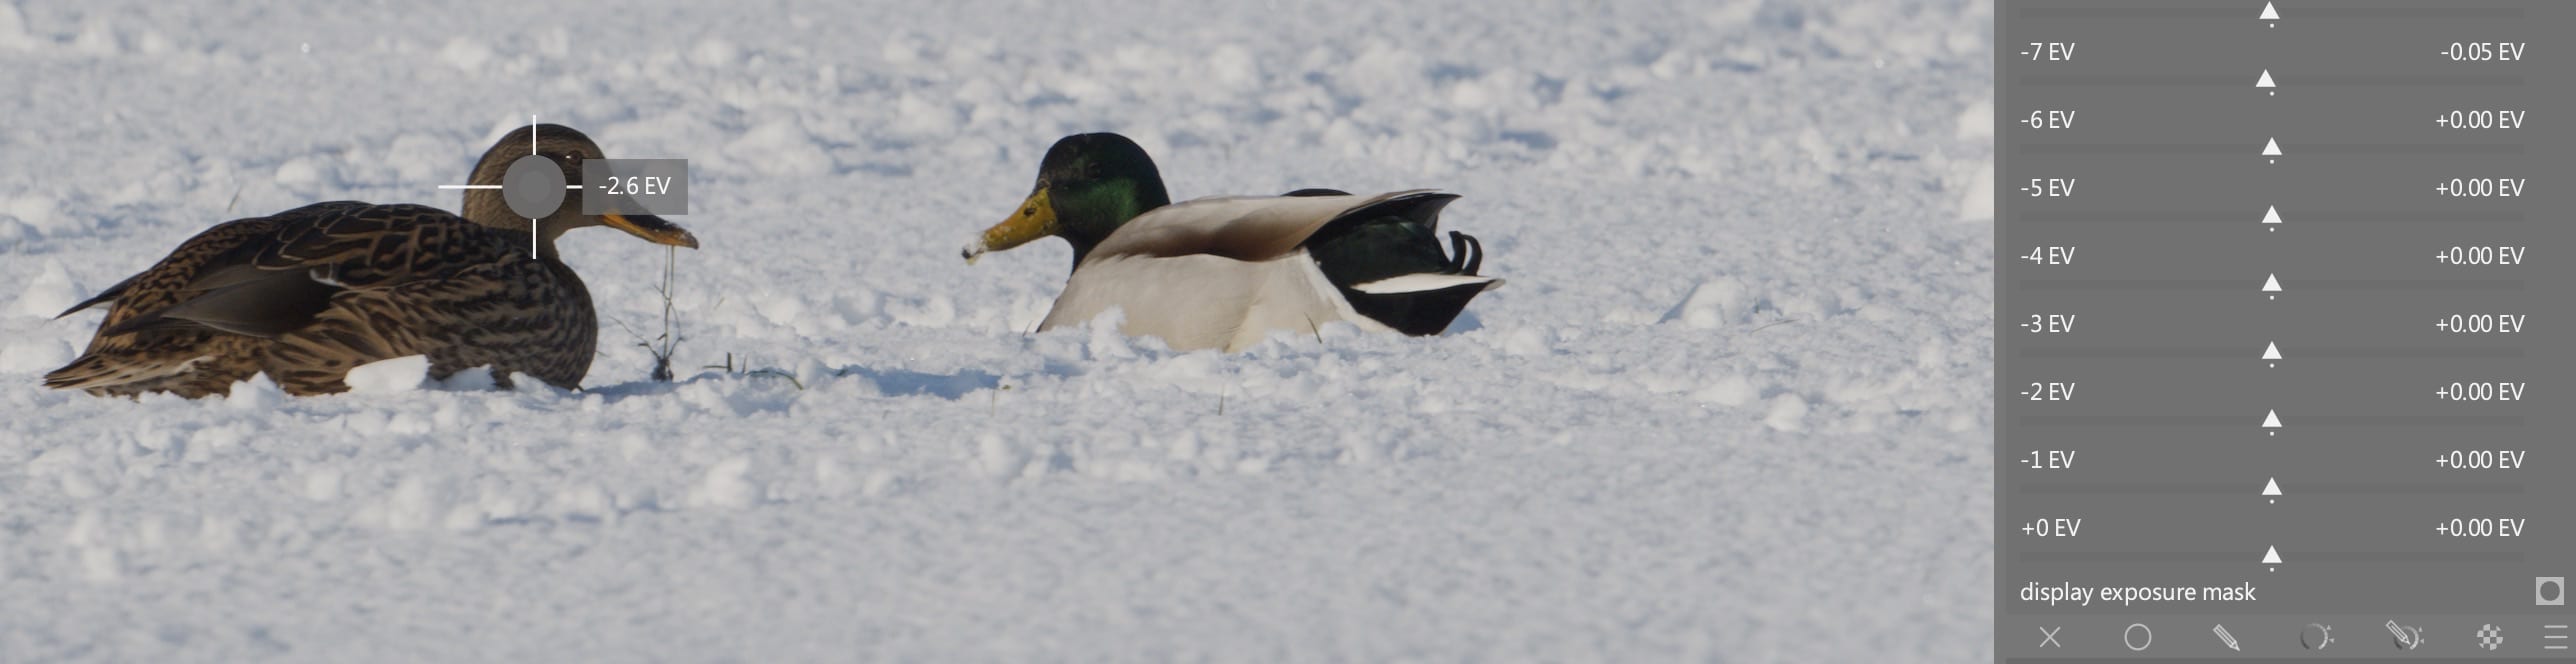
So let’s raise the real dark shadows (-6EV).

At the beginning I was baffled by the result… What is going on here? I pushed -6EV and evyerthing is strange… So are they independent or not??

As a beginning user of darktable at this point I was completely lost. I actually considered removing darktable, because if a program can’t handle shadows properly… it is a lost case for me. But this seemed user error to me (and I figured rather quickly that darktable is not holding your hand like Capture one is doing). So let’s try the advanced tabs.
But first is read:
If the mask’s histogram is evenly spread over the entire tonal range, sliders towards the top generally affect the shadows, whereas sliders towards the bottom generally affect the highlights. You can check the spread of the histogram within the advanced tab.
From a mathematics background I know what the spread of a histogram is. But I hat to read this sentence 3 times before I got an idea what it could mean. This would be more clear in my opinion
When the mask’s histogram spans the entire tonal range of the image, the upper sliders mainly influence shadow tones of the image, and the lower sliders mainly influence highlight tones. To check the histogram, open the Advanced tab.
Next I read:
If the histogram is too bunched up, this means your mask doesn’t have a good spread of intensity levels, which makes it harder to independently control the brightness of the different parts of your image.
As a non-native speak I was puzzled by too bunched up, I actually had to look this up in a dictionary…
Moving a single control point will also affect control points on either side to ensure the curve remains smooth. This behaviour can be adjusted using the curve smoothing control.
So the regions are not independent??
curve smoothing
Control how the curve is interpolated between control points… Move the slider to the left for a more well-behaved curve, but beware that this can result in harsher tonal transitions that may damage local contrast.
I am sorry, but I have no idea what a well-behaved curve is. Initially I thought that it would fix the thing that I broke earlier. But clearly that is not the case ![]()
Okay let’s continue reading.
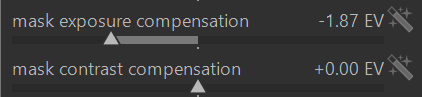
mask exposure compensation
Adjust the mask’s histogram to the left or right. If you have used the exposure module to adjust the image brightness, you may need to offset that adjustment by using this slider to re-centre the mask’s histogram. Click on the wand icon to the right of the slider to set the exposure compensation such that the average of the mask’s histogram will coincide with the central –4EV control point. The slider can then be fine-tuned as required.
mask contrast compensation
Dilate (spread out) or compress the mask’s histogram. The wand icon to the right of the slider will propose a reasonable starting point, which can then be fine-tuned to optimize the spread of the histogram under the tone equalizer control points.
Okay the mask exposure compensation is clear. But I was baffled when I was trying the mask contrast compensation slider. I would assume that the peak of histogram of the mask says in it’s place, but would get lower. But sometimes it can jump 1EV ??? I would not have guessed this from what I read.
From all want I read so far, I find it (still) very hard to go into the tone equalizer and correctly predict what changing the sliders of the mask will have for effect on the image. I mostly do something by trail and error, and it works. And most often, I am happy with the result.
But I am not always happy with the result. Sometimes I just can’t predict where I want the shadows to be at. And I noticed that raised shadows seems noisier then I was used to in other software.
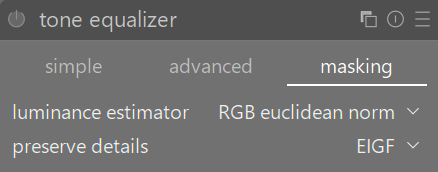
Note: I have not covered the masking tab section of the manual. That is above my pay grade at this point