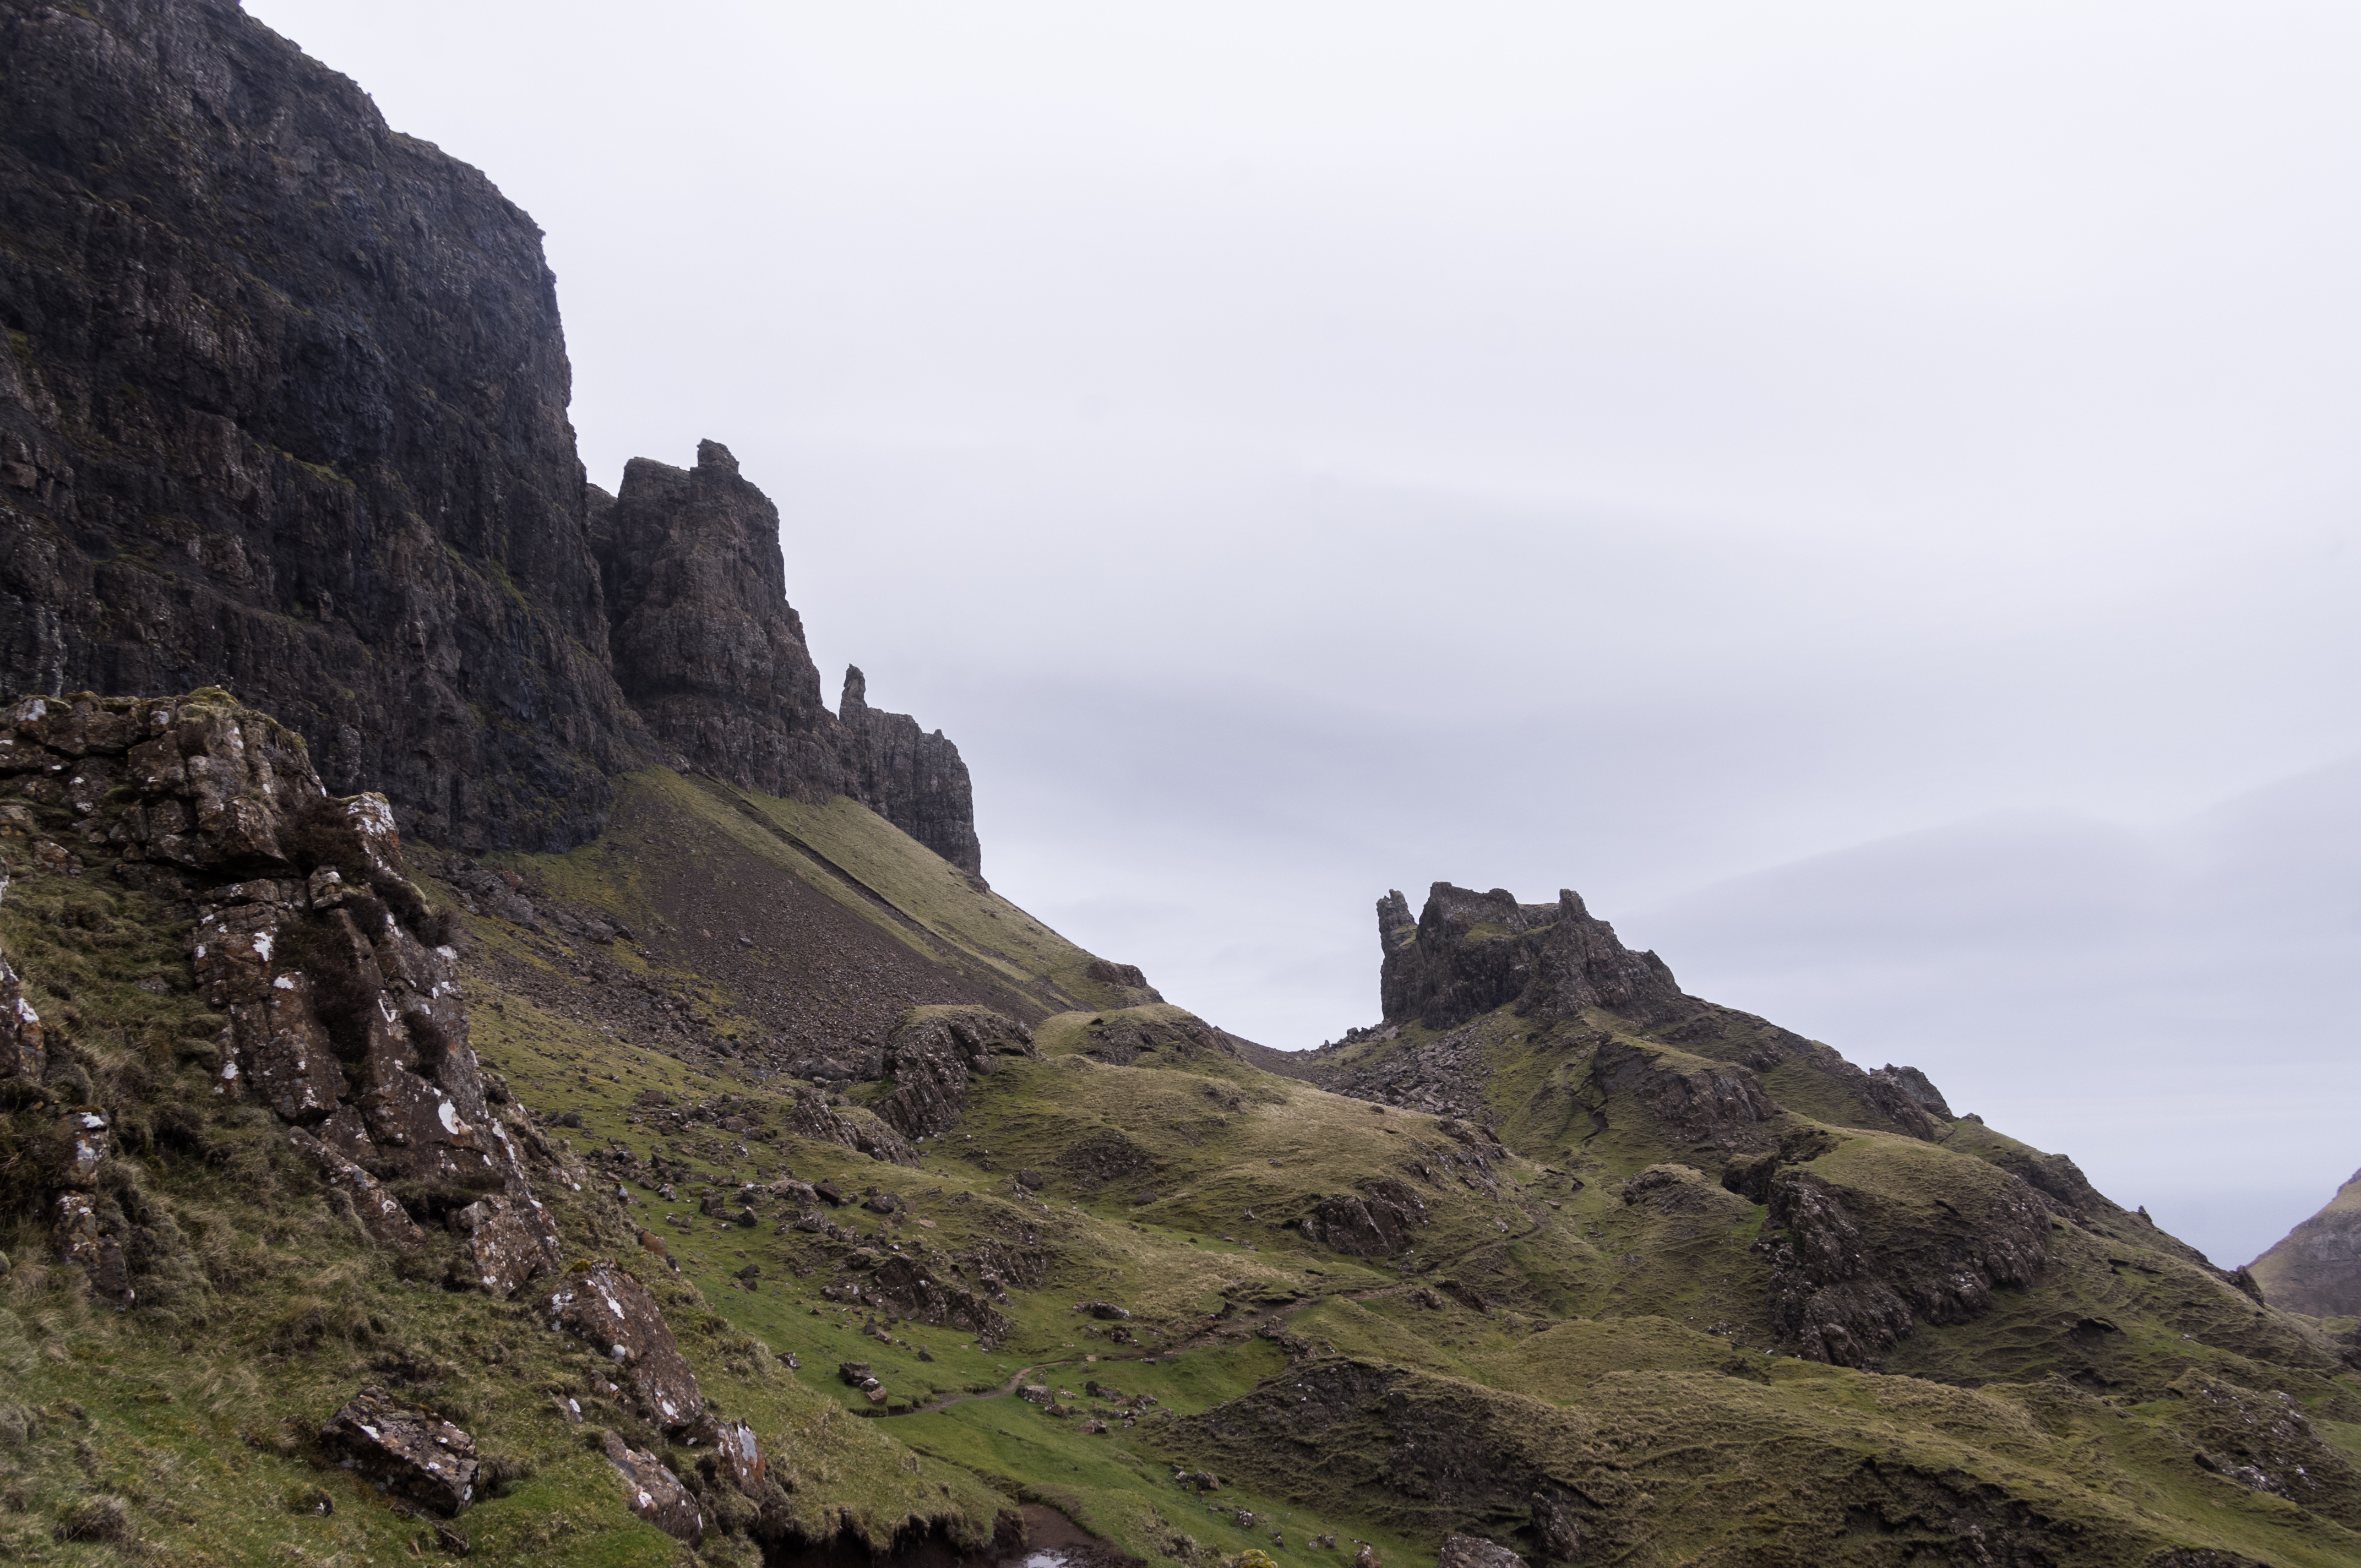
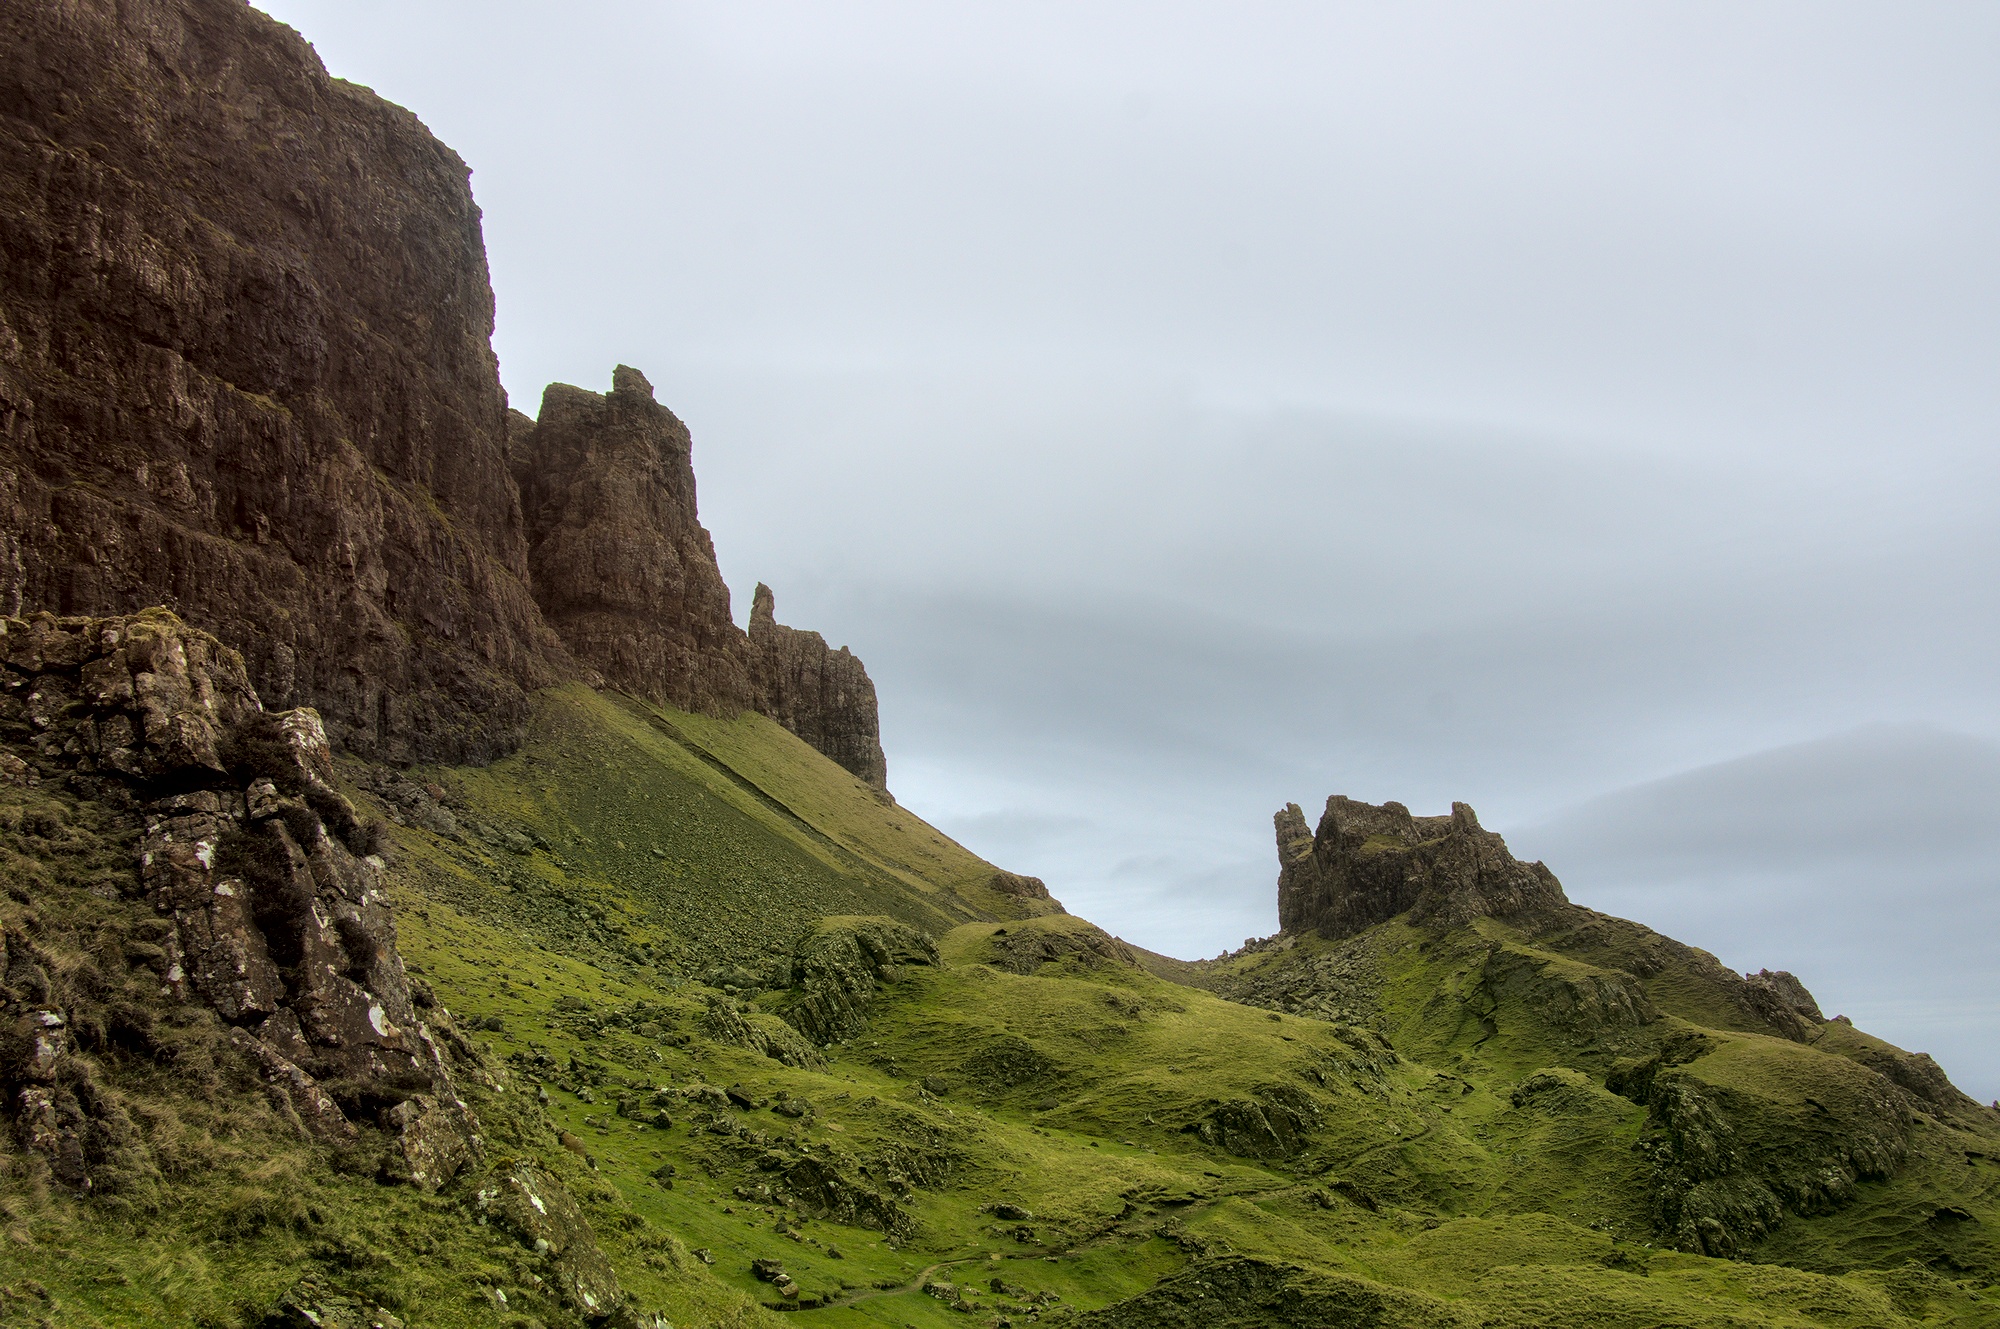
I didn’t want to hijack @black_daveth’s thread “The Quiraing, Isle of Skye”, so I open another one here with a shot I took in May 2015 from a similar perspective. The weather was worse then than on black_daveth’s photo, though on my photo you don’t see yet that an hour later a storm began that would last the rest of the day and would drown my Pentax K-r on my way to the Storr.
At that time I had Lightroom 5 and used it mostly to retouch the dirt on the lens and to slightly increase contrast in the rocks and in the sky with the aim to keep the look as natural as possible (according to my memory)
Now trying to learn darktable and inspired by aforementioned thread I gave it another try in dt. I thought I could not only manage contrast but also overall brightness in the filmic module but somehow I didn’t manage, I had to use levels additionally.
I’m not sure whether I exaggerated saturation a bit, particularly in the sky. When the greens seem right, the clouds seem to blue. I have to learn how to tune this separately.
2015-05-23 - 7865_01.DNG.xmp (13.3 KB)
(Unfortunately I also don’t yet master darktable’s spot removal tool suficciently, so in the sky there are a few traces of the tool.)
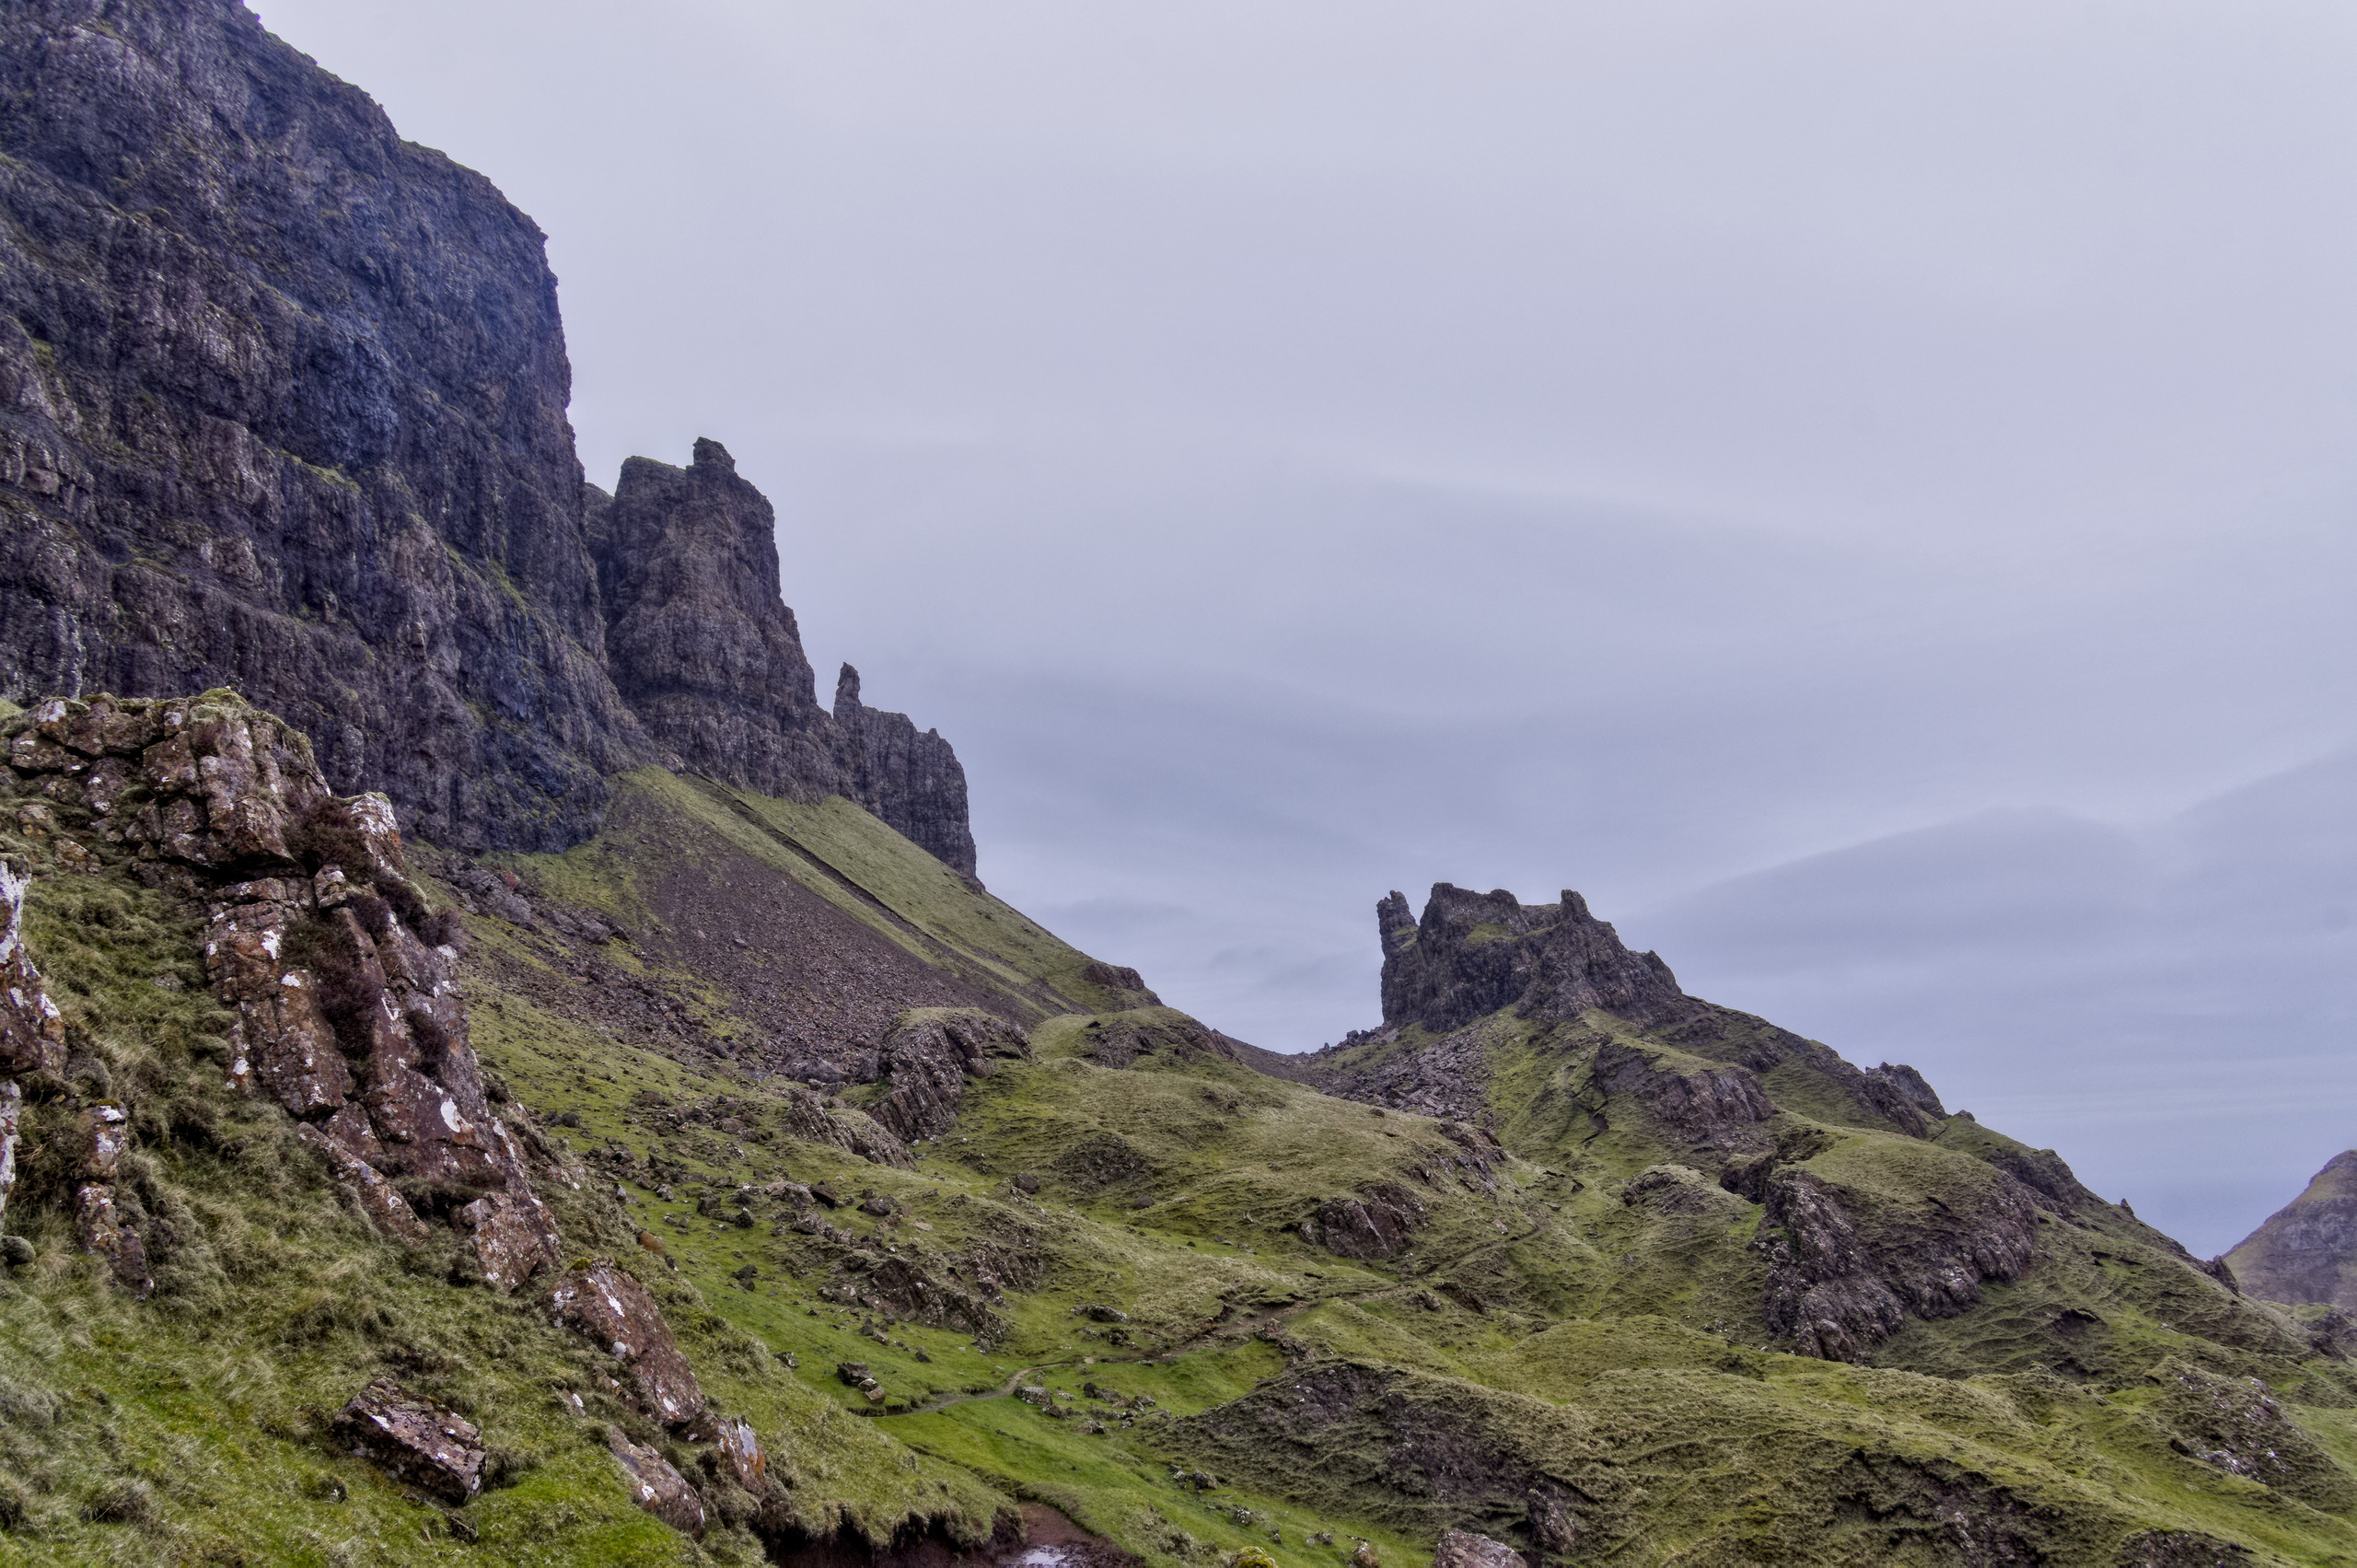
I found this to be an interesting challenge to me - I saw how you had processed the image, and tried to follow your lead while still providing something a bit different to what you and the other contributors have provided.
…The sky was a big challenge for me. It’s almost half of your image, yet it’s mostly featureless. I didn’t know whether to try to dig more detail out of the sky or just let it be. Mostly I let it be, as others have shown done a good job highlighting what you can do with the sky.
BTW, I’m using darktable 3.2.1
Here’s my first take - more or less as ‘realistic’ as I could make it, keeping contrast and colors to what I think is more-or-less realistic - keeping in mind I’ve never been there…
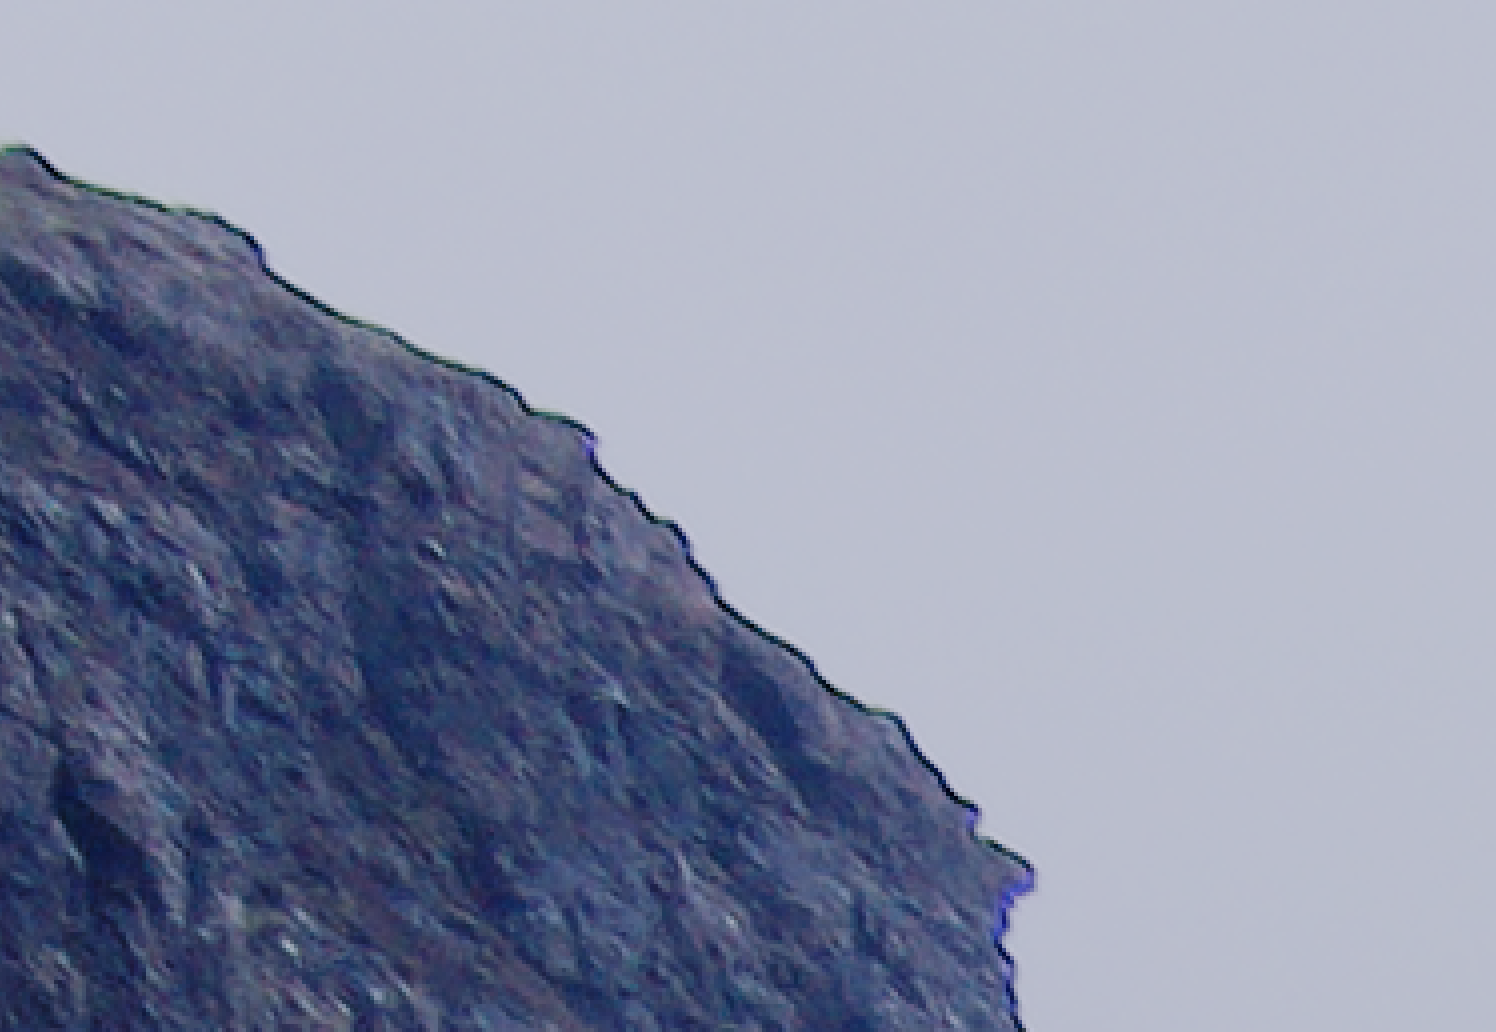
@WmBrant From what I can tell, you dealt with the tones quite nicely. Feels comfortable to look at. If you wish to give it another go, you might consider mitigating the halo where the rock meets the sky.
Thanks sls141 for your versions! Though I find the colour version not to my liking (mostly due to the yellow in the sky) I do learn quite a few things about the use of modules I never used so far. Currently I’m looking into the help for the global tonemap module which I wouldn’t expect to be used in an LDR image according to what I read.
Am I right that you made the b/w version directly out of the colour version without deactivating modules that are not needed for the b/w end result? Anyway I like it more than mine. Your use of the color zones module was very enlightening. I had not tried it so far and not made any b/w attempts in dt so far. And additionally with it’s help I managed to desaturate the sky a bit while keeping the grass green in my colour version.
Thank you pointing that out - I should have caught that!
The halo appears to be mostly caused by my use of two modules:
Contrast Equalizer (I used the Clarity setting)
Color Look-Up Table (Used to lighten up the greens so that the green ‘grass’ tones were not merging with the rock and scree tones.)
And for the record, I used both modules in all three edits I did.
To fix, I added a simple parametric mask to both modules, limiting the effects of the module to the darker parts of the image.
I’m only reposting the B&W image as it was the image where the issue was most visible.
…Thanks again for pointing that out. Feedback is always welcome!
Thank you Bill for sharing your efforts! I like your first colour version very much, I think it is quite realistic. Concerning the sky my aim was to enhance contrast in the clouds a bit without overdoing it, it should have been still a little bit more. The truth about the saturation of the greens would probably be between both your colour versions.
In your b/w version, just as in St.Spephen’s, the contrast is a lot better in the sky than in mine. I have to study your xmps how you did it.
And basically all contributors have made a much better job at retouching the spots. I tried with the spot removal tool, you did it with the retouch module. Just by looking at it I don’t get any idea of how it works but the result makes it clear that I have to study the help for it.
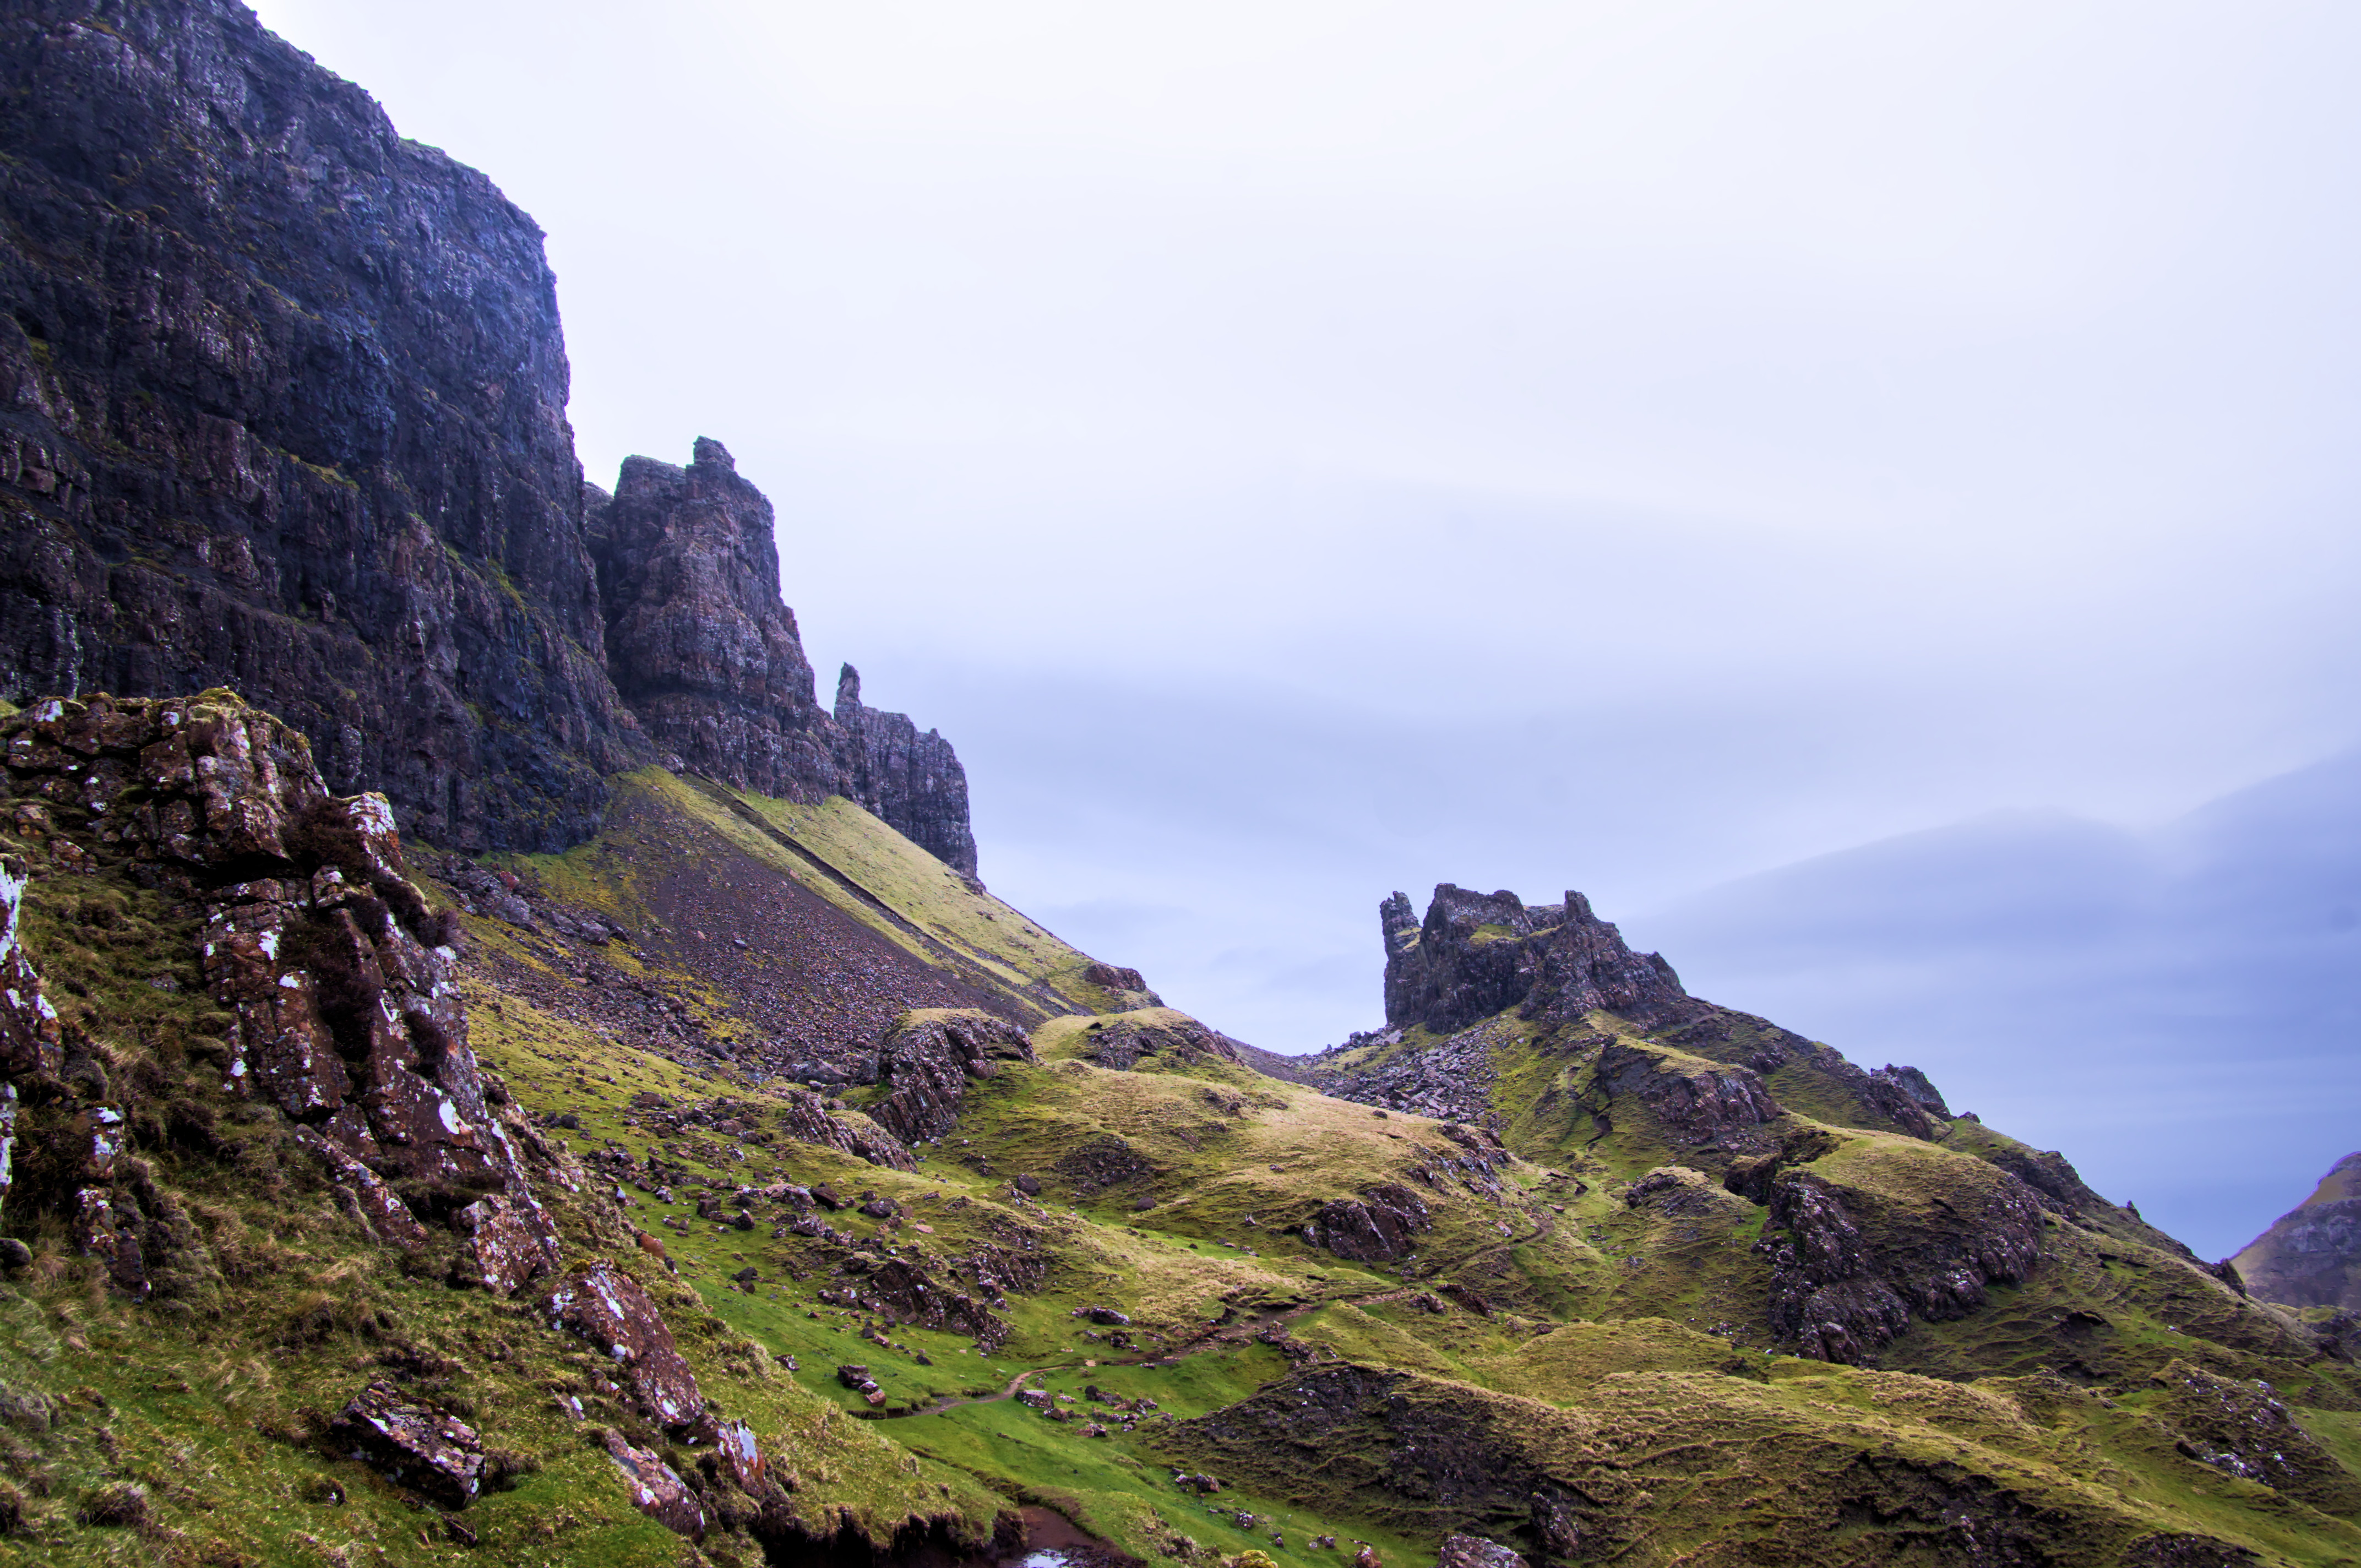
Thought I’d try a different crop, partly because the edge of the mountains in the top right is so hard to deal with! Tried to do some fine tuning with a painted mask and exposure module but still not entirely happy. Good enough to share anyway I think, and thank you for sharing too.
I recently wrote a comment in another thread with some quick tips for using the retouch module (instead of spot removal) @
Excerpt of the important points:
shift-click on the image to set a source point (optional, but useful to avoid adjusting it later)
control-click on an icon in the retouch module to stay in that mode , so you can continually retouch the image (such as dealing with multiple dust spots in the same go)
use your scroll wheel to adjust the size ; hold down shift and scroll to adjust the feathering
you can turn on the highpass module to help identify dust spots in the sky more easily (and then turn off highpass when you’re done retouching) — this is useful if you’re not using wavelets (as you have other methods when using them)
right-click to remove source-destination pairs on the image (just like masks and other things on the image in darktable)
like most other modules, you can duplicate this one too (from the icon that looks like two overlapping rectangles in the header bar) — duplicating helps you use different modules for different targets on the image (such as one for sky, one for ground), so you can adjust each differently (such as with masking)
And I agree with @WmBrant that you should watch the retouch video from Bruce Williams for everything you’d want to know about the module (including the optional, but powerful, wavelets feature).
RawTherapee to examine the image showed up softness and purple and green fringing. Correcting for CA did absolutely nothing and maybe due to the lens being used on a crop sensor camera.
Shift clicking with the magic wand to select the sky with aliasing on and then growing the selection by a pixel or two and then feathering by a pixel, but unless one wanted to spend hours on the join then they’ll be a halo. So my thoughts swing towards, where would the image end up? On a wall it could be quite pleasant with some depth, that’s a nice lot of lichen there…
darken it down (about 650 pixels of feathering), invert the selection and sharpen so that on a wall the texture of the lichen covered rock stands out, then it goes soft then there’s a leading line to where I stole the figure from the other Skye image on this thread. Tiny little guy that eventually gets desaturated and his layer gets darkened but I still want the colour so that on the wall, the viewer gets drawn in to examine the depth of the image.
Then the right side wasn’t adding anything so crop it to square, put a graduated filter to tone down the top of the cliff and sky and put a black key line around it and envisage it against a white matt in a frame
Hi @nodal, interesting ideas! Particularly the crop. True that it makes the image much more concentrated. Though I would shift a little to the right - if I wouldn’t leave exact 1:1 ratio. The only thing I would not do is adding the little red person. (And I think it’s too tall.)
Though I can’t relate some of the procedures you describe (e.g. darkening the first selection) to what I see I find the ideas for these subtle changes good and the result looks quite convincing.
Hi @MarcoNex, At first I thought: No, that’s too much and it simply looks wrong, this version makes a meadow out of a field of scree. But in a way it has it’s merits: It divides the image into clear zones, each one nearly monochrome. As a play with the available colours of the landscape not bad!